Trade Secrets: How to Work With Epoxy in Cold Weather?

The frosty mornings and dark evenings are drawing near. There are projects that need finishing, but what do you do when epoxy and cold weather don’t get on too well.
It’s that time of year when we are keen to complete projects before the winter freeze sets in. As cold can compromise the strength of a cure, what can we do to speed up the process?
Epoxy resin is mixed with a compatible hardener in a precise ratio to start the curing process. The result is a rock-solid material that is tough and resilient…unless that cure is compromised in some way. Trying to mix epoxy in temperatures below 10°C (50°F) is a sure-fire way to end up with a much weaker result without proper considerations.
To understand why this happens we need to appreciate the three stages of a cure.
1: Liquid (Open time)

This is when you have mixed the epoxy resin and hardener together and the result is a workable liquid. This is the time window you have to mix any additives and do any spreading or clamping. The warmer it is, the quicker the liquid will enter the next phase.
2: Gel (The initial cure phase)
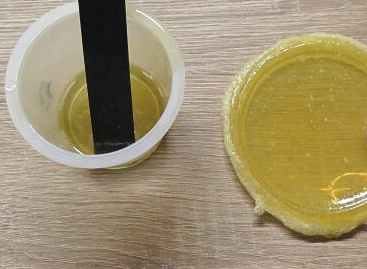
The mix becomes ‘rubbery’. You can still dent it with a fingernail but the mix is no longer workable although it will remain tacky for a while. When used as a coating this ‘tackiness’ can be used to form a chemical bond with a fresh layer, making a stronger bond.
3: Solid (Final Phase)
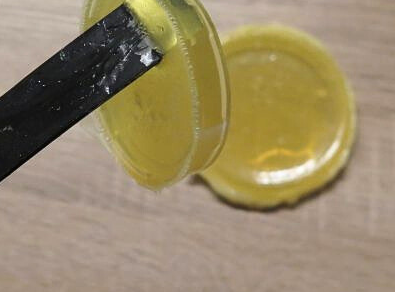
The epoxy has cured into a solid. Now it can be shaped and sanded but won’t form a chemical link to any fresh epoxy – you’ll have to sand it to increase the surface area to create a key for a mechanical bond and change the surface energy to wet out the bonding area better. In reality, the epoxy mix is 90% cured and will achieve full hardness over the next couple of days at room temperature.
When working outside in the winter the liquid and gel periods will extend due to the low temperature and a cure may take many hours. As the temperature nears 0°C (32°F) the epoxy’s min cure temperature, the mixed epoxy may stop curing altogether.
Obviously we need to keep the temperature of both the epoxy itself and the project we are working on, as close to ideal as possible. If we don’t, five things will happen in the cold:
1: Resin will prove difficult to pump and hard to mix. The WEST SYSTEM 301 Mini Pumps/301 Special Ratio Mini Pumps / (300 Mini pumps US & Canada Only) are brilliant for getting the exact ratio of resin to hardener with no need for any maths. But when the temperature falls, both liquids become much thicker and cling to vertical surfaces. This makes proper mixing much more difficult. Also, the cold reduces the exothermic (self-heating) curing reaction and may result in a weaker bond.
2: The mix is harder to apply: Because the epoxy mix has the consistency of set honey it will be troublesome to work with, resulting in uneven coats and the need for extra effort.
3: Trapped air bubbles: When the mixed epoxy is warm and fluid air bubbles introduced by the mixing process find it easier to travel to the surface and vanish. In the cold, however, the surface tension keeps them trapped so they may prove troublesome if you want a clear finish to your coating.
4. It becomes difficult to blend fillers with the mixed epoxy when it is cold. It’s quite difficult to judge the epoxy/filler blend so that it is ‘thick’ enough and won’t slump during the curing process when the generation of a subtle exotherm (heating through the action of curing) will lower or reduce the viscosity.
5. Your coating will be applied too thick. It’s incredibly difficult to conduct a coating work session in cold weather. This coating will initially look fine, however as the curing reaction progresses, a very subtle exotherm will lower the viscosity just before the coating gels and create ‘runs’ and an uneven surface. It’s very difficult to apply any more than 2 coats in one session as each underlying coat will not ‘tack’ sufficiently in order to apply subsequent coats.
So here are some top tips directly from the WEST SYSTEM Technical team to get perfect results when it’s cold.
1: USE FAST HARDENER
The popular WEST SYSTEM 205 Fast Hardener® was developed to be used at temperatures as low as 5°C (41°F). This hardener has been formulated to reduce the liquid and gel times in cold weather and so give a much better cure.
There is also the 206 Slow Hardener® and the 209 Extra Slow Hardener® versions if your project is being assembled in the summer heat of the Med or Tropics. (You can actually blend 205 and 206 together to give a ‘medium’ speed hardener but it is essential that you maintain the correct 5:1 ratio with the epoxy resin).
2: WARM BEFORE USE
Warming the resin and hardener and workplace before use will decrease the viscosity (runniness) and make it much easier to pump and use. The best way is to keep the resin indoors before use and then transport it under a heating outlet in the car.
Alternatively, make a hot box (https://epoxycraft.com/when-making-a-smart-hotbox-lizard-lighting-is-the-answer/) which will keep the resin at an ideal temperature but no greater than 30°C (86°F). Our version is portable so we can plug it in on the project.
3: GET THE RATIO RIGHT

Unlike with polyester resin adding more hardener (i.e. the catalyst with fibreglass) will not speed up the process. The ratio has to be consistent in every job, typically 5:1 (that’s five parts of WEST SYSTEM 105 Epoxy Resin® to one part of 205 Fast Hardener). There are different ratios for the special hardeners. All the information you need can be found on the back of the tin, as seen with this B pack. Altering this ratio will compromise the strength of the epoxy so forget how you ‘tweak’ the catalyst in polyester and keep that epoxy ratio spot on. The calibrated pumps (if warm themselves) will do all the work for you.
4: MIX WELL – IN A SMALLER POT

The measured epoxy resin and hardener must always be mixed well but when it’s colder extra time should be spent really making sure the two chemicals have been properly introduced to each other.
Substrate cools the epoxy can still exotherm.
Get the mixing stick right into the corners to ensure all the resin and hardener have been stirred in.
5: WARM THE SURFACES
On a boat or outside building project, the surfaces could be cold and damp. The cold will slow down the reaction of the mixed epoxy and the moisture could contaminate the applied coating.
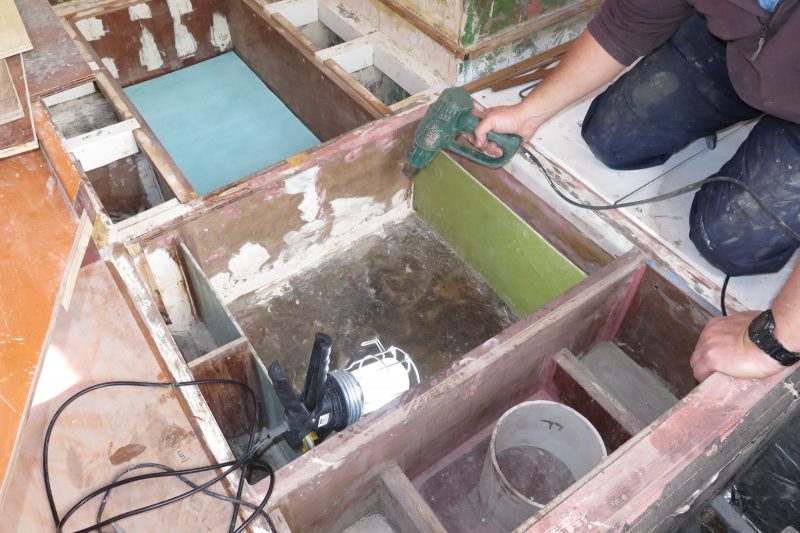
The simple solution is to introduce some heat with lamps, portable heaters or an electric hot air gun. This plywood/GRP combination is being warmed prior to filleting to make a built-in water tank.

It is also a good idea to construct a small tent over a working area to trap the hot air from the lamp and allow it to heat up the surfaces prior to coating.

Material that is due to be used such as glass cloth (seen here in a roll) can also be pre-heated in the hot box, or under the hot air gun. Find out how to make your own hot-box at home here.
6: CLEAR THE AMINE
When rolling epoxy onto a cold surface in cold weather, the heat of the reaction quickly dissipates, so the cure may take longer than usual. This gives the epoxy time to react with any moisture in the air and create ‘amine blush’ on the cured surface. This blush looks like a layer of condensation and should be washed off with fresh water, allowed to dry and then the surface thoroughly sanded. The sanding will increase the bonding surface area and provide a good mechanical ‘key’ for the next coat.
DEALING WITH CRYSTALLISATION
Many of us have done it – left our epoxy somewhere expecting the temperature to stay up – and it has plunged, maybe with an unexpected frost. If the epoxy resin that is stored in the cold, crystals can form and these can make the resin lumpy and difficult to pump. They can also prevent a cure. Instead of coming out as a clear, resin is amber coloured fluid, the crystallised resin will appear milky white. The good news is that they are easy to reabsorb – you just need heat to melt the crystals.
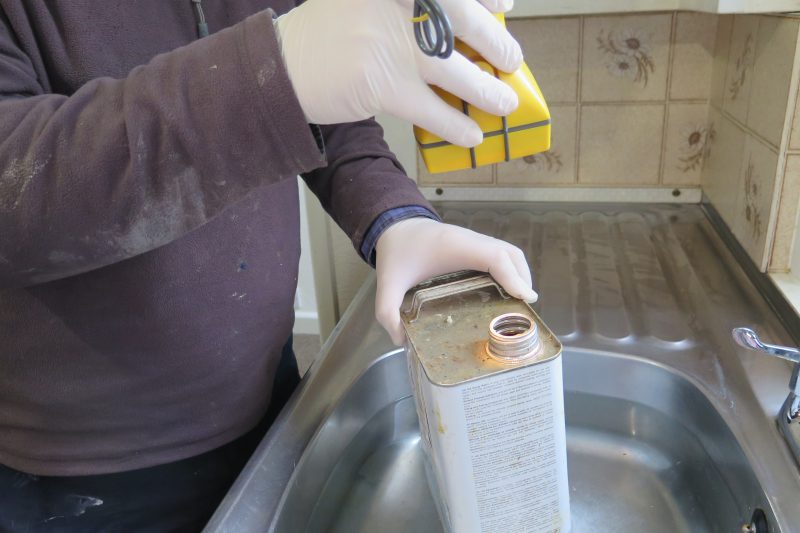
The crystals are hard to see in a tin. If you suspect it has been frozen at some stage, shine a torch in and see if you can spot any white lumps at the bottom.
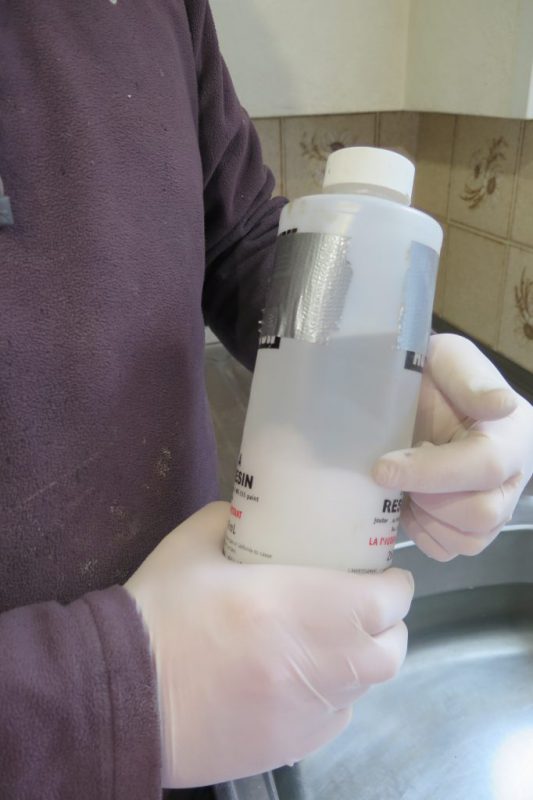
This epoxy from another manufacturer has been left in an unheated shed during a long cold snap and a large mass of crystals has formed. They are usually easy to remove if caught early enough and the process won’t affect the quality of the resin.
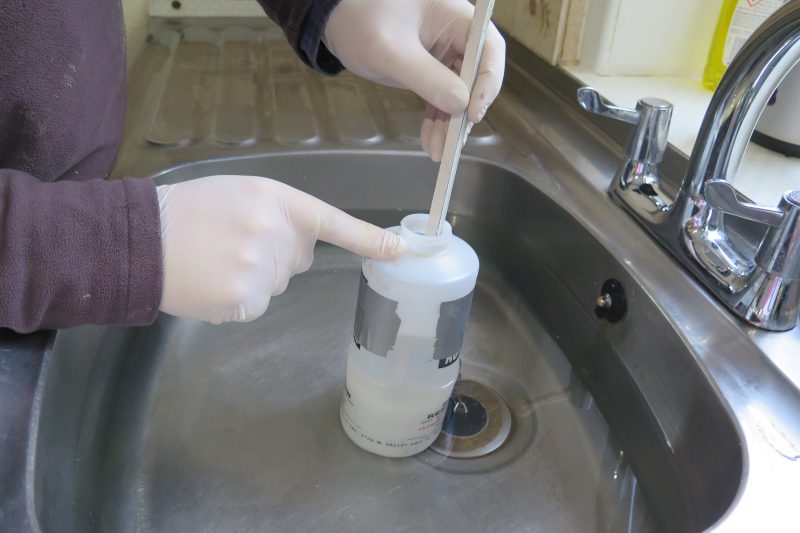
Pour some hot water into a bowl and stand the resin container inside. Crack open the lid to allow any pressure to escape. Be careful, do not allow any water into the resin container! Leave the tin in the water long enough for the heat to really get into the crystals, then gently stir them with a clean stick. Once the crystals have been re-absorbed put the lid back on and invert the container to dissolve any that may have formed in the neck.
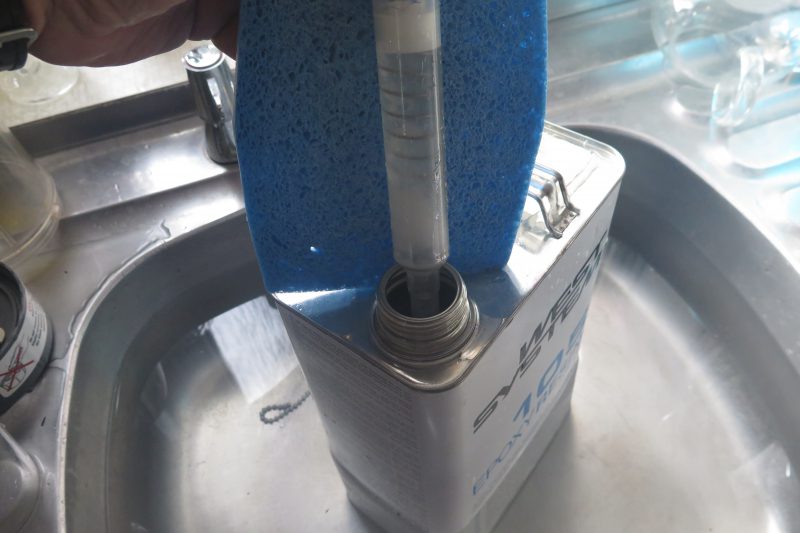
Crystals can also form in the pumps contaminating the epoxy resin, as seen here. Note the milky nature of the resin at the base of the pump. The warming process will eventually cause this mass to reabsorb as heat-treated resin passes through. Speed up the process by warming the pump body under a hot tap. Top tip: Place the pump in a ziplock bag before running under a hot tap to stop water contamination and contain spillage of resin.
Under a gentle stream of hot water, the pump mechanism is worked to encourage the crystals to break up and dissolve, while a container or paper towel positioned at each end catches any ejected resin. Care is taken not to let any water enter the pump or tap mechanism itself. The crystals will vanish very quickly under the hot water and the resin will be clear again.
STORAGE:
Aim to store your WEST SYSTEM resin and hardeners above 10°C and preferably closer to room temperature. If kept in a shed or garage, store them in a hot box at around 20°C-25°C (68°F-77°F).
