How To: Steve Goodchild explains how to build a wooden dinghy (Stornoway 16)
In part one of this series of how to build a wooden dinghy Steve Goodchild takes us through choosing a design, and making a jig for his Stornoway 16.
“I’m essentially a fair–weather sailor,” says retired land surveyor Steve Goodchild. “The trouble is, the weather doesn’t seem to know that.”
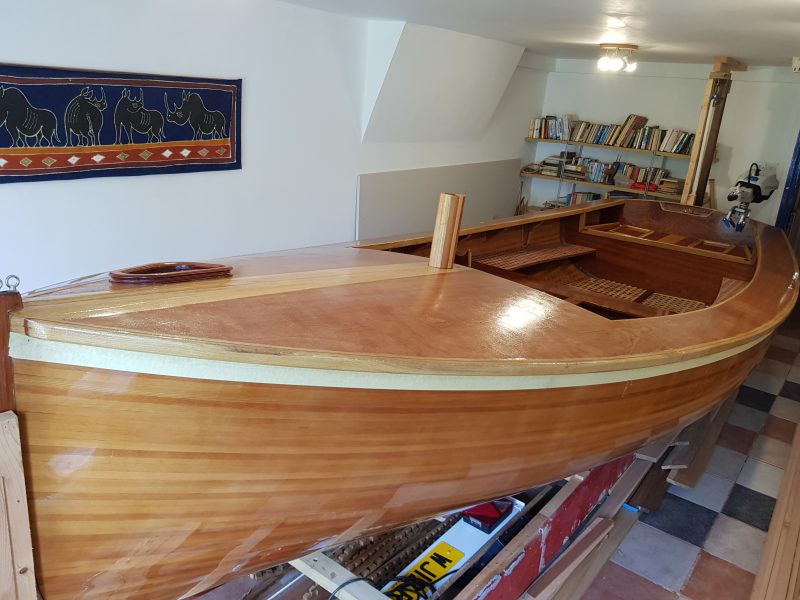
Nevertheless he decided to combine his two passions of wood working and sailing and build a beautiful cedar-planked Stornoway 16. Based near the picturesque harbour of Paignton in Devon, Steve had planned to become an active member of the dinghy cruising association, so wanted a design that would be easy to sail, but roomy enough to camp in overnight. He found his ideal project from the pen of Paul Fisher at https://selway-fisher.com.
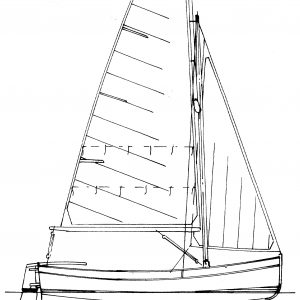
The Stornoway 16 from the drawing board of designer and artist Paul Fisher. He has a huge portfolio of boat designs ranging from steam launches to ocean going yachts.

Now enjoying retirement in Devon, Steve Goodchild ran a joinery shop in South Africa for a few years which made him a competent woodworker. This was to supplement his land surveying business when it was hit by the political unrest of the 1970s.
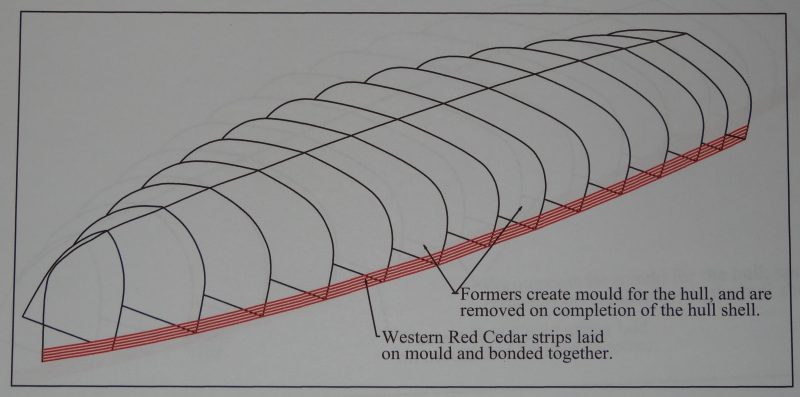
Cedar strip method
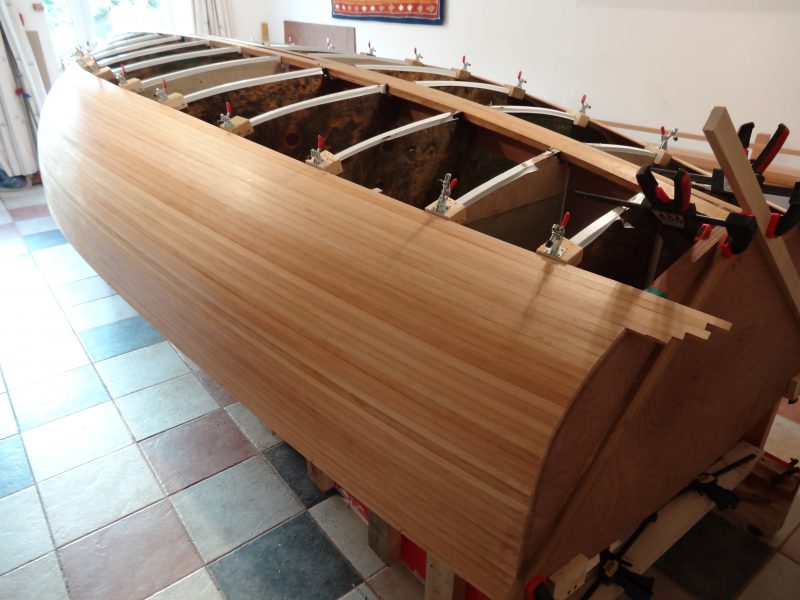
Although the Stornoway 16 was intended to be built with hard chines, essentially made from wide planks of plywood, Paul Fisher’s design also allowed for the cedar strip method.
“The rounded hull shapes that can be made using this technique appealed to me,” Steve says. “Paul has added the necessary mould plans and written a book entitled ‘Strip Plank Boat Construction.’ This has rapidly become my bible.”
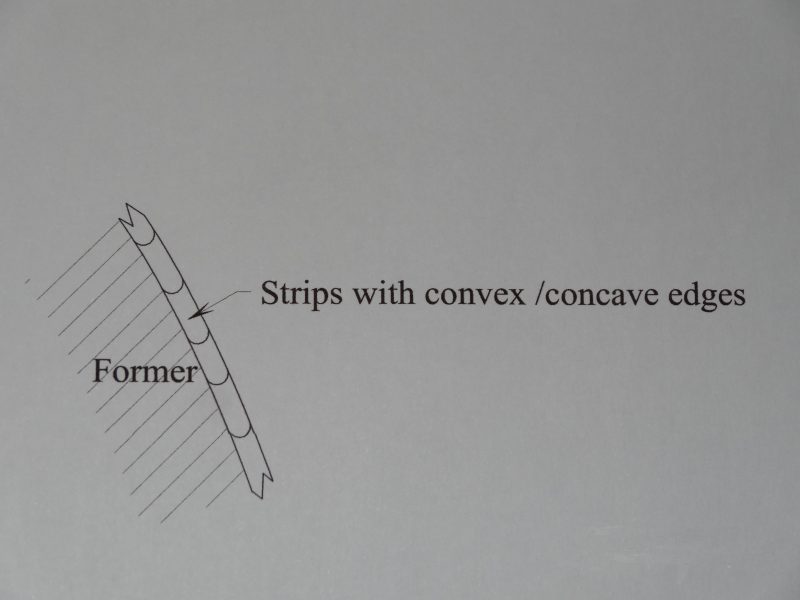
Thin strips of Western Red or Yellow cedar are machined with a convex curve on one edge, and a matching concave curve on the other. They are then bent around a set of formers and interlock to create the hull.
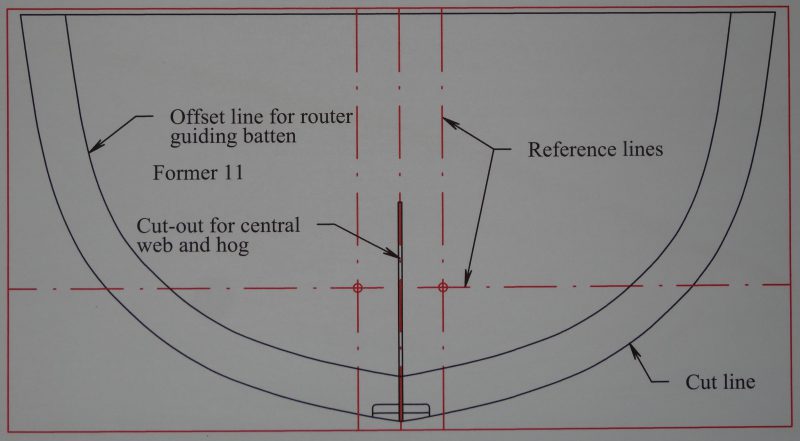
“Selway Fisher Designs provided me with CADD (Computer Aided Design Drawing) ‘dxf’ files for the 13 formers,” Steve explains. “I have used CADD professionally for years and also have an AO (841mm x 1189mm) plotter. This allowed me to print the plans at full size and glue them to some plywood sheets salvaged from an old floor.”
As Steve was concerned about the small deviations of a jigsaw cut he added a second line to guide the router for a more even finish. He also added vertical and horizontal reference lines so he could use a laser to perfectly align the finished formers.
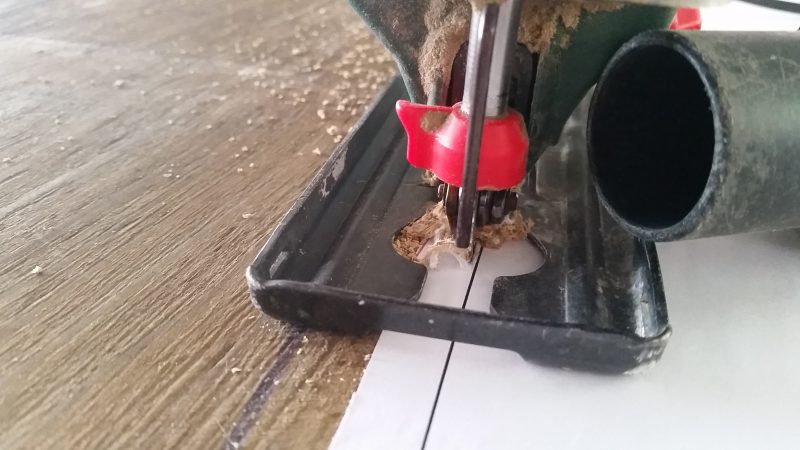
After the paper plans were glued down Steve made the first cut using the jigsaw slightly wide of the mark…
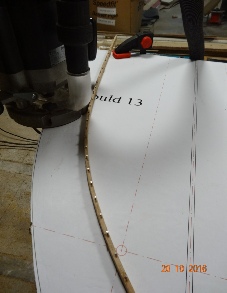
…And ran a router along a pinned-down bead to achieve the final shape.
Formers made and mounted
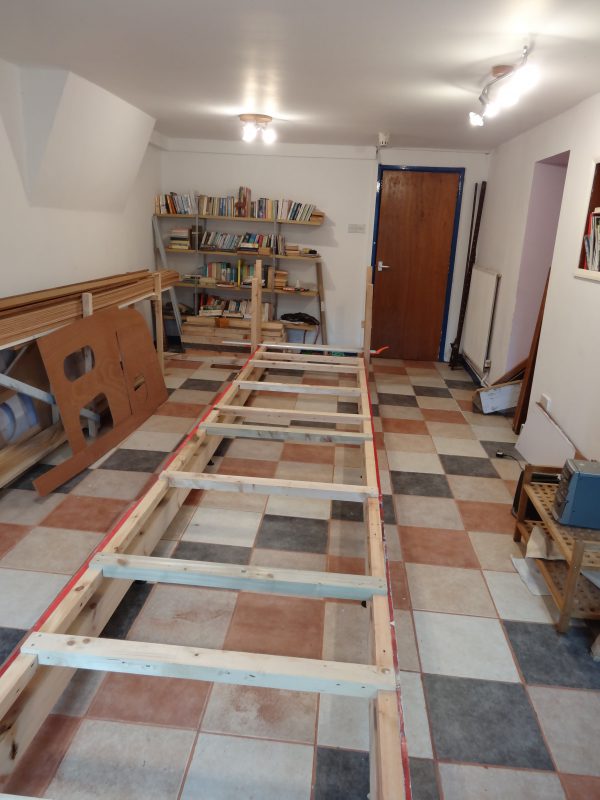
When all the 13 formers were made and marked, they needed to be mounted on a frame called a ‘strongback’ to support the build. It had to be rigid and perfectly square to avoid any twist.
“I made mine from old 25 x 230mm shelving, along with some rough pine of 50mm x150mm and 50mm x 50mm,” Steve says. “I drilled holes along the bottom and added adjustable DIY bath leg screws. Once assembled I levelled the entire structure using a Bosch laser as a guide.”
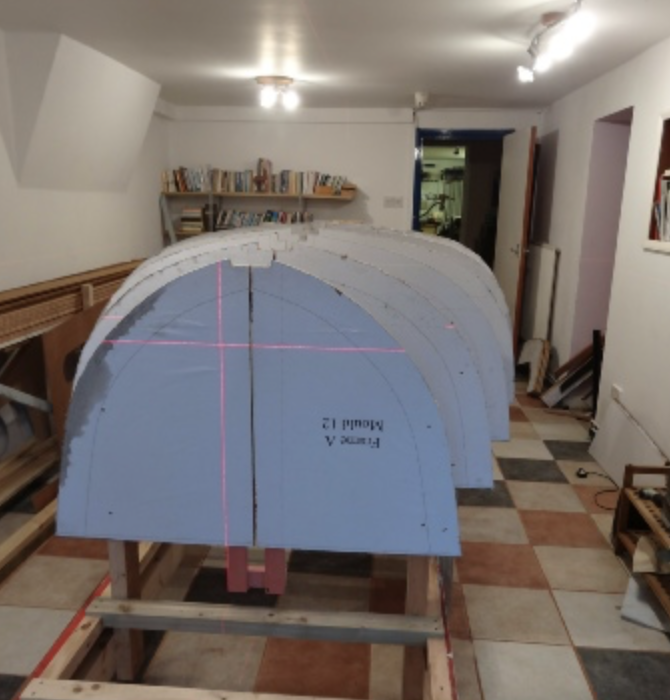
The formers were placed in their correct locations following the plans. A Bosch DIY laser was used to drop a reference line both vertically and horizontally across the formers for exact alignment with the strongback, and each other. The former in the picture will be moved until the vertical laser line touches the edge of the notch at the top of the and the outside edge of the beam at the bottom.
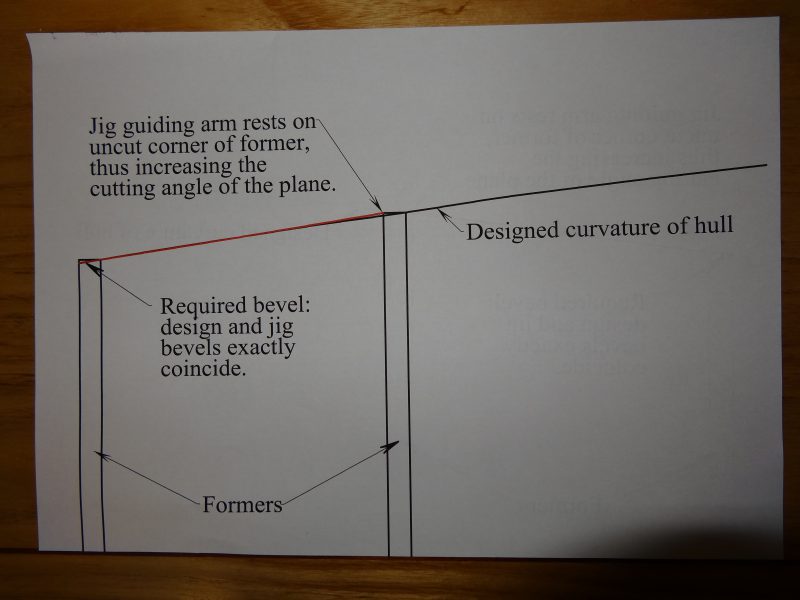
“My next task was to plane the edges of the formers to the correct angle so that the strips would lie in a fair curve,” Steve explains, adding that this part of the jig process caused him the most concern. The idea was that the outer edges of each former would present a flat surface to the strips as they were laid down, but this meant slightly different angles on each one. How to make the curve consistent? He solved the problem with an ingenious solution.
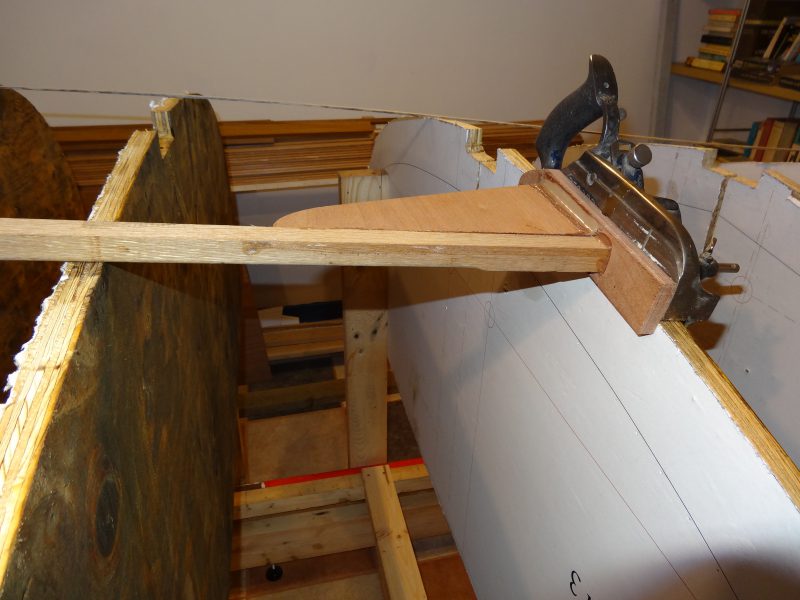
“I made a jig that attaches to a very old Record rebate plane,” Steve explains. “An arm then runs from the plane to an adjacent former. One side of the jig runs against one side of the former being planed and the rebate fence runs against the other. This serves to keep the arm square to the former.”
Steve points out that this isn’t mathematically correct (as the cedar strips won’t always be at exactly 90o to the former) but after a few fine adjustments the jig has worked far better than expected and answered many of his worries about how to build a wooden dinghy.
Building the keel
With the strongback and frames ready to go Steve turned his attention to making the ‘spine’ of the boat. He started with the bow piece.
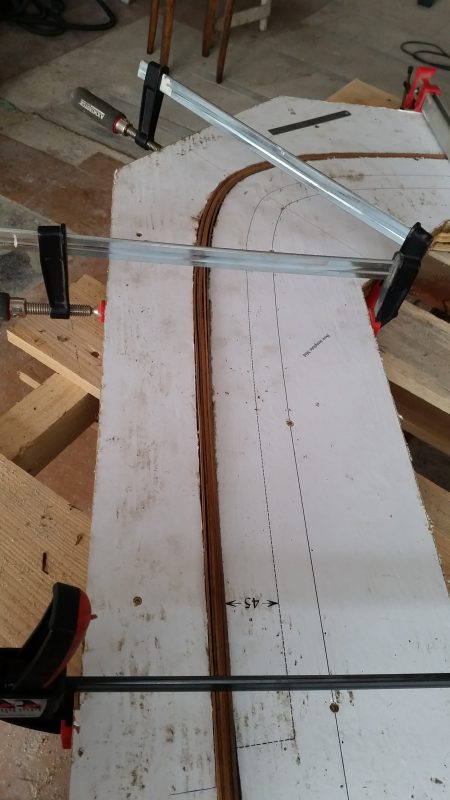
“I had a stock of 2mm strips of mahogany veneer left over from a project started by my Dad and decided to put it to good use. I made three templates out of 18mm scrap ply into which I could shape the strips into beautiful curves. Each strip was bonded to the next with WEST SYSTEM epoxy. This picture shows templates 1 and 2 being used to laminate the outer section of the bow. Each 2mm strip was cut 54mm wide, with 14 of them bonded together to create a thickness of 28mm.”

“Using templates 1 and 3, I bonded another 22 strips of veneer 23mm wide with a curve which exactly matches the inner face of the first section. I then machined it to give parallel sides on a 50mm wide bow.”
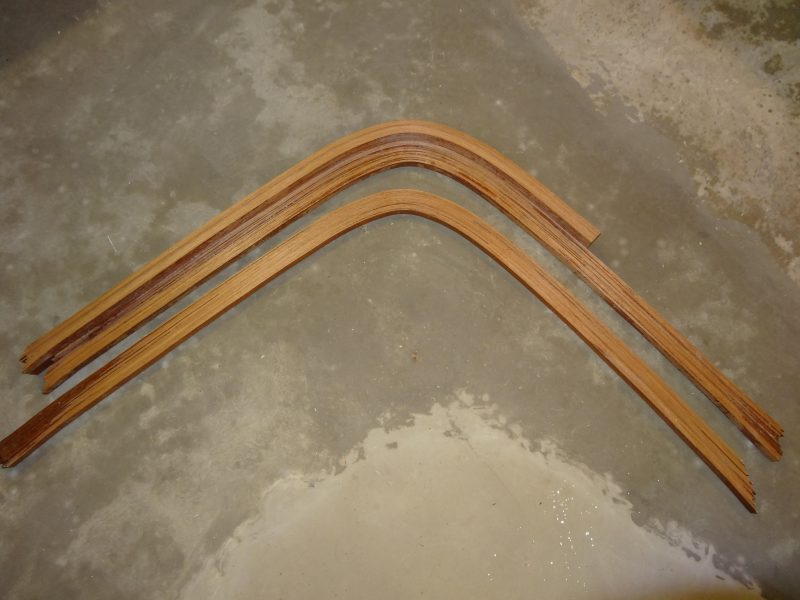
“By combining the first laminate with template 3, I made a piece 24mm wide with a curve which exactly matches the inner curve of the first laminate. At 22mm thick, it will be bonded to both the plywood forward structure and the front section of the laminated bow.”
Steve’s timelapse video of how to build a wooden dinghy is just part of his great website where he documents his projects.
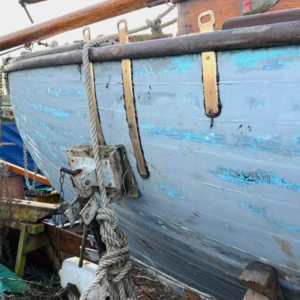
Read how Tim Loftus built a a lug rigged Guillemot dinghy
https://epoxycraft.com/westsystem/willow-the-guillemot-dinghy/
Find out about how Keith Callaghan built the Hadron H2 dinghy
https://epoxycraft.com/westsystem/hadron-h2-dinghy/
Read about Gary Breeze building a small Mouse pram dinghy
https://epoxycraft.com/projects/constructing-a-watertight-pram-dinghy-with-the-help-of-epoxy/