How To: How To Make a Decorative Wall Hanging with LEGO and Epoxy
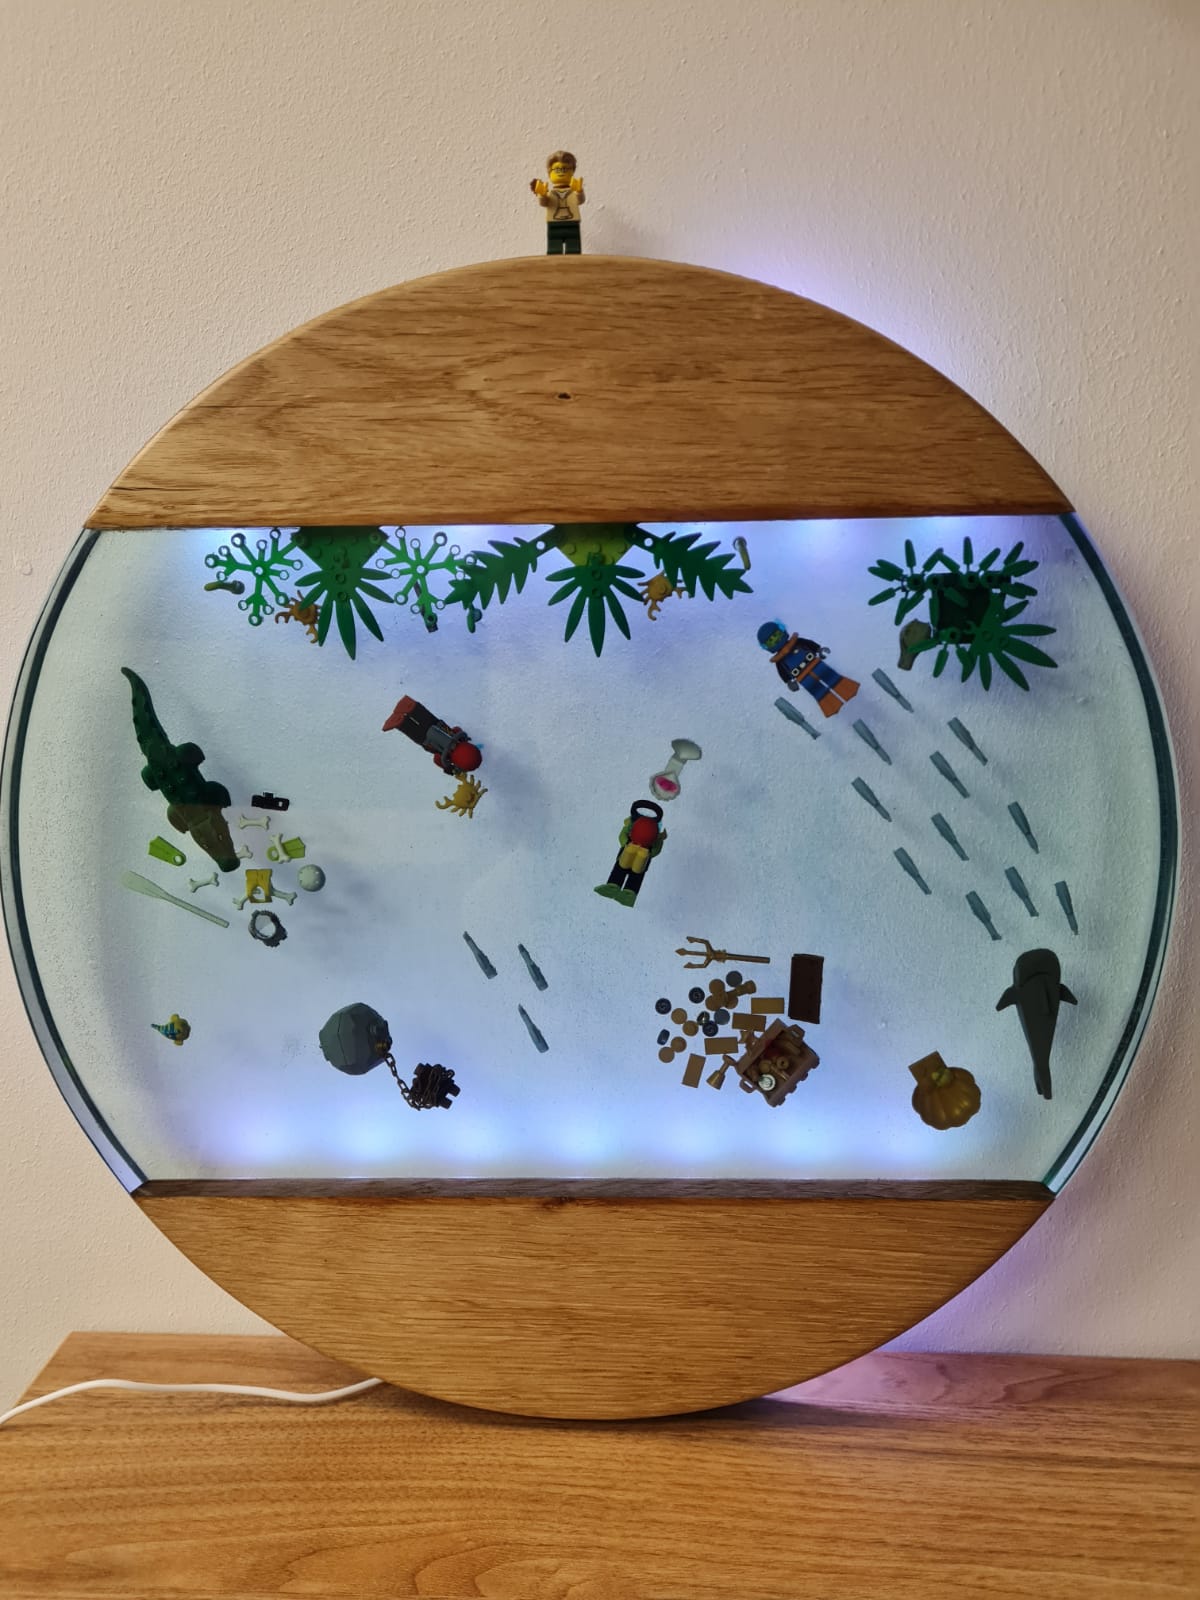
In 2021, our technical guru Hamish Cook set out on an incredible project. Using a variety of tools, Entropy Resins® products, and Lego, Hamish made a wall hanging that he and his family will adore for years to come.
In this walkthrough guide, Hamish details all the equipment he used, alongside step-by-step instructions on how you can build one yourself at home.
Hamish made this as a decorative wall hanging, but the same process can be used to create a table, stool, or countertop. The opportunities are endless.
What will you need?
Create a Circular Mould
1. Determine the diameter of the circle that the oak chunks will fit into
2. Mark the centre of your melamine faced furniture board
3. Pin one end of the thin timber batten to this centre point
4. Measure along the timber batten from the pin and mark the required radius
5. Hold a pencil at the radius mark and draw a circle on the board
6. Pin a timber to the centre point
7. Mark the radius and draw the circle on the board
Next, we need to make the wall for the mould using plastic lawn edging
8. Measure the thickness of your plastic lawn edging
9. Mark the thickness of the lawn edging on the timber batten and draw a second outer circle
10. Use the square-cut timber blocks to support your lawn edging. Place these blocks around the outer circle to determine spacing
11. Roughly mark the centres of these blocks on the furniture board and drill screw holes
12. Place square cut blocks in a circle
13. Drill screw holes into furniture board
14. Use hot glue to glue the timber blocks to the furniture board over the screw holes
15. Ensure that the centre of the square-cut block side is in line with the outer pencil circle
16. Once the glue has set, turn over and add screws to keep all the blocks secure
17. Calculate the circumference of the circle using the known diameter and radius of the inner circle
18. Cut a length of lawn edging to match the circumference ensuring a clean square cut at each end
19. Place the lawn edging into the circle of blocks. If the measurements are accurate, it should fit snuggly
20. You can add an additional block to support the top where the lawn edging joins if you need to
21. Apply a bead of standard silicone sealant around the bottom of the lawn edging to seal it against the furniture board. Also, seal along the vertical join in the lawn edging. Ensure all silicone remains on the outside of the inner pencil line
The lawn edging used had one flat side and one cambered side being thicker in the middle than the edges. Therefore, it was placed with the cambered side inwards to take advantage of the slight gap between the bottom of the edging and the inner pencil line. This gap was the perfect space for the silicone seal, which still allowed for a vertical edge to the timber and epoxy after machining.
Create Your Scene
This is the point where you raid your kid’s Lego stash for marine-type items.
Not got access to Lego? Create a natural scene with rocks and stones, etc. or create a completely unique scene using items such as bottle tops, playing cards, poker chips, or locks and keys anything that you find interesting to look at.
Layout how you want it to look, then take a photo. You’ll need this to look back on later in the project.
Check for Leaks
1. Apply Sellotape over the pinholes in the centre of the melamine board
2. Fill the mould with water
3. If any water leaks out, mark the location clearly
4. Empty the water from the mould
5. Apply additional silicone in the marked areas
6. Once the silicone has cured, repeat this test
Ensure a Release
1. While the mould is empty, ensure it is clean, dry, and free from dust
2. Remove excess dust and dirt with a clean cloth
3. Apply a suitable mould release agent (e.g. mould release wax)
4. Buff to a smooth finish
5. Repeat to apply 3-5 layers of wax
Level the Mould & Surface Preparation
1. Check the mould is on a level surface using your bullseye bubble level. If required, use wedges or chocks to level the mould in a way that is stable for the duration of the epoxy casting
2. The oak should be clean, dry and well abraded (80 grit)
3. Remove all sanding dust from your work space
Seal the Timber
This is important to do to help prevent outgassing from the timber
1. Coat the oak all over with Entropy Resins CCR/CCS Epoxy mixed at a ratio of 100:42 by weight. e.g. 25g of CCR resin to 10.5g of CCS hardener
2. This sealing coat should be applied 24 hours before the first pour is commenced In this project, the green plant pieces on the left-hand side were glued into routered slots in the oak to keep them at the right height
Epoxy cures exothermically (the reaction gives off heat). When epoxy is applied to a porous substrate such as timber, it may cause the substrate to warm up as it cures and the air within it to expand and escape “out-gas”. This escaping air forms bubbles in the epoxy coating or casting. Epoxy cures quicker and reaches higher exothermic temperatures when in bulk. In contrast, epoxy takes longer to cure in thin film with very little exothermic heat.
Pouring the Base Layer
As the final surface will be abraded and polished, it is important to pour a base layer of epoxy for the scene items to sit on. This layer should be around 2-6mm in thickness.
1. Calculate the volume of epoxy required using the formula (Lmm x Wmm x Dmm)/1000 = Vml (volume required in millilitres). So an area 520mm x 300mm and 5mm deep will require 780ml of mixed resin and hardener
2. With this known mixed volume (V) and a known mix ratio of CCR:CCS of 2:1 by volume you can determine the resin quantity with the formula (V/3) x 2 = Resin quantity in ml. So (780ml/3) x 2 = 520ml
3. The weight of resin is found by taking the volume V and dividing by the resin density in this case 1.12gcm⁻³. So 520ml/1.12gcm⁻³ = 464g of Entropy Resins CCR Resin
4. As the mix ratio of CCR:CCS is 100:42 by weight the hardener quantity is found by (Resin weight/100) x 42. So (464g/100) x 42 = 195g of Entropy Resins CCS Slow Hardener
5. Weigh out the required quantity of CCR resin into a clean mixing pot. Use digital scales for an accurate reading
6. Weigh out the required quantity of CCS Hardener into the same mixing pot
7. Stir thoroughly with a clean mixing stick for at least 2 minutes ensuring the stick scraps the bottom and sides of the mixing pot
8. Add a few drops of Entropy Resins Celestial Blue Colour Tint to mixed epoxy
TOP TIP – As this project is an underwater scene, a few drops of Celestial Blue Colour Tint add to the watery effect without visually discolouring the Lego items cast within.
9. Mix the colour tint with the epoxy thoroughly until the whole mix is an even colour
10. Transfer the mix to a second clean mixing pot
11. Stir again for a further 2 minutes with a second clean mixing stick
12. Pour into the mould slowly being careful not to introduce unnecessary air bubbles into the mix. This can be aided by pouring down the mixing stick into the mould
This 2 pot and 2 stick process ensures no unmixed resin or hardener makes it into the mould.
Removing Air Bubbles
1. Allow the pour to settle and find its level
2. You can aid the release of bubbles by passing the flame of a blow torch over the surface
3. If any bubbles are caught in corners or holes a cocktail stick or bradawl can be used to poke them out allowing them to rise to the surface
A blow torch – should always be used with extreme care and as minimally as possible for removing bubbles. Move slowly and avoid starving the flame of oxygen, maintaining a blue flame. If it changes to a yellow flame, this does not burn as cleanly and can leave soot behind on the surface.
Setting the Scene
- Once the base layer has gelled to the consistency of toffee (24 – 36hrs at room temperature), add the Lego to create your scene. Use the picture taken in Step 2 as a guide
- Work slowly and accurately. Once placed on the surface items cannot be moved
- Create your lego scene on the base layer
- Hold the oak down during bulk pours
Adding the Bulk Pours
1. Once the base layer has gelled to a solid-state then the next pour can commence
2. Complete each pour following the tasks in Step 7 – Step 8
3. Allow 48 – 72 hours at room temperature between each pour for each layer to gel
4. When completing the bulk pours, ensure that the oak is held down to prevent it from floating in the mould
As this project was completed mid-summer the workshop temperature was quite warm therefore the decision was taken to split the bulk pour into 3 and build the thickness up in stages of approximately 15mm at a time. This was to avoid any risk of exothermic heat build up that can discolour the epoxy.
Curing
1. Allow the epoxy to cure for 7 days at room temperature
2. Post-curing can be used to speed up this process and increase the thermal properties of the cured epoxy: 8 hours at 50°C after room temperature gelation is the standard post-cure schedule. Ensure the heat is a dry source such as an electric oven or infrared lamps. Ensure post-curing is done in the mould so that the casting is well supported to minimise any movement
WHAT IS POST CURE? Post Cure is heating the epoxy after it has gelled to a solid state to increase its physical and thermal properties. i.e. making it stiffer, tougher and harder, along with being able to resist higher temperatures.
Releasing from the Mould
1. To release the epoxy’s bond to the mould, flex a corner of the furniture board over the edge of a workbench, working gradually around the circle
2. The cast circle can then be tipped out of the mould into catching hands or onto a soft surface
3. Larger moulds or shapes that are more complex may require the mould to be dismantled to get the castings out
Shaping & Flattening
1. Abrade the top, bottom, and sides to the required surface level
2. If a large amount of material requires removal, then start with 40grit
TOP TIP: A combination of belt sander and dual-action random orbital sander works well If you have access to a router sled, this is also an excellent way to flatten the surface before cutting back.
Cutting Back, Routing & Polishing
When cutting back and polishing epoxy, the more grit stages used the better, i.e. if you have to start at a coarse 80 grit to flatten an area, then this should be followed by 120, 240, 320, 400, 500, 800, 1000, 1200, etc.
1. Router the edges if required at the 120 grit stage
2. Continue sanding, working through the various grits of abrasive paper
3. Ensure the work surface and immediate area is cleaned to remove the dust created by each grit before starting with the next finer grit as the courser grit in the dust could continue to scratch the surface
4. Avoid working on one area for too long as the friction may overheat the surface and you don’t want the surface heated above the epoxy Tg as it will start to soften
WHAT IS TG? Tg is the temperature at which a material changes from a hard (rigid) molecular structure into a soft, semi-flexible one. With epoxy this is the upper use temperature of the material, above which its mechanical properties will be significantly reduced.
5. Once you get to around 1500 grit dry sanding, you can move to cutting paste and finishing compounds with a polishing mop or sponge head. A lot of compounds and polishes are used with water
6. Ensure all water and traces of polishing compounds are removed from the casting before removing the masking over the timber
When polishing the epoxy next to bare timber, mask off the timber to prevent any water or compound staining the timber flash tape is excellent for this. A plant spray is helpful to keep the surface damp and the polishing heads working effectively.
Finishing
If the surface is abraded back to bare timber then the timber can be finished with natural oil.
Mounting & Lights
1. If the casting is to be wall-mounted and to be backlit, additional mounting boards are required
2. These should be set back from the edge of the epoxy by approximately 12mm