How To: Three easy steps to rebuilding a plywood joint
If you notice that plywood joints are beginning to deteriorate, it’s time to take some action. These three steps make for a simple and easy wooden boat repair that will help you avoid ending up with a leaky boat, which is the last thing you want!
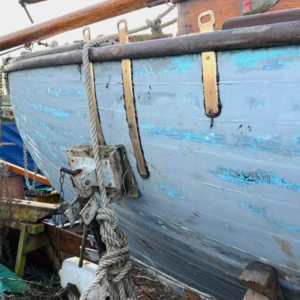
Due to its lightweight yet strong qualities, plywood is a popular choice with many modern boat builders. However, lightweight plywood joints can also create problems; deteriorating over time due to the huge amount of stress applied to the joints over time.
It is important to make sure these areas are taken care of properly.
It is important to make sure these areas are taken care of properly and checked regularly to avoid problems such joint failure causing weaknesses in the structure. If left unattended for a long period of time, you may even face larger and more extensive repairs, costing you a lot of extra time and money.
Luckily, we have come up with some easy-to-follow steps to help you avoid this problem:
1. Clean out the joint
Clean out the joint by using a circular saw along the seam. The saw’s cut should be set to reach the full thickness of the plywood, with the width of the blade set to shave the edges of both sheets of plywood at the joint, exposing fresh wood on each edge. Make sure you remove any fasteners that could get in the way.
Drive the fasteners further into the joint and then use a disc sander to sand a valley, roughly 100mm wide. Make the depression about 0.75mm deep for each layer of 175g/m2 fibreglass tape that will be used to fill the joint.
Finally, remove any surplus rotten or damaged plywood around the joint by using a sander or chisel. Use a round over sander to round the corners of each edge. A 6-9mm radius should allow the glass tape to lie flat on the surface.
2. Seal the edges
Start by wetting-out the seam and sanded area with a resin and hardener mix. Follow this by recoating the seam with epoxy so that it absorbs into the end grain of the plywood. As an extra step you can inject epoxy between any delaminated veneers that are still sound.
Next, apply a mix of epoxy and WEST SYSTEM® 406 Colloidal Silica as thickener, mixed to a mayonnaise type consistency. Using a plastic squeegee apply the thickened epoxy into the wet-out seam and smooth the excess mix along the joint. When doing this, try to make sure the epoxy is pushed into any voids and between delaminated veneers previously wetted-out with the resin/hardener mix.
3. Apply fibreglass tape
For the final step apply a layer of fibreglass tape in the depression, along the joint. Taking the squeegee work epoxy into the fabric, removing the excess once complete. Repeat the process to add extra layers if required.
To ensure that the edges of the layers don’t fall directly onto each other, place the layers so that they are 12mm either side of the previous layer. Apply a mixture of epoxy and WEST SYSTEM® 407 Low-Density Filler to the joint – this should be mixed to the consistency of peanut butter. Use the squeegee to apply and shape the epoxy mix slightly higher than the plywood surface. Allow to cure thoroughly and sand fair.
To find out more about the products used in this repair, visit the West System International product page.