How To: Build A Bamboo Archery Bow?

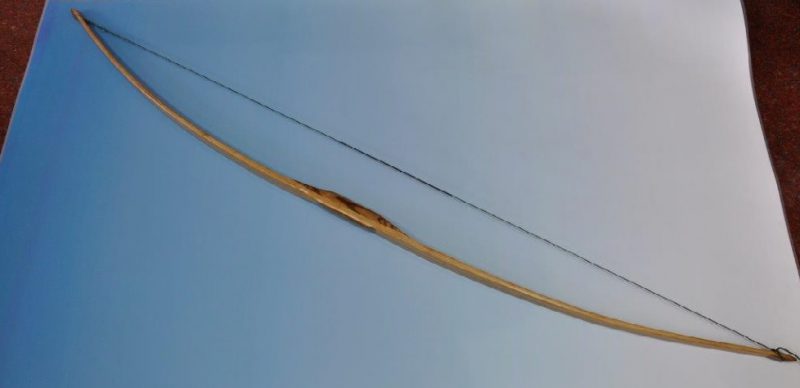
In this article, our technical expert Hamish Cook shares his passion for archery – and talks us through how he built a traditional flatbow in bamboo and epoxy.
The flatbow is the most traditional and ancient bow of them all. In prehistoric times before gunpowder was invented, this tool was used by tribes around the world for hunting and fighting, mainly because it was easy to find the materials to make one.
Today, you’re most likely to find a flatbow down at your local archery club. Although even here, these primitive bows are a rarity. As a keen archery fan myself, I found the idea of using one very appealing. I learnt to shoot on a modern recurve bow, yet a flatbow has no telescopic sights or other tools to steady your aim; instead, it’s a matter of pure skill to hit the target. So when some friends told me that they’d built their own out of bamboo, I jumped at the chance of doing the same.
Taking it back to basics
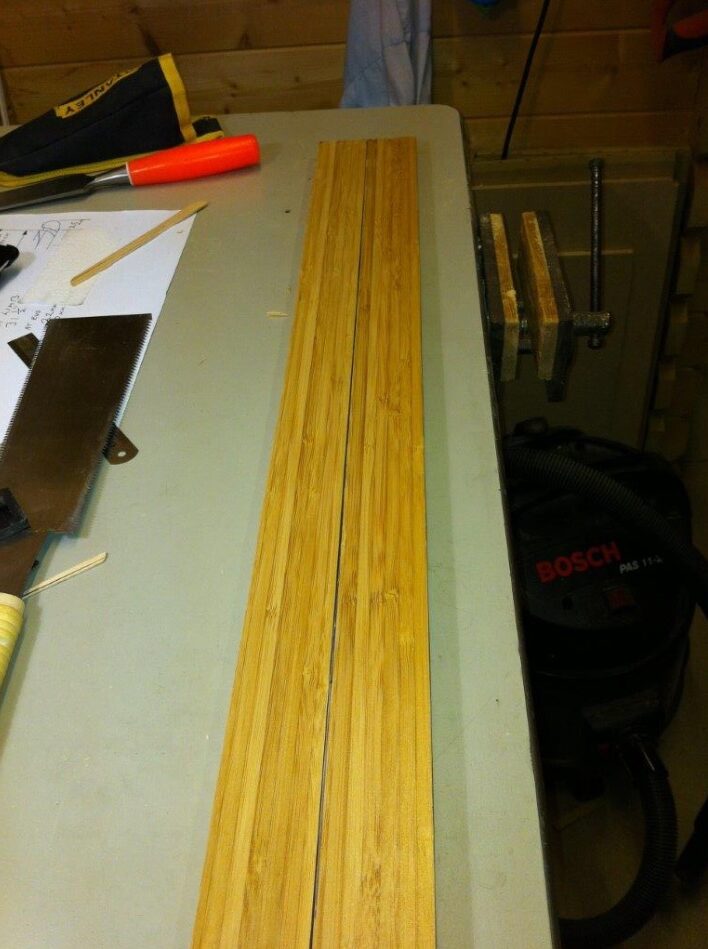
The basis of the bow is a bamboo flooring plank, about a metre long and 120mm wide; just a standard one, with tongues and grooves down the sides. You’ll find these down at your local DIY store and you may even be able to ask for one as a sample. Bamboo is the perfect material for a bow as it’s flexible; a bow must be able to flex and spring back to shape, to give the arrow its much-needed propulsion!

I also used some simple cutting and shaping tools, plus some sandpaper.
For bonding I used WEST SYSTEM® G/flex® 655 Epoxy Adhesive. The G/flex epoxy is an essential addition, as it allows the bonds between different parts of the bow to remain strong while offering enough flexibility.
Cutting, bonding and marking
First of all, I cut off the tongues and the grooves so that I had a solid length of bamboo. Then I split this length exactly down the middle so I had two thinner halves.
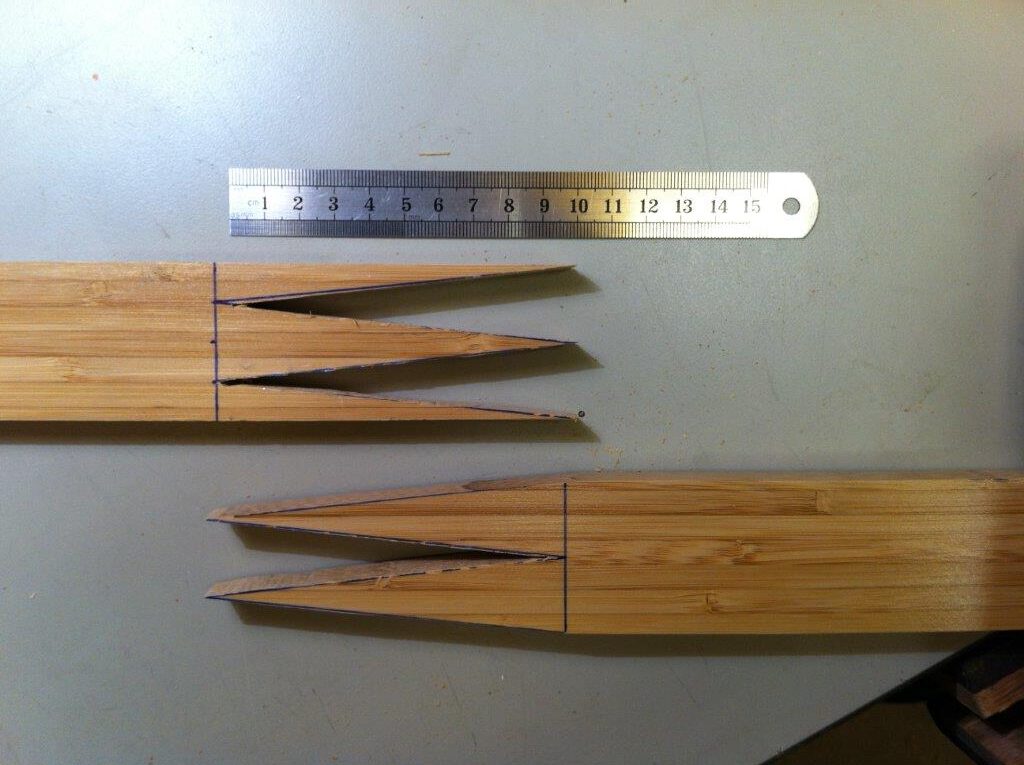
The next step was to create a finger joint, which involved cutting interlocking shapes in one end of each piece of the wood (see picture). I bonded this with an epoxy G/flex blend and allowed it to cure.

I then covered the bulk of the newly-bonded piece of bamboo in masking tape and marked a centre line in both directions. Referring to the plans, I then marked out all the cutting, shaping, and gluing that I needed to do; this included marking the length of the limbs all the way to the end, the size of the riser, and so forth.

At this point I cut the wood to size and tapered the ends with a plane; this is what gives the bow its characteristic shape that is fatter in the middle.
Shaping and finishing
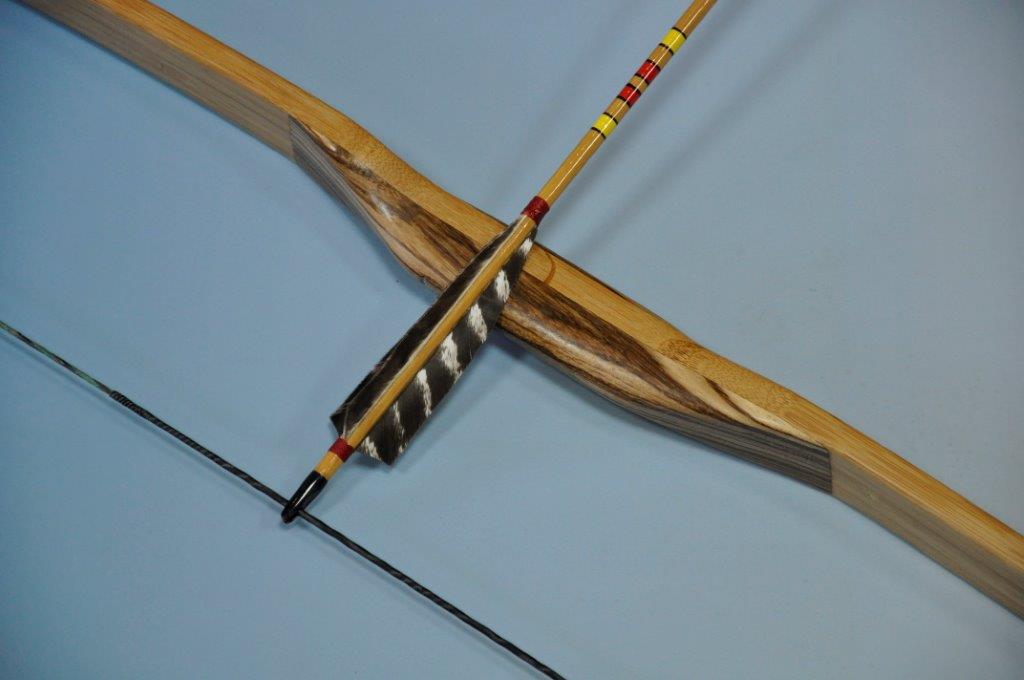
I then needed to make the bow even bigger in the middle so it would be easier to hold on to. To do this, I bonded a piece of black walnut on both the front and the back of the bow using the G/flex epoxy (making sure to abrade the gluing area with sandpaper first) and then shaped the wood according to the plans.
I also used the same approach to bond extra wood onto each end of the bow, which I shaped and cut a notch into where the string would be attached.

It was at this point that I became pressed for time, so a friend of mine (who had already made his own bow) kindly finished it off for me. First, he sanded it and finished it with a basic spray lacquer that you can get from a DIY store (you can also seal it with sanding sealer if you wish). Finally, he stitched some leather onto the handle for an authentic, rustic look. I doubt I would have been able to do this myself, so it was a great addition!
I can’t wait to use my new bow and test out my primeval hunting skills!
Thanks very much to Hamish Cook for his contribution.
Have you subscribed to our FREE monthly newsletter? Sign up here!
Working on a project? Share it with us! Click here…
