Projects: Building a modern classic launch
Experienced in making furniture as a hobby, retired fashion photographer David Falcon Grey decided his next project would be a hand built, retro-styled motorboat. Although far from being finished, the result is stunning.
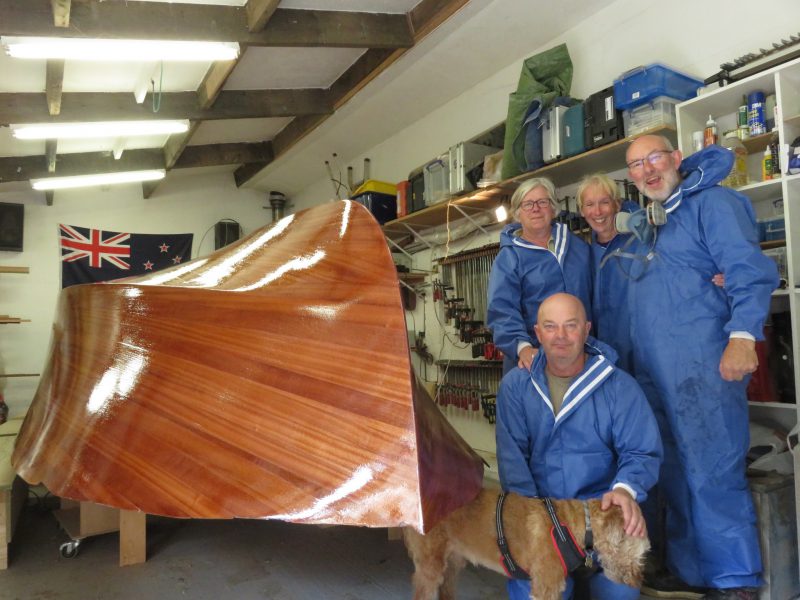
David Falcon Grey (right) with his wife Shelley (centre) with the Boatworks team Julie (left) and Mark Bestford
Back in the late 30s and again in 50s and 60s, several American and Italian boatyards began to produce some head-turning launches and runabouts in hardwood, principally mahogany inlaid with maple. Names such as Riva and Chris Craft are perhaps the most famous but there were other designs that were equally finely built. The arrival of the Gougeon brothers’ pioneering WEST SYSTEM epoxy brand in 1969 allowed bespoke builders to create strong but lightweight craft built from a series of thin veneers strips over a stout framework. The wooden hull was then coated in an epoxy-backed finish that allowed the natural colour of the wood to really shine through. Epoxy also offered better protection for the timber and greater structural integrity than earlier construction methods.
As a talented amateur furniture maker, David Grey wanted to stretch his skills to a much larger project and what better than a boat. As he lived half of each year in the UK near the River Thames and the other half in New Zealand on an island, he opted to create a launch in his 8m Oxfordshire workshop.
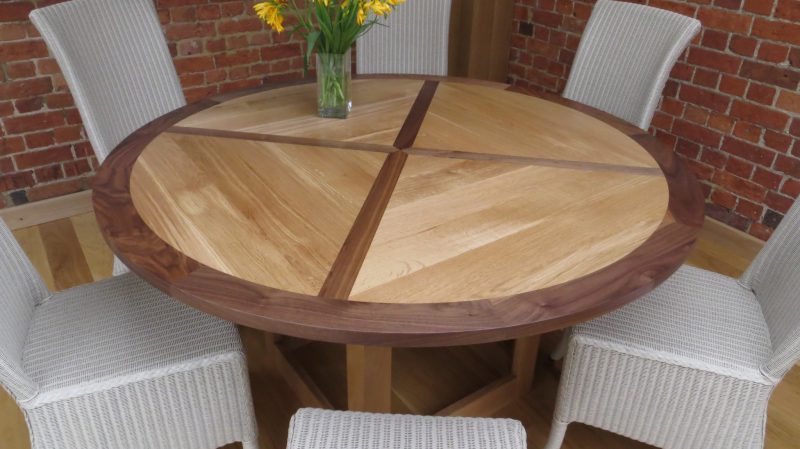
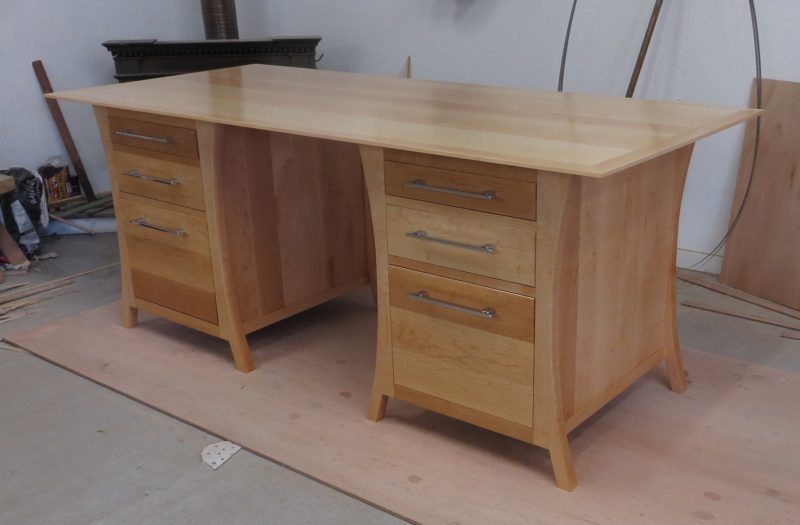
Examples of David’s furniture making skills, which were to prove a real asset in the boat project.
“I found some plans for a 5.8 metre ‘Barrelback’ from Glen-L in America,” he blogged at www.greyfalcon.info. “It has early Chris Craft DNA and would really test my woodworking skills. It seems that time and patience are the essential ingredients to build a boat. We shall see!”
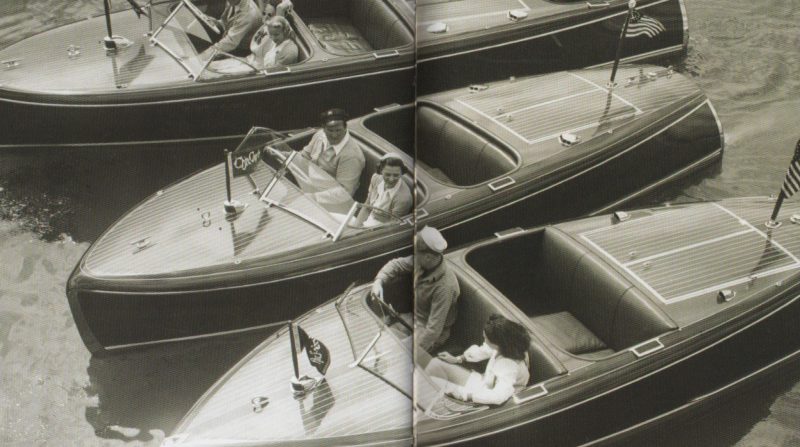
The boat David was about to create is the middle one in the raft of three in the photograph. Notice the curved aft deck defining the design as a ‘barrel back.’
“I started in March 2015 with almost no knowledge of boatbuilding,” he told Epoxycraft. “I only had a cursory glance at the WEST SYSTEM website.”
He has kindly allowed us to use some of his copyright pictures and has also described the role WEST SYSTEM products have had in achieving the end result. Shown below is the as yet unfinished project (up to November 2017) in its key stages and you can follow the full build on the greyfalcon.info website.
1: Choosing the timber
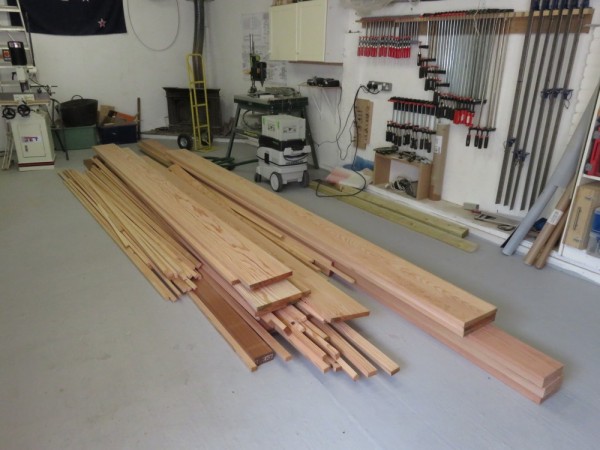
Having the right tools for a job saves a great deal of time and money. Although already well stocked with woodworking equipment, mostly in the Festool range obtained from specialists Axminster Tools, David added an oscillating bobbin sander. He also bought a van to avoid wrecking his car when transporting supplies. “Yesterday the timber arrived from Chilworth Timber in Milton Common, UK,” he blogged. “There is rather a lot but it will do all the framework. It is mostly Douglas fir, with sapele mahogany for the motor stringers and a few other bits. I had it all machined as the space and equipment I have on site don’t really allow for this and I would probably have died of old age before I got it done.”
2: Setting up the jig
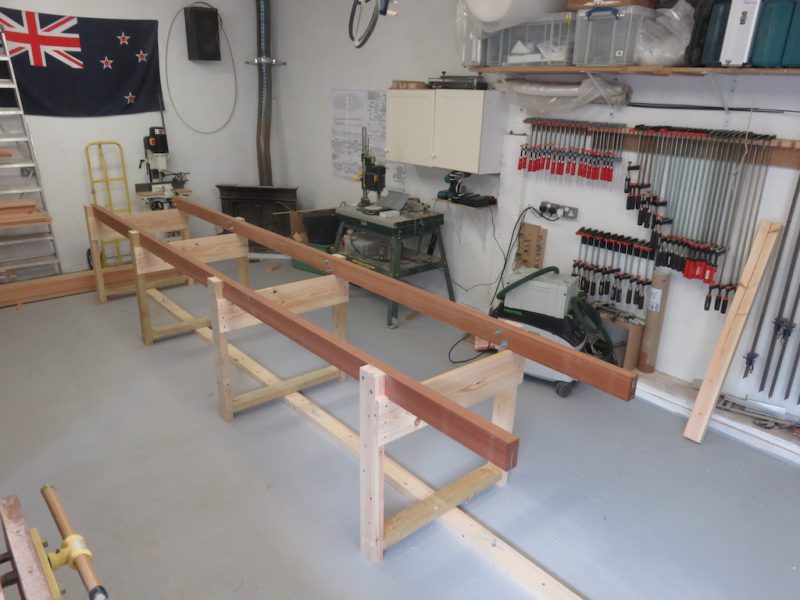
Work started by setting up the jig and screwing it to the floor.
“I had forgotten that Douglas fir splits very easily, so all connections will have to be pre-drilled,” he said. “I have rather enjoyed cutting all the curved bits and the spindle sander is excellent as long as you don’t put too much pressure on it. I was told that a boat, unlike furniture, should have no straight lines and this proved a challenge. I have also bought a Raptor brad gun from Spotnails Ltd. The Raptor is a nail gun that fires composite brads. Unlike metal staples, these brads don’t need to be extracted but can be left in place and sanded back, so are ideal for tacking jobs. They fire straight into oak through 6mm ply. I think they will be real time savers.”
3: Fixing the frames
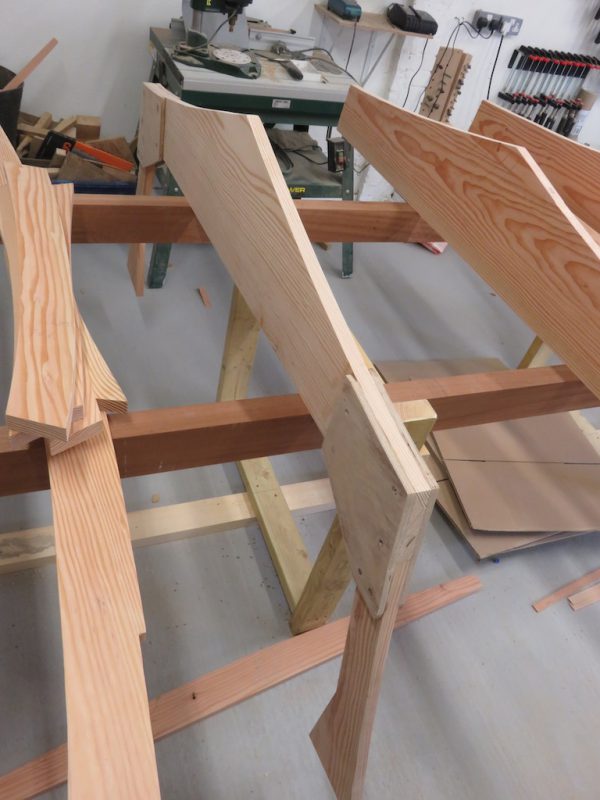
The hull is being built upside down, which is common practice with wooden boats of this type. WEST SYSTEM epoxy is being used mixed with microfibres to make a glue mix, with the sections of wood clamped in place until the epoxy cures.
“Do the research into which hardener to use and where, as well as which thickening agent,” David advises. “There are some golden rules, some of which can be bent, but not the ratio of resin to hardener. This assembling is such good fun that I cannot help thinking that I am making fundamental mistakes. I still have not mastered the dark art of finishing the rounded shapes but by the time I finish this boat, the skills I have learnt will mean the next one will be perfect!”
4: Adding the keel
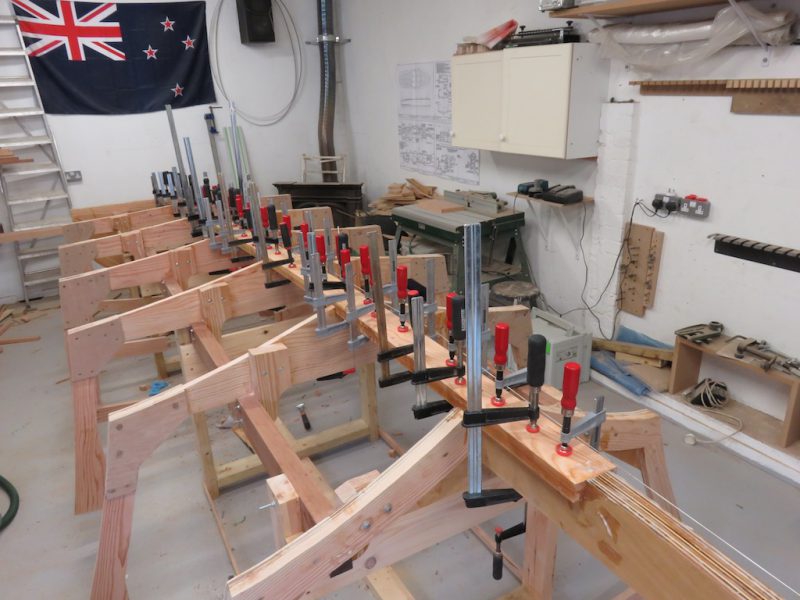
“Having already epoxied the ribs, I have now cut in and glued the ‘keel,’ which is really just two pieces of timber joining the ribs together. I managed to use every clamp I had but it all went together easily. To sand it into shape, I started by planing it with a Stanley 12″ planer and found I really reconnected with the hand tools. The tenon saw is king when it came to cutting the longitudinal slots into the ribs. I have also been using the Fein Multimaster, another essential tool, which will do plunge cutting, except that the coarse-cut blades seem to shed teeth at the edges. Because replacement blades are expensive, I grind the edges of the blades down to the next available teeth. I also have some fine small blades of about 25mm that work well.”
5: Completing the transom
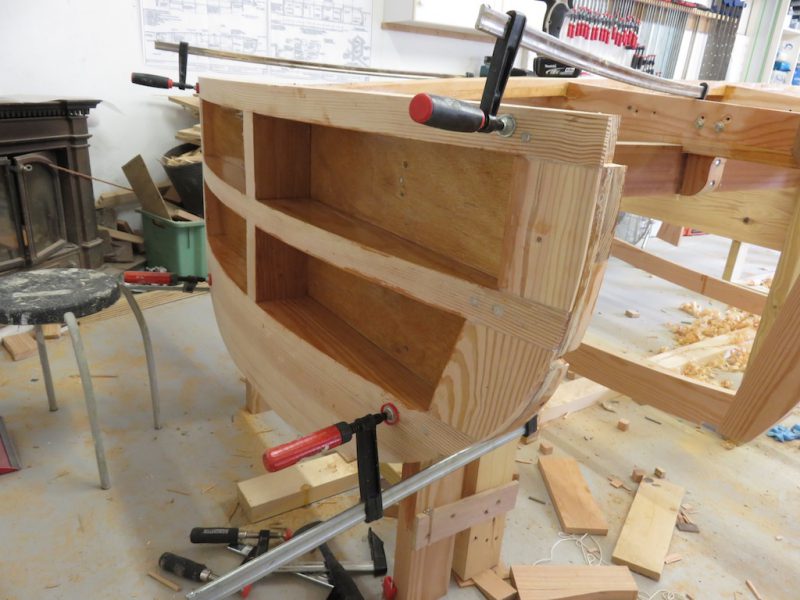
“I started to add the end shaping timbers to the transom, having cut the notches for the longitudinals, four on each side of the bottom and three on the sides of every frame. Once the transom was built and shaped, this became a real psychological moment as it completed the basic framework.
A word of caution. I am not Mr ‘Elf and Safety’, but I completely forgot to wear a mask for the fumes when epoxying the transom. I had been very good up until then with opening every door and I have a big fan that I switch on to get the air circulating, so had no problems at all. But after an hour of work without a vapour mask, boy did I feel it. Always ensure that you have good ventilation when working with epoxy resin in a confined space.”
6: Adding the longitudinals
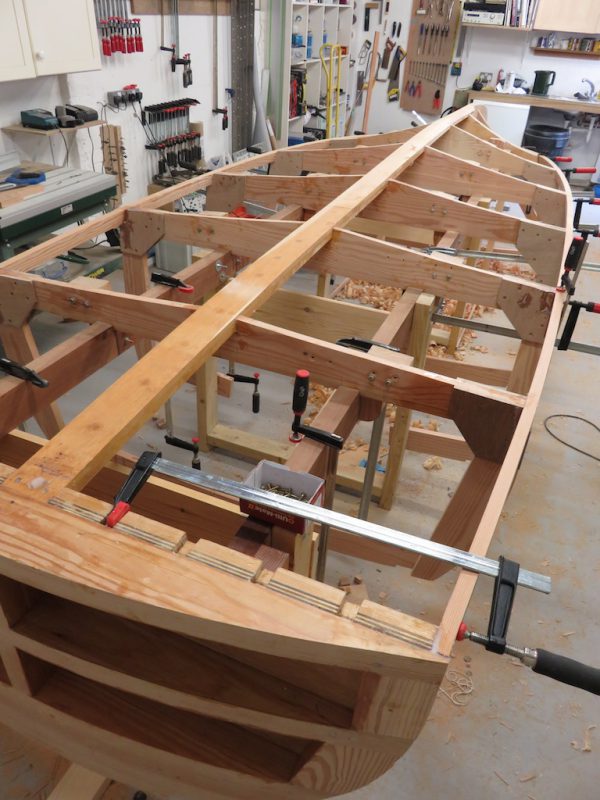
With the framework complete, David now began to fit the longitudinal timbers, starting with the chine logs, the two strips of wood that reinforce the join between the side of the boat and the underwater hull.
“Two days on and the chine logs are fixed,” David reported. “It took a lot of effort to bend and twist the timber into place but with the help of my faithful neighbour Michael we managed it. I then moved on to the ‘sheer clamps’. These form the line where the deck meets the freeboard (sides). They are two timbers measuring 3/4″ x 1 1/8″ (19mm x 28.5mm). They are added one at a time and epoxied together. I put one in place and was able to bend it just enough to get a couple of screws to bite. I managed to fit the starboard sheer, but overnight it split. I decided to try out the wallpaper steamer I bought for £34 and I found some useful instruction on this link: https://www.youtube.com/watch?v=–iPQIwSEJM. The wood bending technique described by Shipwright Louis Sauzedde is superb. I cut out the broken piece and steamed the replacement for about 45 minutes and it bent into place with no effort.”
7: Fairing the framework
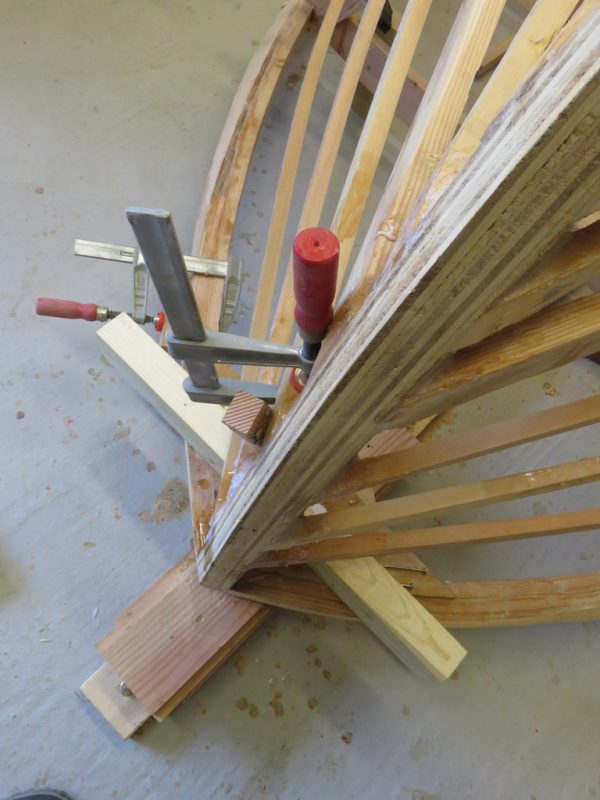
With the help of a visiting American friend, David steamed and attached the longitudinal battens to make the rest of the framework.
“The final battens had to be fitted and the clean-up of the frame started, followed by fairing. This is a perfect example of art meeting science. Fitting the curved battens, especially the bow section, is a matter of trying to find two similar looking pieces of timber and hoping they will bend to identical curves. You then fair them off to mirror each other. The epoxy looks a mess until it is cleaned up and we had bits of timber splitting, although the end result was fine. The bow is the most complicated part to fair.
8: Mixing epoxy
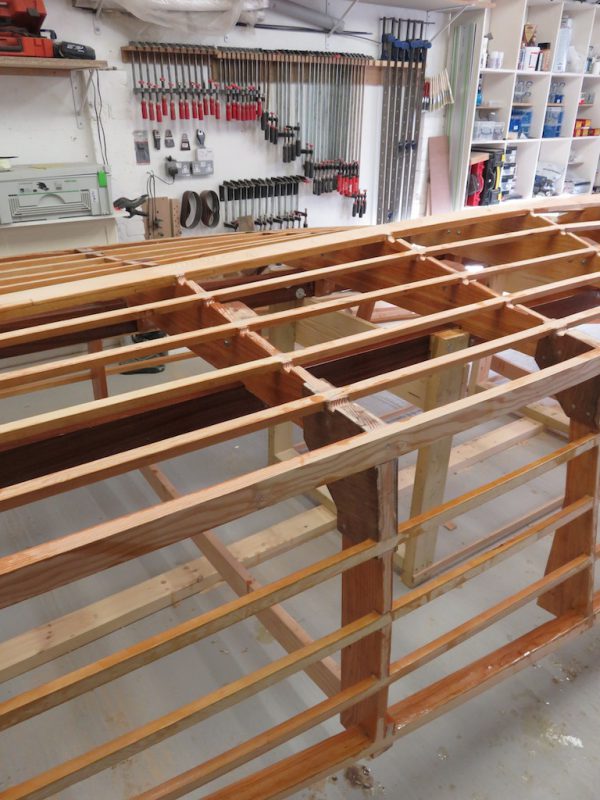
After many hours of sanding to knock back the various protrusions in the battens and smooth the framework, David was ready to epoxy the wood as a first layer of protection, but here he discovered the vagaries of amine blush.
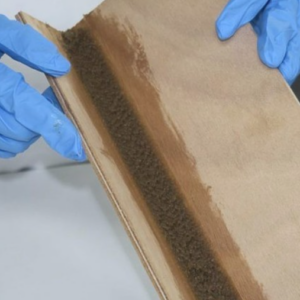
“My workshop is on top of a hill, so a little cold and damp – two things epoxy does not like. Because I was working mostly on my own I have been using the slower WEST SYSTEM 206 Hardener, as I thought the longer ‘open’ time would be useful. Wrong. The cold alone gives it a longer ‘open’ (working) time, but shorter is usually preferable. A by-product of the curing process when working in cold and damp conditions is a waxy film on the surface called ‘amine blush’ and it needs to be washed off before the boat can be re-coated. This is where the faster hardener comes in. Coat the boat with the epoxy and while it remains tacky coat it again ‘wet on tacky’. This is because the amine blush has not yet risen to the surface. That way you can put several thin coats of epoxy onto the boat in one day, without having to wash down every coat.”
The way to remove amine blush from a cured coat of epoxy is to rinse the coat down with warm water – the amine blush is soluble – and wipe with a scouring pad. You should avoid sanding before washing.
“A very helpful advisor in WEST SYSTEM UK’s technical department explained that because I had already sanded part of the boat before I had washed it, I had probably sanded the amine blush into the surface. The answer was to wash thoroughly and sand again.”
9: Building a warm store
“The other important element is heat, both in the viscosity of the mixed epoxy and the room where it is to cure. So I built a box to store the epoxy in, as outlined on the West System International website. It has a 40W filament light bulb for warmth (or you could try a reptile cage heating mat), which is controlled by a thermostat. The temperature is now a constant 22oC. The mistake of using slow hardener set me back a few days but I have already adjusted the amount of time I expect this boat to take to build from 18 months to nearer 24-30 months. If anybody is reading this to glean information prior to building a boat then think carefully. It is a huge amount of work but having said that, as a 67-year-old I was only working around 4-5 hours a day.”
10: The first layer
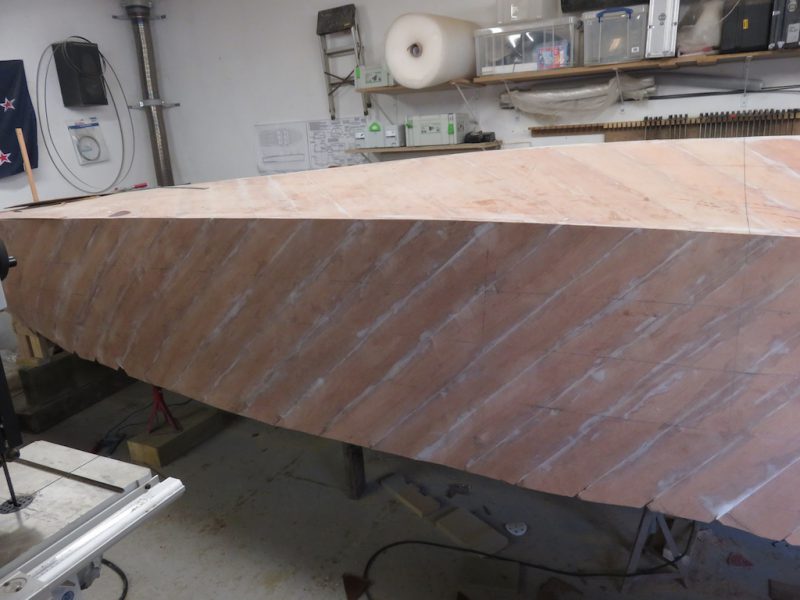
Back to using fast hardener, which made the job quicker and easier, David finished coating the frames and areas that would he hard to get to once the boat was finished. These thick protective coats of epoxy would ensure the wood stayed in pristine condition by repelling water. With the frame prepared, David now began to attach what would be the first of three layers of thin (4.6mm) rectangles or ‘slivers’ of marine grade plywood, set at diagonals to each other and held in place by the brads. The joints were glued with thickened epoxy to lock them into shape. To make access easier for this stage, the frame was lifted a metre off the ground.
“I have finished the first layer of ply on the whole boat with the exception of the transom,” David blogged in June 2016. “It appears a bit messy as I have only rough sanded it but the profiles are looking good. The ‘sharp bit’ was a challenge and I had to go down to 50mm widths to be able to get the curves to sit properly but I think the rear end is going to be more difficult. I made a mess of two points. One is at the bow where I did not follow the profile well and the epoxy cured as I was trying to straighten it out. The other is at the stern where I shall have to fill a dip were it does not feel right. (This is where I used WEST SYSTEM 407 Low Density Filler with the mixed epoxy). The next layer should be easier for the fact that the shape has been made by the first layer. I shall finish the sides first, then the bottom.”
11 Final layers
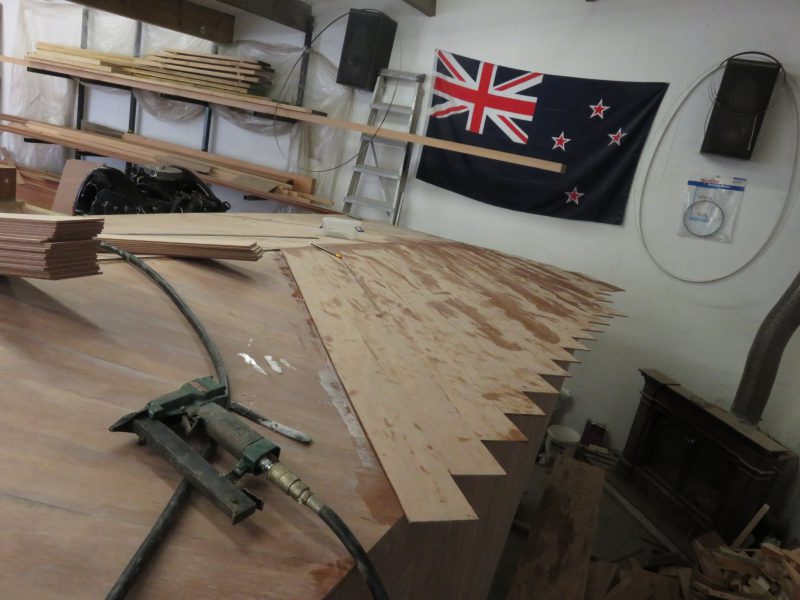
Once David had finished the second layer of diagonal strips of ply, he was faced with applying a final layer of sapele for the bottom and sides but this time running longitudinally along the hull and thicker than the rest so as to give more strength.
“I have had the sapele machined to 6mm and I just need to angle the edges so that I can fix it in place without visible fastenings. The first strip of sapele will be attached to the side chine. I can do this with the brad gun as it will be fibreglassed and painted. I made some brackets that I can screw to the ply that will hold the sapele in place until the epoxy cures. It may well end up being a ‘one strip a day’ effort but the end result will be really clean.”
12: Sanding for sheathing
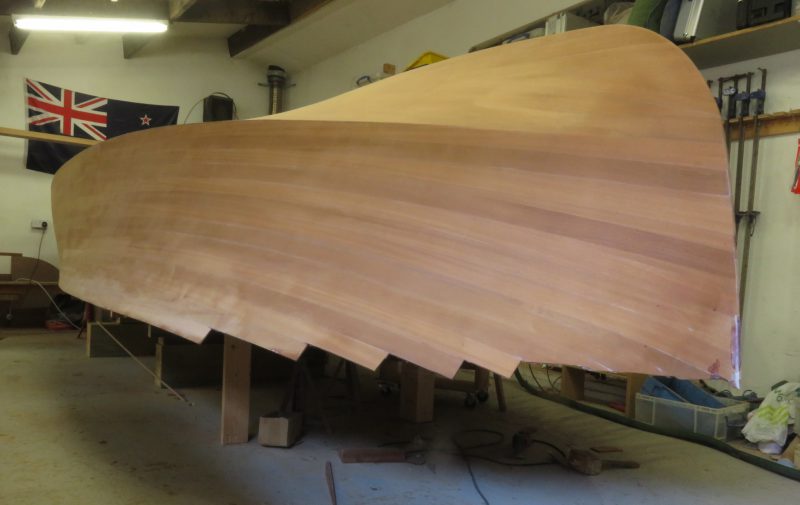
With the last strip of sapele in place, a job that ‘required 24 clamps and a lot of patience’ the hull was complete. The next task was to prepare it to receive a protective layer of fibreglass below the waterline.
“I am really pleased with it,” David wrote. “Now I have the unenviable job of fairing and ‘longboarding’ the whole hull for fibreglassing. I am not doing that in the conventional way. I don’t have the strength or the patience so I spoke to Festool’s rep Bob Vine to devise an easier method. He said to put a hard sanding pad on the 150/3 random orbital sander and gradually work it over the hull in all directions, initially with 80-grit ‘Granat’ discs. They are the longest lasting discs and work brilliantly. Epoxy needs a good ‘key’ so don’t use a sanding disc that’s too fine. Where the curves get too acute I am using the 125mm sander with a medium pad and even the 90mm sander with the soft pad as well. Festool also make a foam pad for sanding curves, which I found very useful. As the picture shows, the whole thing is sanded and faired to within a millimetre of its life and I think it looks pretty good. All edges have been softened and the waterline will go on before the professional fibreglasser gets here.”
13: Sheathing the underwater hull
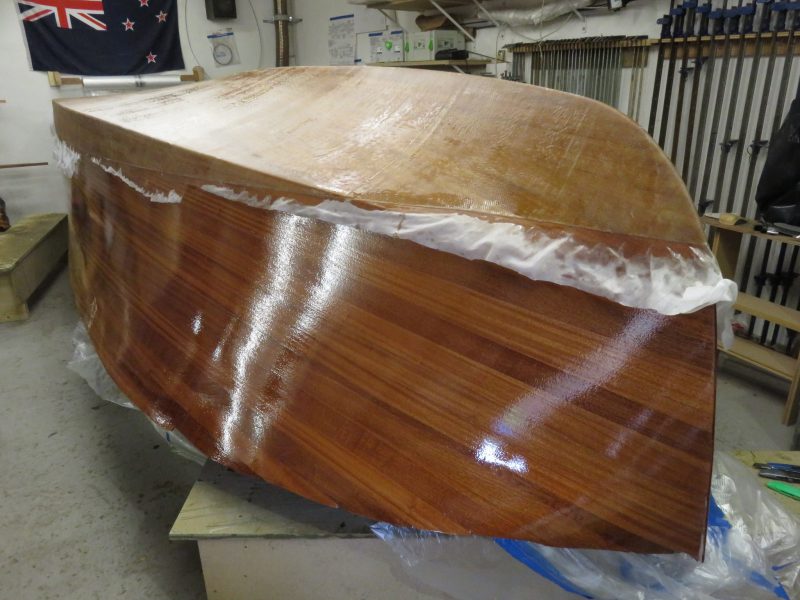
Unwilling to tackle such a large job single-handed, David recruited his wife Shelley and Mark and Julie Bestford, the husband and wife team that own and run the boat building and restoration company Boatwork Ltd. Although the company is based at Oundle Marina, Peterborough, the couple also have a mobile workshop. They were going help David with the tricky job of wetting out and positioning the fibreglass cloth on the underwater profile. This additional barrier would ensure absolute watertight integrity and a very long life for the hull.
“Mark decided we should first completely cover the boat with three coats of WEST SYSTEM 105 Resin with 207 Hardener, as this leaves a clearer coat with less amine blush to wash off,” David explained. “We allowed these coats to cure overnight. The following day we started at 09.00 by washing off the blush and then flattening back with wet & dry paper before laying on the glass-fibre. Patience was required as the sheets of pre-cut cloth were lowered onto wet epoxy. We then used flat-bladed plastic ‘squeegies’ to force the epoxy right through the weave, making sure it was all ‘wetted out’ to one consistent shade – no light patches. Finally, a layer of ‘peel ply’ was rolled over the top to give the cloth a keyed surface ready for the fairing filler. By 21.00 we were all exhausted, but we did manage the two layers of glass-fibre and a layer of peel ply. Over the weekend we used 12 kilos of WEST SYSTEM 105 resin and 4.5 kilos of 207 Hardener. We got through 20 metres of glass-fibre fabric, 8 metres of peel ply, 120 pairs of plastic gloves, 40 rollers and 5 litres of acetone. Job done and the hull is looking very beautiful, ready for the next stage. Mark has been a mine of boatbuilding information and very helpful.”
14: Removing some mottling
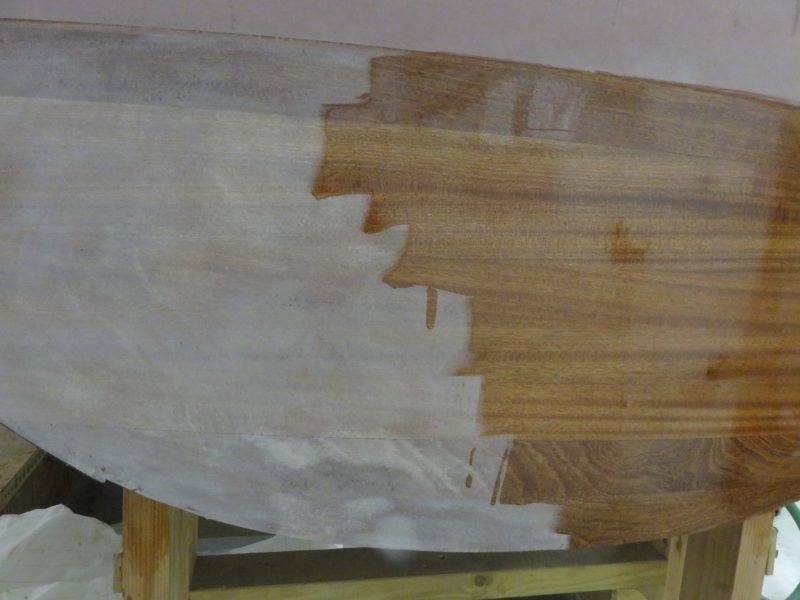
It is quite easy to put a coat of epoxy on a little too thick and this can lead to an ‘orange peel’ consistency.
“When we finished rollering the three coats of epoxy to the sides of the boat it was left looking a bit mottled and lumpy,” David blogged. “I flatted it back so there was not a wrinkle in sight and I confess to a few moments of nervousness as it looked dreadful. I then mixed some WEST SYSTEM 105 Resin with the requisite amount of 207 hardener and with a small roller dipped in the mix I just wiped it onto the flatted epoxy layer. It worked brilliantly. I then tried a test section that took about an hour to sand to a point when I can fill the little air/pin holes ready to fine sand afterwards.”
15: Priming and flatting back
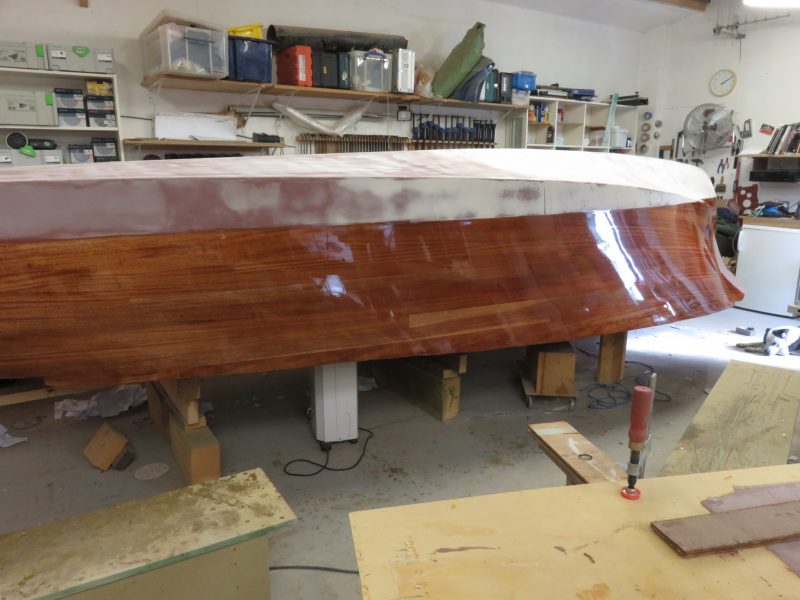
To prepare the underwater hull for its paint, David had the long job of applying a filler to smooth out the legacy of the peel ply and create a perfectly smooth surface.
“I have been sanding and fairing the bottom of the boat for the last two weeks which has been a bit challenging but quite good fun,” he wrote in his September 2017 blog. “I was recommended the WEST SYSTEM 410 Microlight as a filler as it made fairing easier but I found it a bit too soft and prefer the 407 Low Density Filler. So then I sanded the sides (a two-day job of approximately 8 hours each) and gave them a layer of epoxy. I smoothed this on with a 3.5 inch roller cut in half, or rather several rollers cut in half. When I left it last night it was perfect. This morning, however, it transpired that there were some drips but more disturbingly there were some ‘contamination’ marks like little fisheyes all over the boat. They will have to be cut back with more sanding and redone. I think they were the result of not washing the amine blush off the boat properly, so my fault. Today I test-sanded a small area and I can cut it back without taking off everything I put on, so I am gradually building up the surface to look very good.”
16: Painting the underwater hull
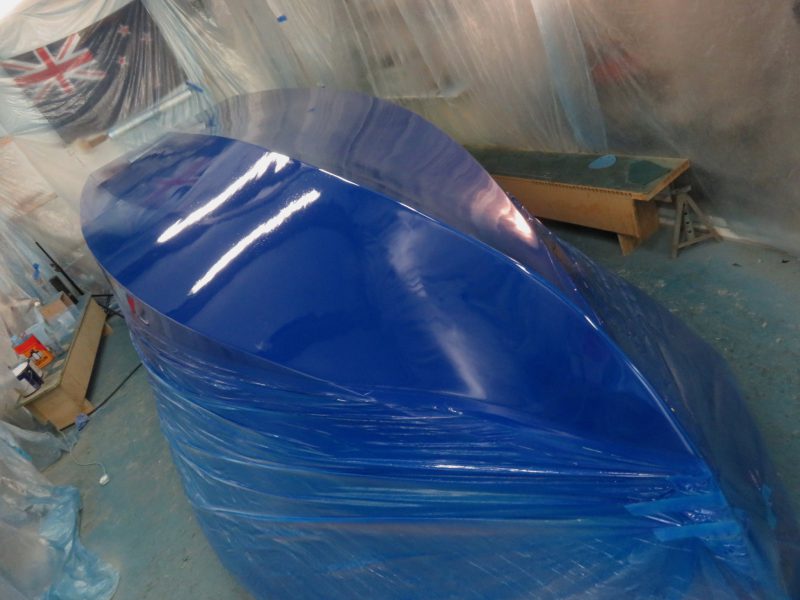
With the last of the filler fully sanded back, David carefully masked off the unpainted hull with a curtain of polythene to ensure no stray paint got onto the beautifully epoxied sides. He then partitioned off the hull from the rest of the workshop prior to painting to minimise dust being blown in. Tempting though it was to turn the boat immediately after painting, the trick was to let the fresh paint cure properly first.
“After waiting the requisite 7 days for the primer to properly harden, my friend Michael and I flatted the primed surface and gave the hull it’s first coat of Jotun Megagloss yacht paint. I chose a dark blue but always test the colour first as the chart can be misleading. Saturday saw a further flattening of the first three coats of paint followed by another three coats.
We now leave it for another 7+ days to really harden and then we will gently flatten and polish it to a brilliant shine!
Then can I turn it over, please? Actually no, Mark told me, as it needs a couple of coats of polish first. This protects it and of course is much easier to put on when the boat is upside down. Then there is the 25mm pale grey ‘boot top’ line that I would like to put between the blue and the wood. So, another two weeks to turnover to get this all done.”
Engines and gearboxes
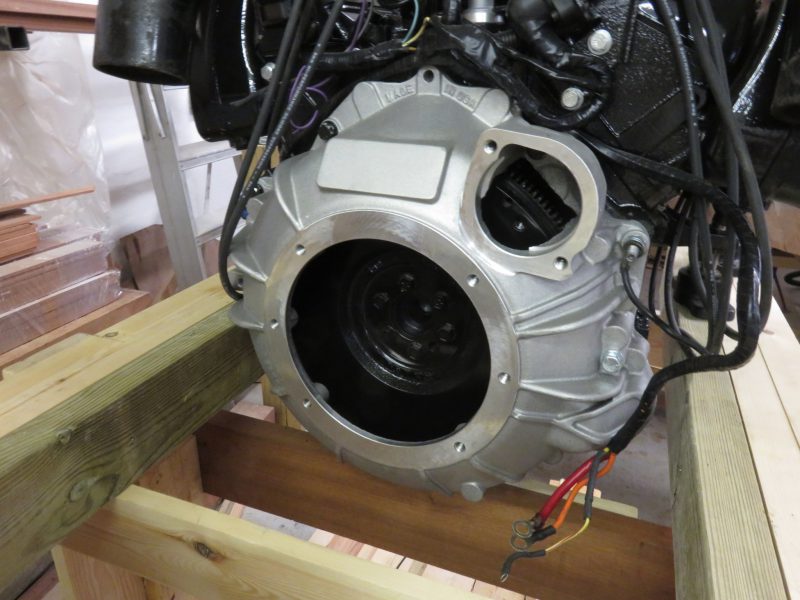
We have focussed mainly on the role of WEST SYSTEM epoxy in assembling the hull but we should also give a quick mention of how the boat will be powered. David had explored an electric option for this boat, although this proved to be too expensive when coming in at around £27,000 for the batteries and motors. Instead, he opted for a single, second-hand 4.3 litre V6 petrol engine from Mercury Marine. The engine had been rebuilt but was missing a lot of extras, such as the bell housing, starter motor, waterpump, manifolds and instruments, so David ordered these from the US. This proved a mistake, as whilst the parts were quite cheap (US$ 500) the import duty and taxes added about 30% to the purchase price. The Velvetdrive gearbox was sourced second hand from eBay in the UK and was also rebuilt.
David will be installing the engine and drive train once the boat has been turned over and you can follow the whole process, written in his cheerful narrative with plenty of high quality photographs, at www.greyfalcon.info

