Projects: Building an 18th century gajeta – Part 6
In our latest instalment of this fascinating series, we get deep inside the build of this inshore fishing vessel.
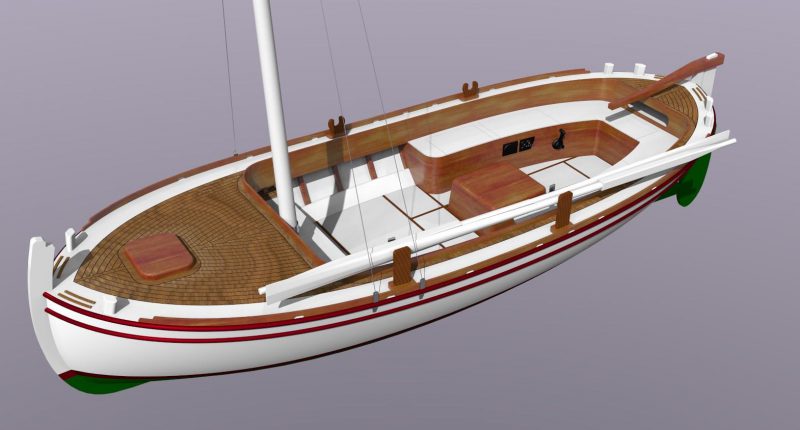
The tough and seaworthy gajeta is powered by a lanteen sail and a small inboard engine. This graphic shows the internal design, including the small forepeak cabin and was posted onto the workshop wall as inspiration.
Part 6
Engine beds, internals and decks
Once again 3D design software and computer numerical cutting (CNC) is used to create precision parts in this 9-metre inshore fishing vessel. This time they are for fitting out the supporting structure for the engine and floorboards. Using parts cut to drawings by naval architect Srdan Dakovic the team at the Betina Shipyard in Croatia start to assemble the internals.
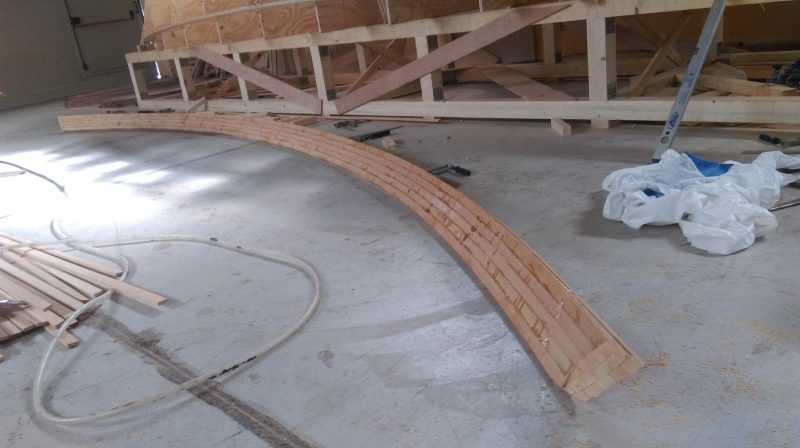
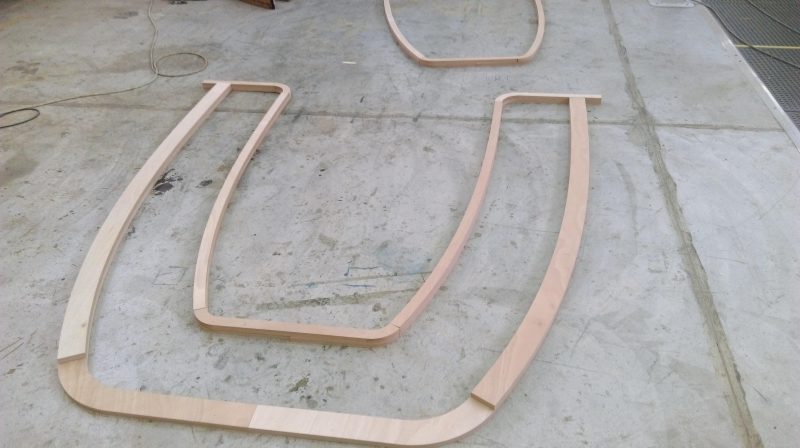
Quite early in the build, the team made two ‘stringers’, reinforcement pieces that run the full length of the hull to act as a support for the floorboards. Here the CNC really came into its own to ensure the sweep and camber were exact at every contact point. As you can see, each stringer was made by laminating six pieces of wood together, three strips down and two strips deep.
The CNC machine also cut the base shapes for the deck supports and internal seats. Note how the two layers of marine plywood overlap and interlock for greater strength. This also helps prevent warping.
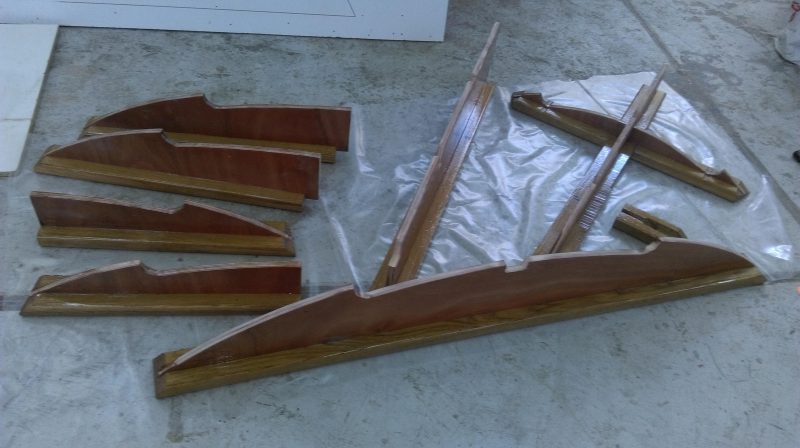
The internals for the engine beds were also cut and shaped before being coated with several layers of WEST SYSTEM 105 Epoxy Resin and 205 Fast Hardener. It is very important to ensure that the exposed laminates of the ply are fully coated. Even marine ply can eventually delaminate if fresh water can enter the exposed layers of the timber.
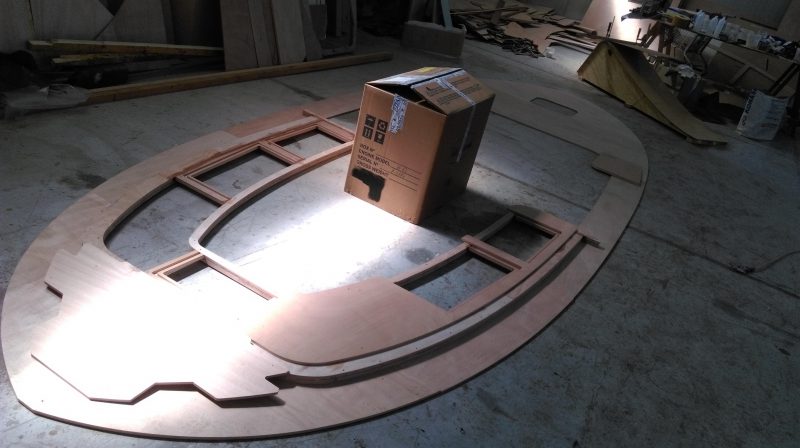
The plywood decks were also pre-formed and dropped perfectly onto the supports. The CNC cutting has the extra advantage of minimising waste and so keeps the cost of raw materials as low as possible. This is particularly useful in mass production.
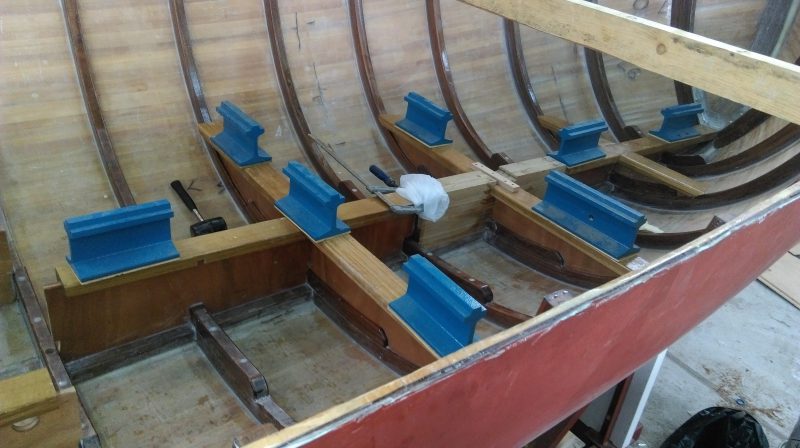
The floorboard bearers and engine beds were lowered into place and bonded with fillets made from WEST SYSTEM 105 Epoxy Resin and 205 Fast Hardener. Srdan’s philosophy is to use as few metal parts and fastenings as possible, relying instead on the powerful adhesive qualities of thickened epoxy.
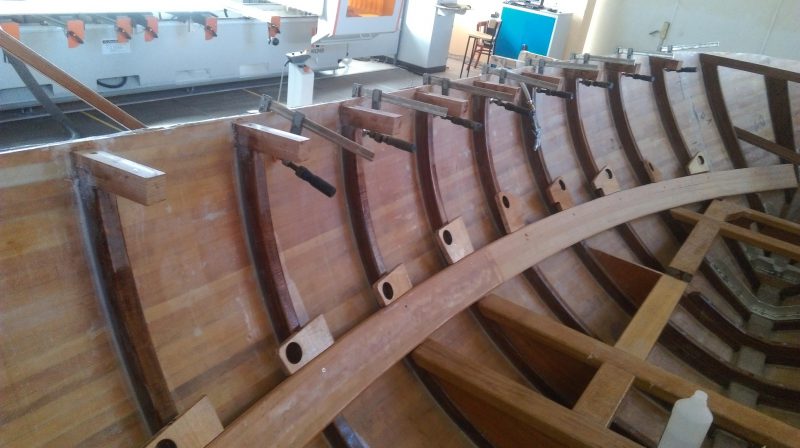
The longitudinal stringers were sanded, coated with three layers of protective epoxy and then positioned on each side of the hull. The ‘knees’ that will support the deck have been put in as well. Note the wooden plates that have a hole cut to accept pipework. They will be attached later. Forward planning of any boat design minimises the work needed in the subsequent fitout.
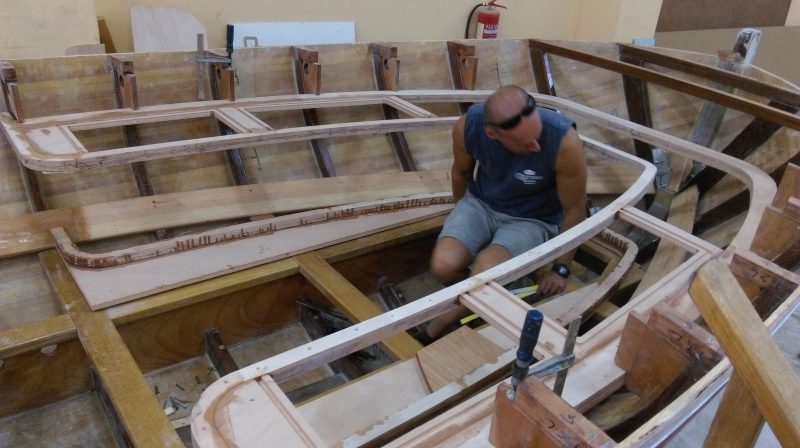
The frame for the seats has been positioned and sits neatly – and level – on the frames. The knees have also been placed and will be attached using fillets. All the timber will be coated with three layers of epoxy for long term protection, even timber that will never be exposed to the elements.
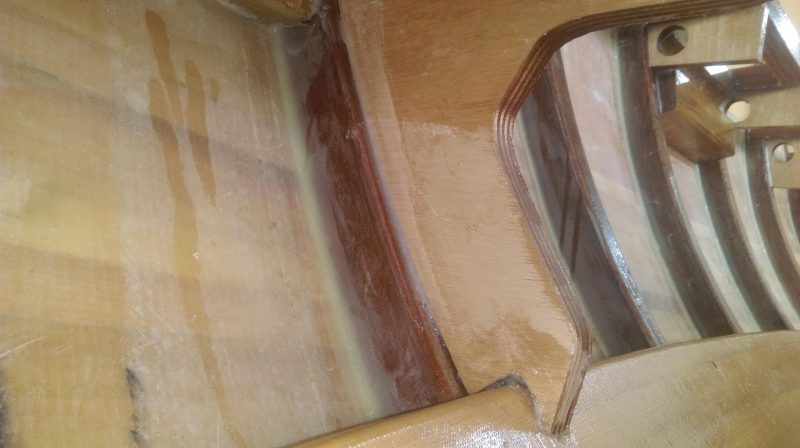
A study from under the deck showing the extent to which fillets – seams of thickened epoxy – are used to hold the whole structure together. Epoxy is often stronger than the wood it is adhered to and provides a long-lasting bond that won’t deteriorate due to corrosion. Even stainless steel metal fastenings can corrode under certain conditions, whereas epoxy resin’s only real enemy is ultra violet light – and UV resistant coatings solve that issue.
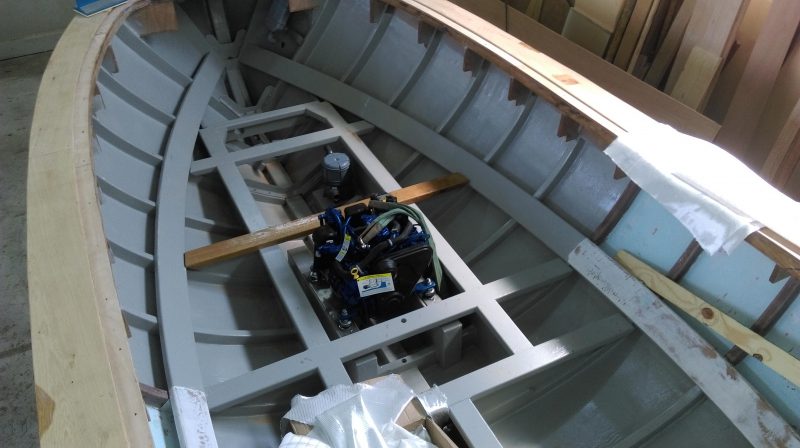
With the internal hull given two coats of epoxy primer the engine can be dropped into place. The water trap, the grey cylinder sitting behind it, will prevent any syphoning from the exhaust.

In a departure from the state-of-the-art technology used so far, a tried and tested method of aligning and drilling the propeller shaft takes place at the stern. The timber guide is held by an observer at the correct angle whilst a craftsman drills the hole in the sternpost using a very long drill bit. Care has to be taken not to apply too much force as the drill could bend. The observer ensures the shaft stays true.
Check out the next article in the series.


