Boat Building: Building an 18th century gajeta – Part 4
Part 4:
Putting on the skin and sheathing
A gajeta is a traditional design of small open fishing boat but as they are raced competitively, an enterprising naval architect decided to make one using modern epoxy techniques. In this instalment, the computer-generated design is taking shape on its temporary jig and the base layer of planks has been glued into place. Now the team at the Betina Shipyard in Croatia can start to lay the thin layers of mahogany over the top before sheathing with WEST SYSTEM epoxy.
The double-diagonal method of construction provides for a very strong but relatively lightweight wooden hull, which is why it was so widely used in early powerboat manufacture. With the advent of modern resins, fibreglass moulding took over for production boatbuilding, whilst traditional planking skills were kept alive for classic renovations. Now wooden boatbuilding using this method is beginning to make a comeback, as the process really lends itself to custom projects. By bonding thin sheets onto a solid base stand then covering the whole thing in woven glass cloth, the result is as watertight, strong and lightweight as it is possible for a wooden boat to be.
Whilst naval architect Srdan Dakovic was keen to replace traditional technology with modern epoxy processes, he realised that he couldn’t completely remove all metal screws and other metal fastenings from the project. The double-diagonal process would still need thousands of marine grade stainless steel staples to hold the veneers in place whilst the thickened WEST SYSTEM epoxy cured.
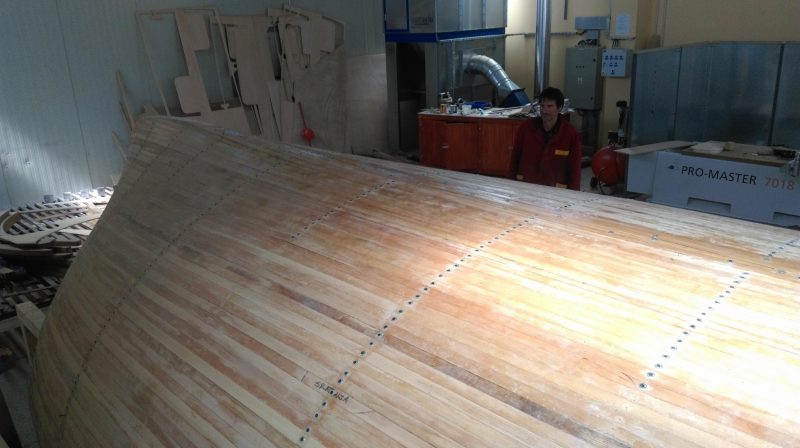
Picking-up from last time, the cedar strip planks have cured into place and the wax-coated screws are being withdrawn so the bare wood shape can be covered with the first strips of mahogany. In total, two layers of hardwood will be used to create a double-diagonal hull, which will be immensely strong. Triple diagonal, with three layers for even greater strength, is also a popular method of build, usually for deep-ocean racing yachts or fast powerboats.
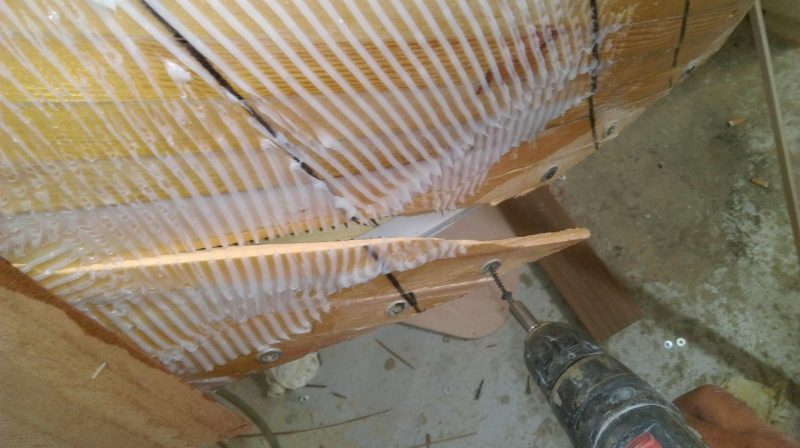
WEST SYSTEM 105 Epoxy Resin with 206 Slow Hardener is mixed and thickened with 406 Colloidal Silica. This adhesive mix is applied to the wood with a notched scraper, the slow hardener allowing larger areas to be covered in one session as there is less of a time constraint. Just as well, as one of the planks seen here has split after the glue application. The split can be quickly repaired using 5-minute G/5 epoxy and the plank reattached using a waxed screw. The G/5 will achieve full strength whilst the WEST SYSTEM 105/206 mix is still curing. The waxed screw can be removed long before the repair needs to be covered with veneer.
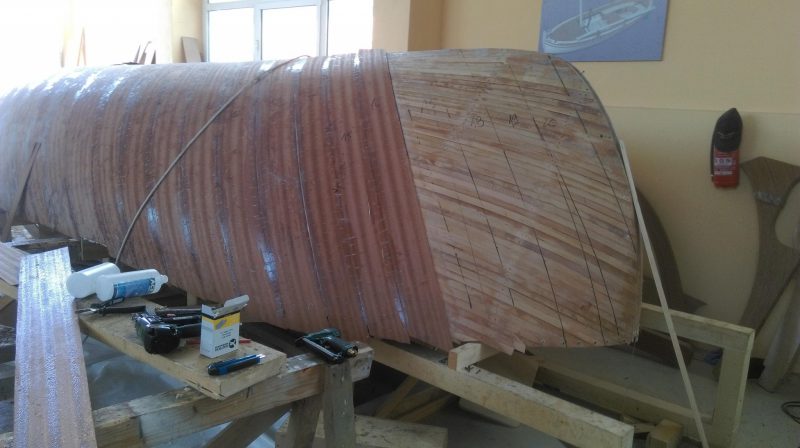
The planking advances, with each thin strip of mahogany veneer butting up against the next. Note the diagonal angle and the use of a cord to pull the plank down prior to the staples being applied. High quality 316 stainless steel staples and an electric staple gun are essential in this type of build.
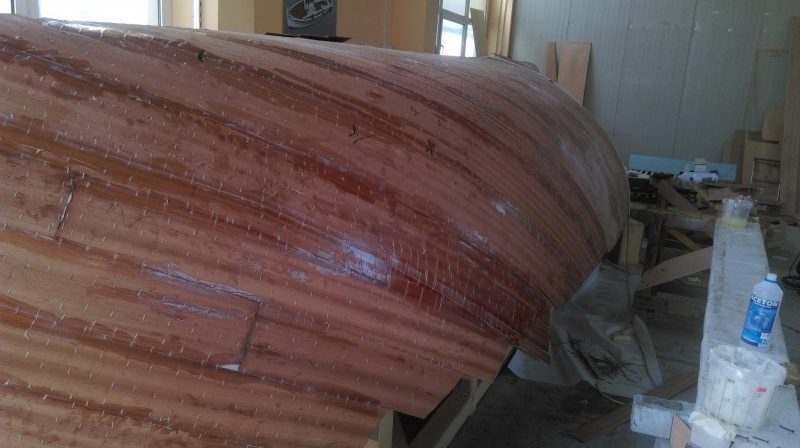
The staples are evenly spaced across the joins with two more through the plank itself. The adhesive mix is also a good gap filler. You can see where one of the veneers has lost a corner but the void has been easily filled with the thickened WEST SYSTEM epoxy. The builders take care to ensure that no gaps are left unfilled by spreading squeezed-out epoxy along each seam.
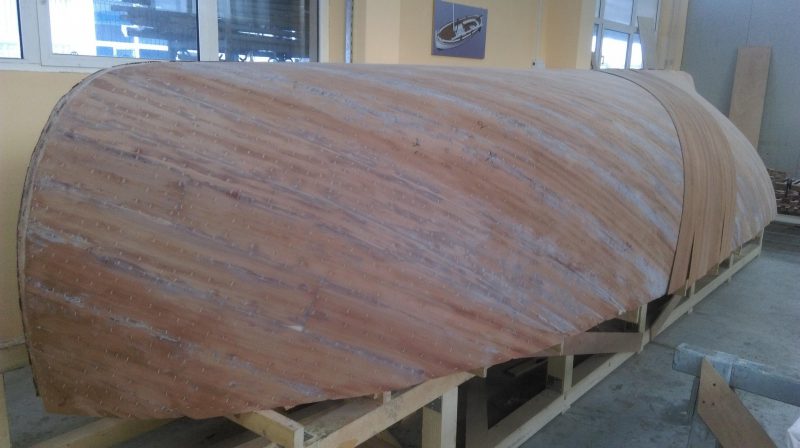
Once the first layer is down and the epoxy has cured, the whole hull is sanded fair to remove excess adhesive mix. Then the second layer is applied, using exactly the same technique. Four staples are added across the plank, the outer ones holding each veneer to its neighbour.
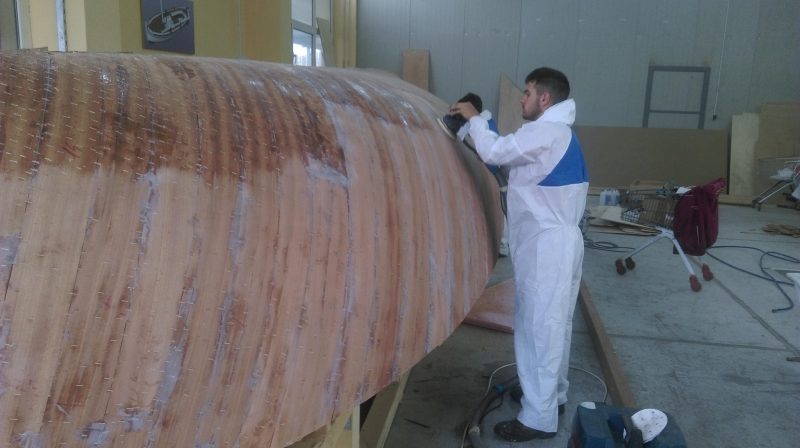
Once the second layer has cured, the surface is once again sanded fair. You will notice that the operator has omitted his personal protection gear. Ideally, he should be wearing a face mask, goggles, gloves and ear defenders, so we’ll pretend he is just posing for the picture.
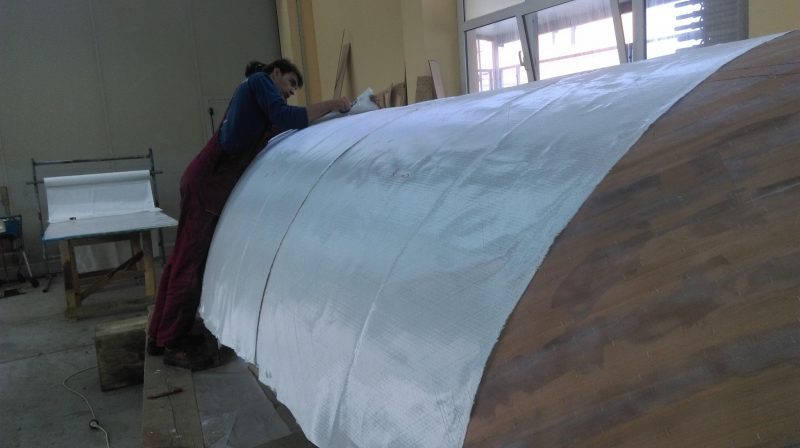
With the hull sanded back, mainly to even out the surface but also to provide a key, now it can be measured for the sheathing material. Here a craftsman is cutting out the first lengths of biaxial cloth that will form the basis of three layers. The woven glass cloth is 300gsm (300 grams per square metre) which is a good balance between thickness and strength.
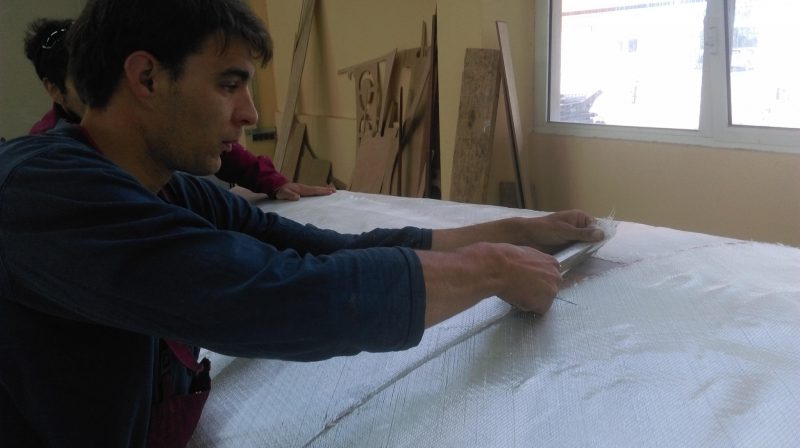
The cloth is trimmed to allow for some overlap, but not too much, although any ridges won’t matter as the whole surface will soon be faired using an epoxy/filler mix. After trimming, an indelible marker is used to identify each panel so others can be prepared in advance and stored nearby. The wet-on-wet technique means that each panel will be laid onto the ones below whilst the epoxy is still in liquid form, so it can soak through.
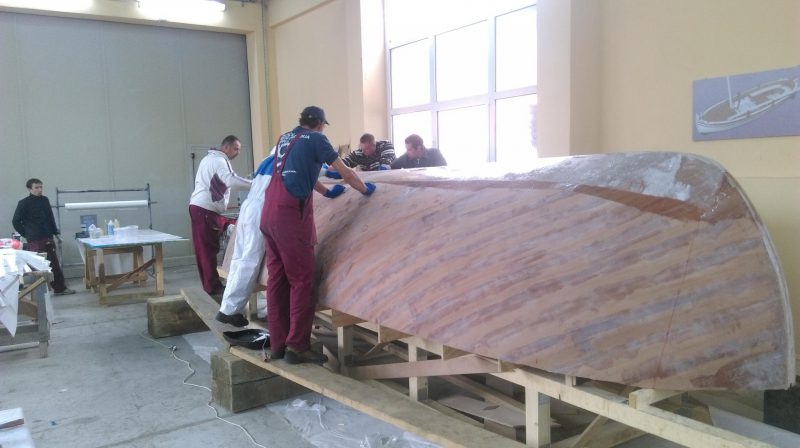
Working together on one section at a time, the team first roll on a coat of Epoxy onto the bare wooden surface. 206 Slow Hardener is being used as the temperature inside the shed is quite warm, so the epoxy’s pot life and working time is extended. Again, the team should be wearing overalls and goggles to protect themselves against splatter from the foam rollers, but professionals are often the worst offenders when it comes to personal protection equipment (PPE).
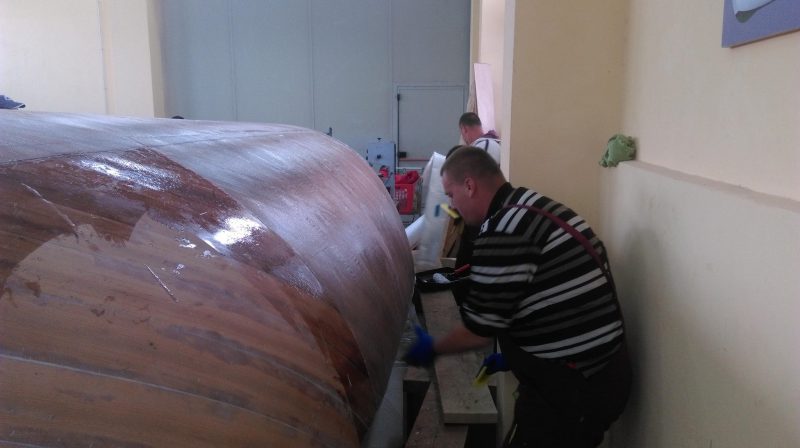
The first layer is going on well. Note the epoxy coated timber in the foreground and how the biaxial cloth behind it has been fully wetted out. It is uniformly wetted out with no white patches to be seen. The team will be aiming to get all three layers applied in one hit so the epoxy soaks through each layer and cures as one. If the epoxy was allowed to cure between layers, the cured surface may need the amine blush washed off and the entire hull abraded again before continuing.
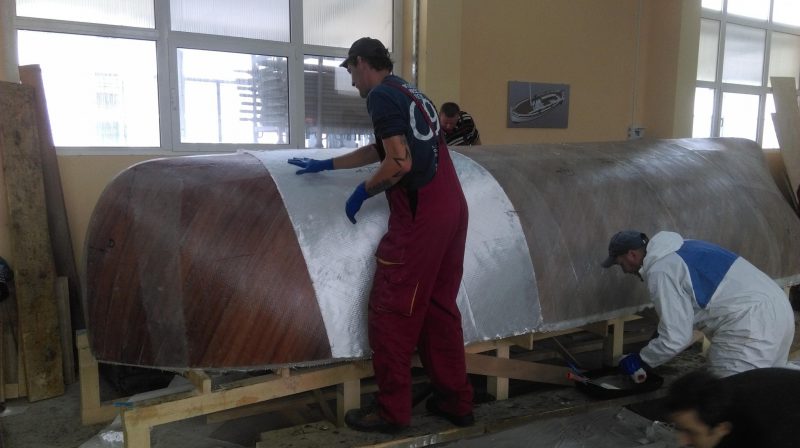
The second layer is going on, once again made up of pre-cut sections. You can see how each one has been marked with its identifying number and orientation.
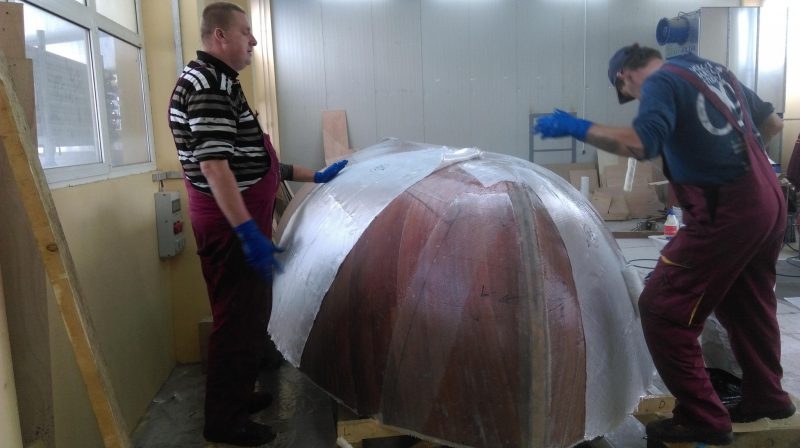
It’s probably not a good idea to leave a tray full of mixed epoxy where you will step right in it. The look of the guy on the left says it all….
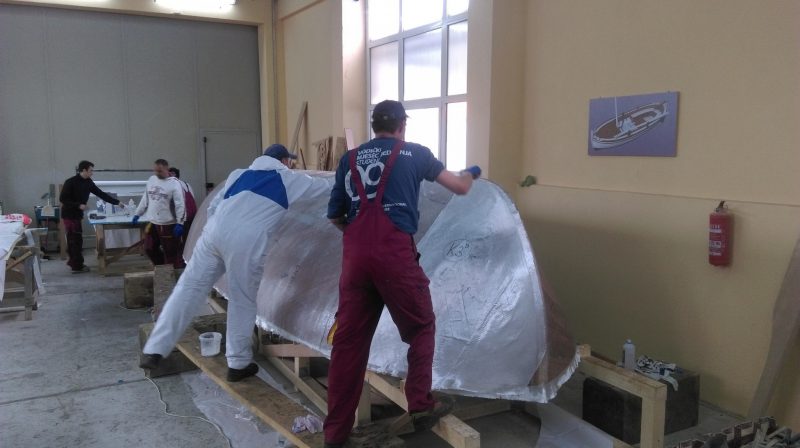
The third and final layer of biaxial cloth is laid onto the wet second layer underneath. Note how the layers are allowed to overlap to ensure full coverage. The seams are flattened as much as possible to eliminate any air pockets.
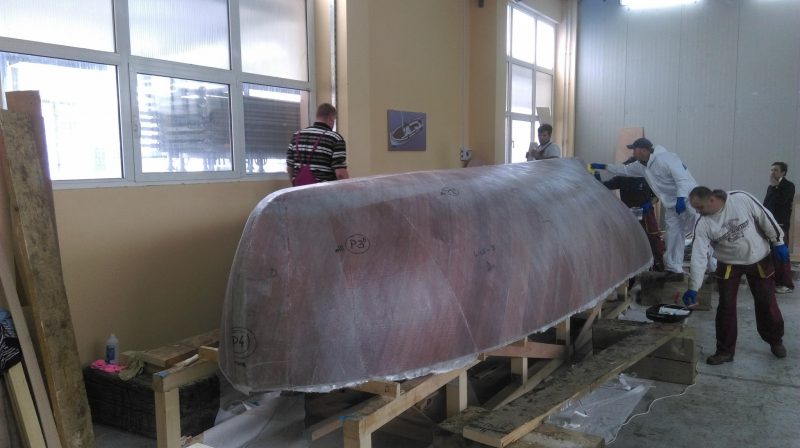
The cloth is hand positioned and epoxy rolled onto it. Then squeegees (flat blades of yellow-coloured plastic) are used to force the cloth down and spread squeezed-out (hence the name) epoxy evenly over the cloth to complement the work being done by the rollers.
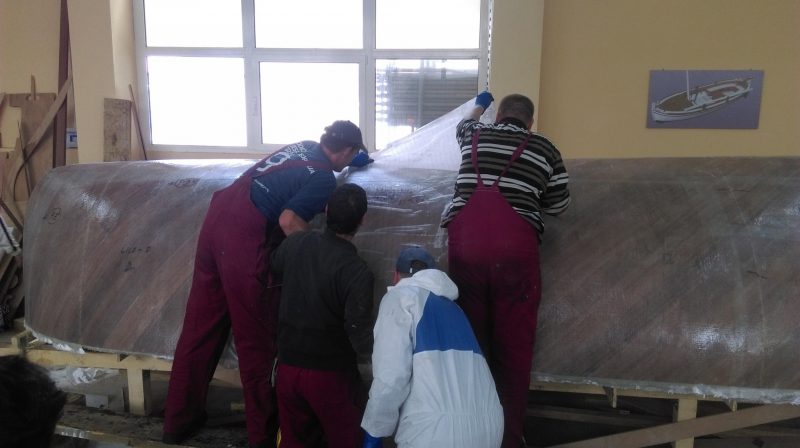
The final layer is a sheet of peel ply, identified by its red stripes. This thin sheet of nylon is positioned onto the wet layer underneath and rolled down to ensure thorough wetting out. Once the epoxy is cured the peel ply is literally peeled away, taking any contamination, such as amine blush, with it and leaving the cured surface with an imprinted ‘key’ ready to accept the filler.
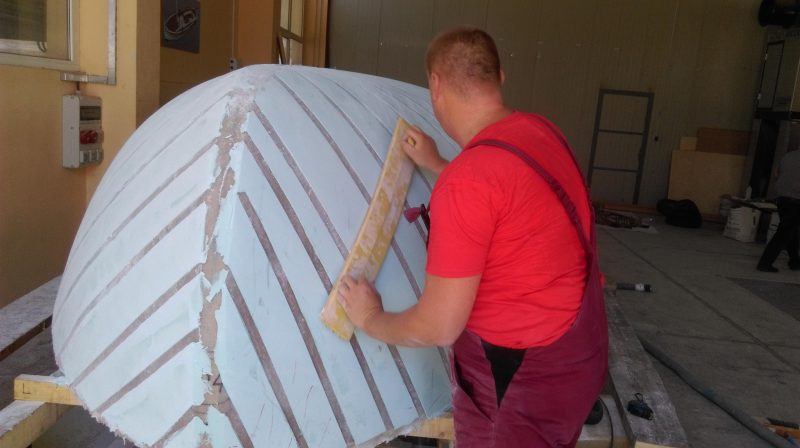
Filling and fairing for a smooth finish and flipping the hull over to work on the interior.

