Trade Secrets: TRADE SECRET: Wooden boat repair – repairing localised dry rot with epoxy
Dry rot is the natural decay process that causes wood to discolour, crack, shrink and – worst of all – lose its strength. Fortunately, when the worst does strike, you can rely on epoxy to save the day.
In the bilges, behind cupboard doors, at the bottom of the chain locker or under the bunks; it’s a simple fact that wooden boats contain numerous small, often isolated areas with poor ventilation that are likely to trap moisture. Whenever that happens, dry rot is likely to develop.
It’s no wonder, then, that repairing small areas of dry rot is possibly the most common wooden boat repair.
When that happens, epoxy is the perfect solution. Not only does it restore the structural integrity of the material but it also totally replaces the water, forming a barrier against dry rot happening again in the future. In this respect, a dry rot repair made with epoxy can genuinely be ‘better than new’.
There are two filling methods which are recommended for treating localised dry rot. The method you should use depends on the size of your cavity.
This means that, before you decide, you need to excavate the area so you know exactly what you’re dealing with. Start by removing all of the wood which has been noticeably damaged by rot, making sure to extend well away from all sides of the apparent damage. A chisel is the best tool to excavate all the weak, crumbly wood. You should be left with a clean cavity with solid wood exposed on all sides.
The size of this exposed cavity will determine which of two filling methods is the most appropriate.
Method 1: Filling smaller cavities with epoxy
The simplest method is to fill the cavity with an epoxy/filler mix. This certainly saves time but is only suitable for small areas – approximately a 12mm layer or a volume the size of a golf ball. A larger volume will produce an exothermic reaction, causing it to heat up and significantly weaken the epoxy.
- Prepare the surface
Once you’ve excavated your small cavity, prepare the surface as usual, making sure the area is thoroughly dried out to prevent any further moisture damage. - Wet out
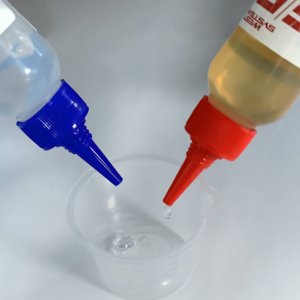
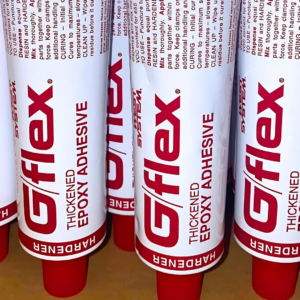
When you’re certain the area is dry, wet it out with a mix of WEST SYSTEM 105 Epoxy Resin® and 205 Fast Hardener®. - Thicken epoxy with high density filler
Then thicken your epoxy with a high density filler. Adding 406 Colloidal Silica, 404 High Density Filler or 403 Microfibres will get your epoxy to a peanut butter consistency, which makes it perfect for gap filling, filleting, fairing putty and bonding uneven surfaces. - Apply epoxy / filler mix
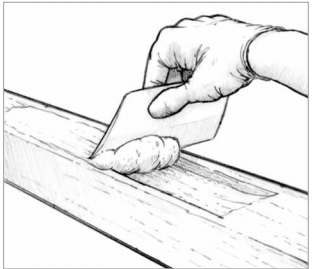
Next, use a squeegee or mixing stick to trowel in the mix. Make sure the cavity is filled with this thickened epoxy. Then smooth it flush with the wood’s surface and quickly remove any excess before the epoxy begins to cure. - Cure
Finally, allow the mix to cure thoroughly and sand down your filled cavity. Do this only once it has had time to fully cure.
Method 2: Filling larger cavities with wood
Larger cavities need a more involved and labour intensive response. This second method involves carving a plug, or “dutchman” (wood shaped to fill the cavity), to the same shape as the cavity. This plug is then bonded in place using epoxy to create a repair that will restore the area’s original strength.
- Prepare the plug
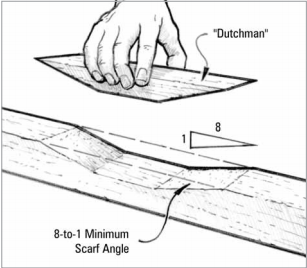
Firstly, prepare the plug – if you have the same kind of wood available, it’s recommended to use that. - Carve the cavity, applying bevel to the sides
Carve the cavity into a shape that will make fitting the plug easier and bevel the sides of the cavity. The longer the bevel on the sides running across the grain, the stronger the repair will be. An 8-to-1 bevel (8cm long for every 1cm deep) or greater will get you closest to the original strength of the wood. Then check the plug for fit. A perfect fit isn’t entirely essential, as your thickened epoxy will fill fairly large gaps. Now you can prepare the surfaces for bonding. - Wet out
Wet out the bonding surfaces of both the cavity and the plug with a mix of 105 Epoxy Resin and 205 Fast Hardener or 206 Slow Hardener®. - Thicken epoxy using high density filler
Then thicken your epoxy using a high density filler. Add 406 Colloidal Silica, 404 High Density Filler or 403 Microfibres to get your mix to a moderately thickened, mayonnaise consistency. This blend is recommended for any general bonding, filleting or hardware bonding making it ideal for this application. - Apply epoxy / filler mix
Using a mixing stick, apply the epoxy to the cavity’s surfaces. Make sure that you apply enough of the thickened compound to fill any gaps. - Fix and clamp plug
Insert the plug into the cavity. Any excess epoxy should squeeze out of the joint. Clamp the plug into position and remove any excess epoxy before it starts to cure. If you need to hold the plug in place use weights or staples. - Cure
Finally, allow the mix to cure thoroughly before removing any clamps. You should always sand down your filled cavity, but make sure to do this once it has had time to fully cure.
The ability of epoxy to protect wood structures from water has made modern wooden boats almost immune to dry rot and WEST SYSTEM® epoxy is unequalled as a moisture barrier. To find your nearest stockist and start your repairs, click here.
photo credit: https://www.westsystem.com/