How To: How to keep your hardwood structure looking naturally beautiful with epoxy
How do you ensure that your hardwood structure doesn’t lose its natural sheen over the years? According to engineer and experienced boat restorer Mark Raynes, the answer is preparation, preparation, preparation – plus a good dose of WEST SYSTEM® epoxy.
You can’t beat the look of natural wood on a boat. On my MANCHESTER AND SALFORD lifeboat the superstructure of the wheelhouse and the coach roof is two half-inch layers of rich iroko, bonded together with epoxy.
To keep the wood looking beautiful, it’s got to be beautiful to start with.
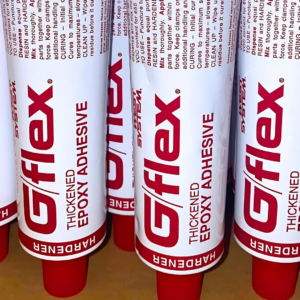
This is actually the first critical point: to keep the wood looking beautiful, it’s got to be beautiful to start with. It would have been simpler for me to use one-inch iroko planks but these have a habit of splitting, so by the end of construction the structure would probably look awful. Instead, I used two half-inch iroko layers bonded together with a mix of WEST SYSTEM 105 Epoxy Resin® and WEST SYSTEM 205 Fast Hardener®; added to the mixed epoxy is WEST SYSTEM 406 Colloidal Silica® – this increases the mixed viscosity to produce an adhesive paste. This is stronger and it won’t split, which is the ideal surface to start off with.
To protect and enhance that natural beauty is actually really easy – but the key is in the preparation. Here’s what I would recommend.
Step 1 – sand it smooth
Give the wood surfaces a rough sand at first and then gradually work your way to 120 grade paper. At this point it’s important to remember that timber changes colour by the day; the longer you leave it without a surface coating, the more the colour will lift. So be careful that all of your timbers are at the same stage (or let them weather to the same stage) before you do any surface coating.
Step 2 – coat with epoxy
Once you’ve sanded it smooth apply one coat of epoxy – the warmer the day the better, especially for the first coat. We like the temperature to be above 20°C as it thins the epoxy, allowing it to soak into the wood. This strengthens the timbers and gives them much better water resistance.
Once this is dry, just lightly sand and degrease (if necessary) and then repeat the process. We tend to apply three coats in all.
Step 3 – apply UV protection
To give the epoxy the UV protection it needs, so as not to degrade, you need a varnish. We use Epifanes two-pack polyurethane varnish which was recommended to us by West System International. It comes in satin, matt or gloss and all of them look amazing. We tend to apply four or five coats but you don’t need that many.
You’ll have a stunning finish which you won’t need to re-do for years.
That’s about all there is to it. It’s really easy and you don’t need any special tools. Prepare well and use WEST SYSTEM epoxy coupled with two-pack PU varnish and you’ll have a stunning finish which you won’t need to re-do for years… if ever!
Mark’s top tips
- Deal with any imperfections in the wood first. This will help to ensure the most attractive finish. Where necessary, we use a standard wood-coloured filler and give it a light sand before applying the first coat of epoxy.
- Apply the epoxy with brushes or rollers. I buy big packs of disposable brushes as it’s more economical but the hairs have a habit of falling out, so keep an eye out for this as you apply the epoxy. If you’re doing a large area, roller the epoxy on but have someone following behind with a brush touching up – you’ll get a much more even layer this way.
- If the weather’s not warm it doesn’t matter. On cooler days I put a fan heater near the resin container which tends to thin it out a bit, as well as helping it to cure. I also get a heater inside the room that I’m epoxying the outside of, to get the chemical reaction going nicely.
Want more of Mark’s top tips? Click here to learn Mark’s method for restoring a teak deck with graphited seams.
To see more of the MANCHESTER AND SALFORD, visit Mark’s website.


