Projects: The Art of Constructing a Wooden Steering Wheel with WEST SYSTEM® Epoxy

Experiencing discomfort from extended trips out at sea, a customer decided to revolutionise his boating experience. He would no longer confine himself to the wooden seats at the stern. It was time to take the helm at the front! In this article, we’ll walk you through the transformation from traditional tiller controls to a remote system and how a customer created a beautiful, custom-made steering wheel from scratch, using the power of WEST SYSTEM Epoxy.
Our boat enthusiast had grown weary of the constant strain of manual tiller control. The decision to switch to a remote system was a game-changer, offering not only increased comfort but also enhanced control and manoeuvrability.
Step 1: Moulding the Spokes
First things first, the spokes. They needed a profile, not just flat. So, laminated teak was the choice. An old scrap ply was used to make the form for lamination. Seven layers of teak were glued together. The glue? WEST SYSTEM Epoxy mixed with wood fibre. Strong stuff.
The stock part for the spokes was made wide, about six inches. This gave room for shaping the spokes later. Two downward-facing spokes were decided upon. A slight taper was added. A vintage look was the goal.
After moulding, the drawing of the spoke and hub brings the design to life. The marking of the centre happens first. Then, measurements extend eight inches on either side. This measurement aims to create a 14-inch wheel, with an additional inch of scrap on either side for trimming. A jigsaw then springs into action, cutting out the shape. In the middle, a quarter-inch hole is drilled, providing a reliable centre to work from.
Step 2: Making the Stock for the Rim
Next up, the rim. Bits of oak were cut on the chop saw. The shape had 12 segments. The size of the segments? Trial and error. The goal was a 14-inch diameter. The pieces were about two inches wide at this point. Plenty of room to play with.
Firstly, a band clamp secures the entire assembly, ensuring a snug fit. Then, the rim undergoes clamping to take its shape, but glue doesn’t enter the picture yet. Following this, it positions itself face down on the bench, ready to welcome the spokes on top. Once everything aligns, the drawing around the spokes takes place. Lastly, the cutting of channels happens, paving the way for the spokes to settle into the rim.
The chop saw leaps into action once more, this time setting a depth stop. Swiftly, it cuts out the majority of the wood, leaving only a few pieces, which a chisel neatly finishes off. With precision, the cuts turn out fine. Next, the pressing of the spokes onto the segments in the vice takes place, a process that emphasises strength. As soon as all the joints achieve a tight and flush fit, it’s a signal that it’s time for gluing. Lastly, clamping up the entire assembly marks the end of this stage, as it awaits the next.

Step 3: Assembling the Rim
The next step was to assemble the rim. Twelve segments of oak come together to form the rim, each cut on a chop saw. Through trial and error, the size of the segments is determined, aiming to achieve a 14-inch diameter. The pieces were about two inches wide at this point, giving plenty of room for adjustments.
Next, the rim is clamped into shape, though not yet glued. It finds its place face down on the bench, with the spokes carefully arranged on top. As everything aligns, the outline of the spokes is meticulously drawn on the rim. This paves the way for the final step in this phase: cutting channels into the rim, creating a perfect seat for the spokes.
Step 4: Fitting the Spokes to the Rim
Channels now cut into the rim, the stage is set for fitting the spokes. Pressing the spokes onto the segments in the vice happens next. Precision cuts ensure a snug fit, all done with an emphasis on strength. Achieving a tight and flush fit across all joints signals the time for gluing. Finally, glue secures the entire assembly, followed by a firm clamping up, marking the completion of this phase
Step 5: Final Touches
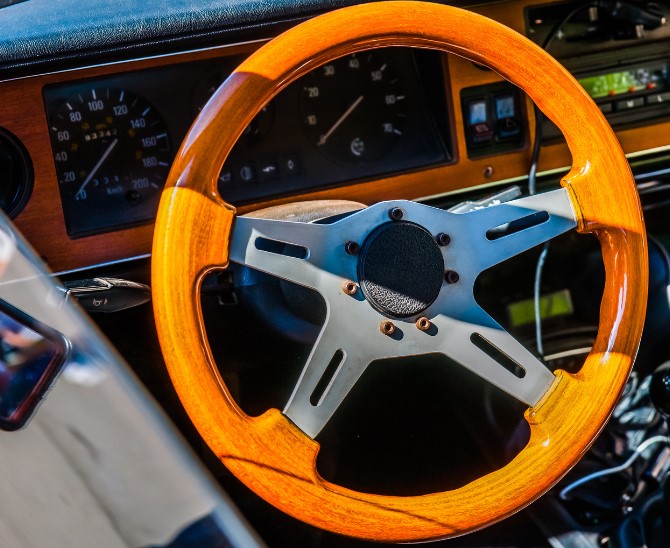
The final step was to add the finishing touches. Sanding down the wheel achieves a smooth finish. Following this, an application of WEST SYSTEM Epoxy takes place. This not only added strength but also enhanced the natural beauty of the wood. The epoxy dried to a glossy finish, giving the wheel a polished look.

The end result was a bespoke, elegant wooden steering wheel, perfectly suited to its new position at the helm. The switch to a remote system, coupled with the addition of the new wheel, transformed the boating experience proving that, sometimes, change really is a good thing.

You can find your nearest WEST SYSTEM Stockist here.
Have you subscribed to our FREE monthly newsletter? Sign up here!
Working on a project? Share it with us! Click here…
To find out more about the customer’s story you can view his blog here.
