Projects: Building The Longbow Hydroplane – Part 1
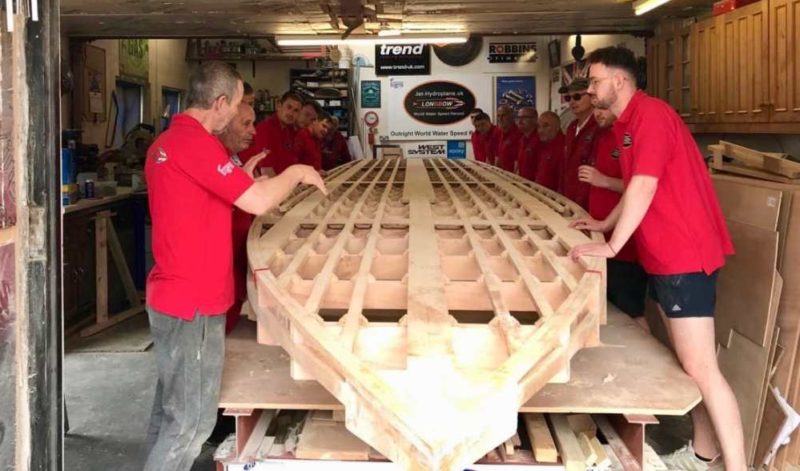
A British team is taking on the challenge of a lifetime. Breaking the current water speed record in the purpose-built jet hydroplane, Longbow, with a wood structure bonded and coated with Epoxy.
Forty-four years ago this November the current holder, Spirit of Australia, set the record at 288mph, then a year later set the current record of 317mph in October 1978.
Back in 2019, we caught up with the team behind the world record attempt, when they spoke to us about why they chose to build the hydroplane out of wood instead of more advanced composite materials. “We could of course use materials like carbon fibre composite or, as in the case of Bluebird K7, all-metal,” explains Project Coordinator David Aldred. “However, supporting the case for wood is that the two previous holders of the record have both been made this way, including the penultimate holder, Hustler, which achieved 285mph”. David also goes on to explain that “The hull and riding surfaces are all formed as one continuous piece. This means it is very difficult (and expensive) to make significant changes to a moulded carbon hull if proving trials made this necessary. By comparison, a timber hull is very easy to modify and be made equally strong again afterward.” You can read that article here.
Longbow has come a long way since work commenced back in 2018 and over the next couple of months, we’ll be sharing with you the work the boat has gone through, and how epoxy has played such a monumental part in the build of this jet hydroplane.
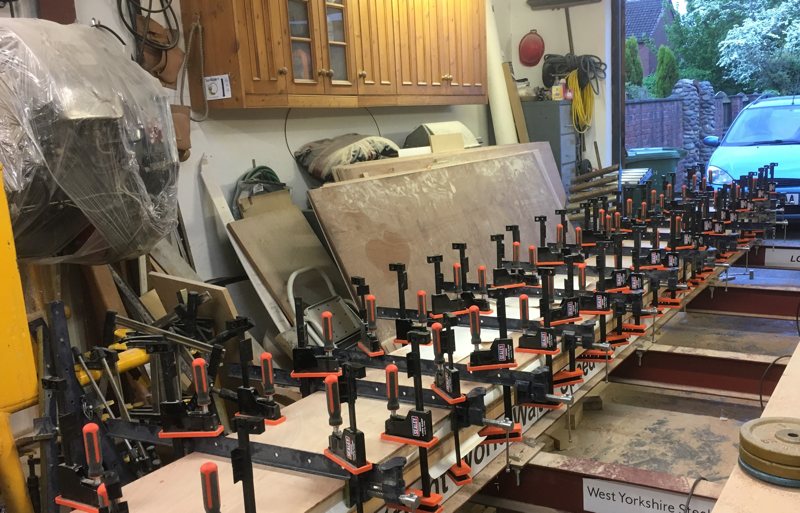
Let’s start way back in August 2018, and the task at hand was to construct the main bearers for the craft. The team created scarf joints using router pits and assembled them using WEST SYSTEM® Epoxy. They used a large number of clamps to keep the assembles of the main bearers together while the epoxy cured.
Avoiding Dry Rot Damage
Dry rot damage can destroy a boat. In the case of the Longbow team, they wanted to stop the wood in the hull from suffering dry rot damage before it even launched. Controlling the moisture content of the wood to below 20% was vital and they needed to encapsulate the timer in epoxy to keep the moisture and decay spores out.
When deciding what wood would be the best fit for the purpose, the team needed to consider three things:
- The wood’s natural resistance to decay
- The rate at which the wood would expand and contract
- They needed a wood that was easy to cut out and shape, as well as not being too heavy
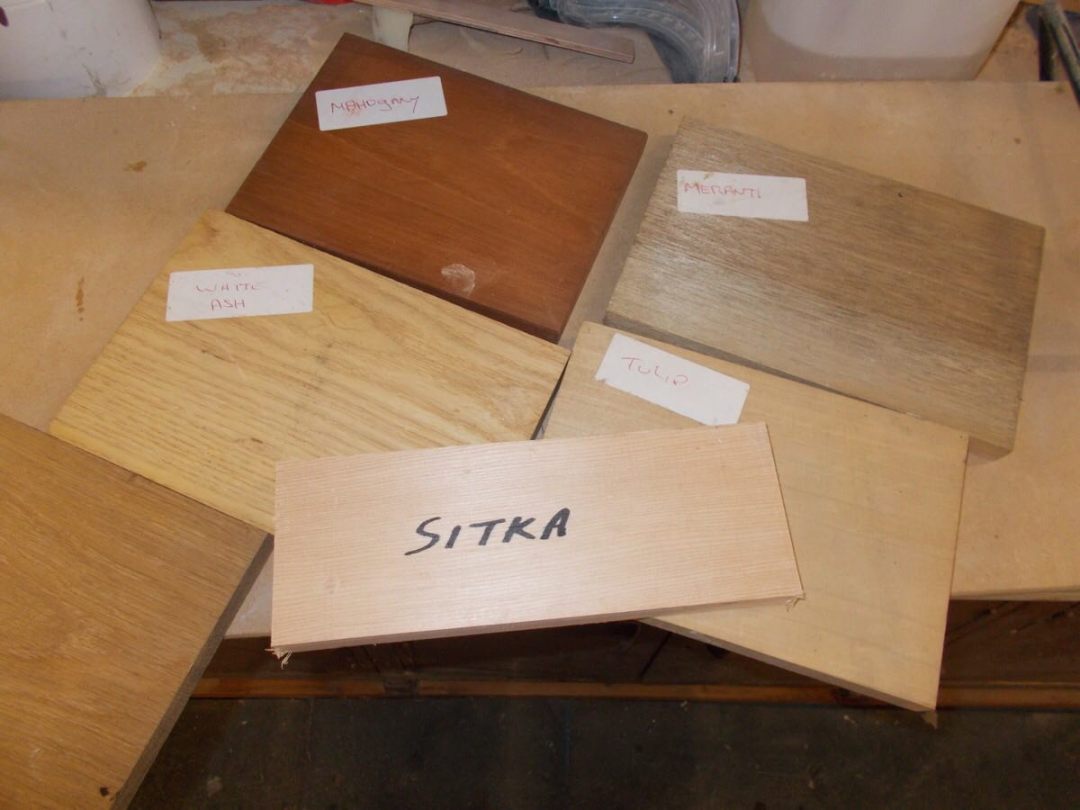
They immediately decided against using Oak. An often common and popular choice due to its natural strength and durability but were swayed by the fact that oak contains tannic acid which will continue to leach over time, playing havoc with any bonded joint.
After consideration, the team decided on Sitka Spruce. “Sikta grows tall and straight which makes the grain structure straight, it has a high strength-to-weight ratio, relatively free of knots and it has an excellent take up of epoxy resins right into the grain structure,” explains David Aldred.
The team coated the Sikta Spruce in WEST SYSTEM 105 Epoxy Resin and 205 Hardener. “Allowing these two products to come together at a set ratio commences the exothermic reaction, which after appropriate surface preparation, we use in pure form to ‘wet out’ both surfaces being bonded prior to making the joints in order to prevent a resin starved joint occurring.”
Building The Hull
For ease of use, the hull was initially built upside down.
The next task was to form the vertical timber frames that will separate the outer bearers from the sides of the hull. The outer bearers are curved and each frame station is a different height and width. This meant that the timber frames (which each consist of multiple pieces of timber) became a massive jigsaw to cut and shape. The team had to number each part to stop themselves from getting lost with so many sections of wood. These were then all primed with WEST SYSTEM Epoxy and left to become tacky.
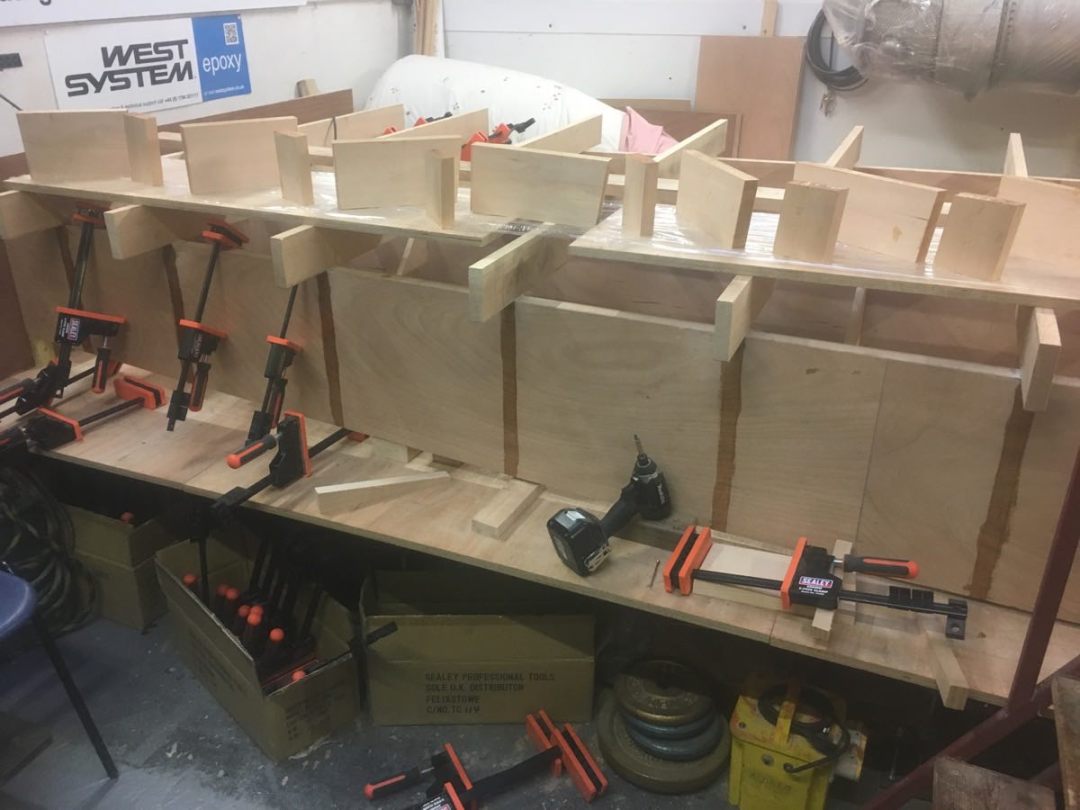
After the first coat was complete, the second coat of epoxy with filler was applied. All of the parts were then assembled using clamps and temporary holding battens wrapped in clingfilm
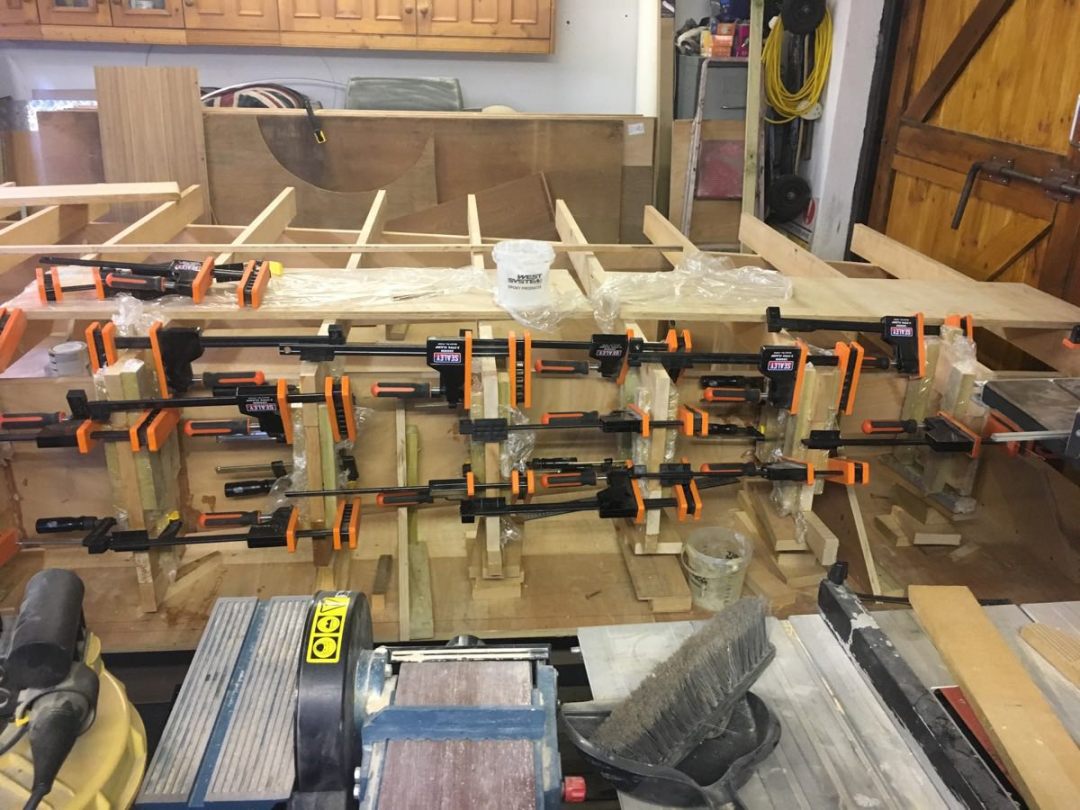
To provide additional strength and bonding, the next task was to laminate the individual frames using WEST SYSTEM Epoxy.
At the beginning of 2019, the team set off on the task of attaching the timbers that run from the bow to transom. “Here, the timber is subject to bending, and to avoid that, we used a scarf joint,” explains David.
“With a scarf joint where the wedges are in the range of the low angle/gradient mentioned previously, what you have is a glue line bond that runs along the grain over a considerable distance and hence avoiding the weakness of the half-lap joint end grain,” David continues. “The bonded scarf joint, therefore, tends to act not much different from a continuous wooden beam without any joint at all.”
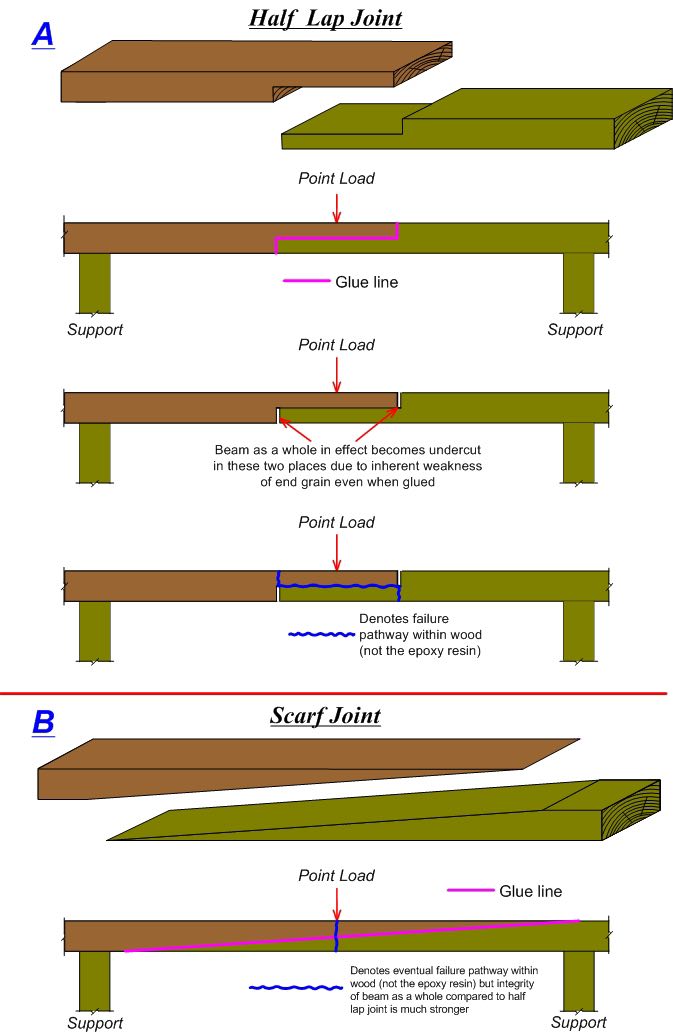
“It should be noted that the failure of the joint will usually be in the wood itself rather than the epoxy resin used to form the bond, as the latter is typically stronger than the wood it is being used upon.”
“The scarf joints to the main stringers were done at a higher rate than the ones we did later to the plywood skins. The variation, depending upon the application, ranged from 1:8 all the way up to 14:1. We also did finger joints on the scarfs in some applications in order to increase the contact area of the epoxy.”
The team created the joints with a jig and router to get the shape and angle they needed for the scarf joint.
They then had to fabricate the transom boards, which were later laid up using WEST SYSTEM Epoxy.
On the timber frames, the team formed fillet joints and WEST SYSTEM peel ply tape to provide a smoother finish prior to sanding.
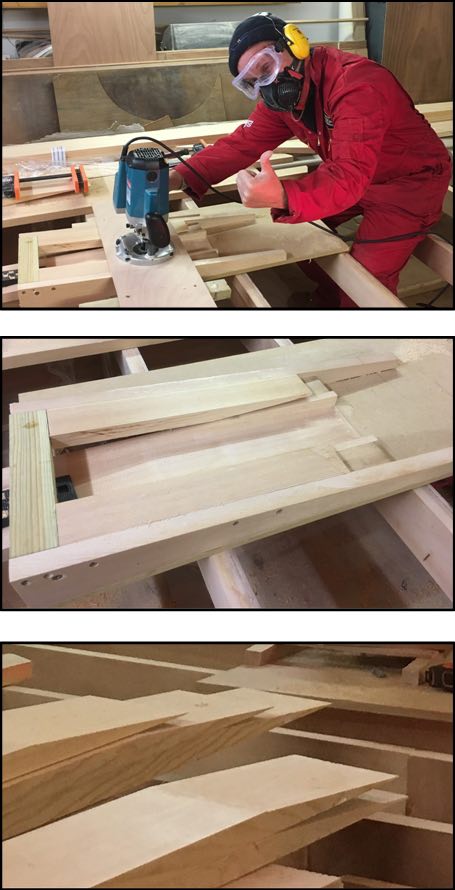
As the Spring came around, the team set out to form the bow of the boat using the Sikta Spruce and the wood was teased into the required profile.
They also fitted the battens to the underside of the hull using a combination of marine-grade screws and WEST SYSTEM Epoxy. The battens run parallel with the central keel from the transom all the way to the front.
The next task was to glue blocks to the underside of the hull. These would provide the necessary support and bond area where one section of the underside with eventually meet the other. The blocks were fitted into place using stainless steel screws and WEST SYSTEM Epoxy.
“We also used WEST SYSTEM Epoxy to attach the rebates into the side frames along the length of the hull.”
The team then had the monumental task of turning the hull over the right way so they could start work on the outer rails of the hull.
That’s it for Part 1 of this Longbow Hydroplane build. Keep your eyes peeled for Part 2 where the team starts work on forming the structure of the hull and building the air trap. In the meantime, you can find out more about the team and their work over on their website here: https://www.jet-hydroplane.uk
