Trade Secrets: TRADE SECRET: Wooden boat repair – rebuilding a plywood joint
Nobody wants a leaky boat. So when plywood joints start to deteriorate it’s time to start a wooden boat repair that will make sure your boat stays high and dry.
Modern boat builders are frequently looking to produce designs that are lightweight, fast and strong. It’s why many of them turn to plywood. But it’s also why these lightweight joints can be a source of problems.
These areas of weakness are put under a great deal of stress which causes them to deteriorate over time. Without proper care water often begins to seep on-board, causing damage to equipment, reducing buoyancy and even resulting in large-scale damage that can require extreme repairs such as hull replacements.
By following the steps below, you can avoid damage to your boat inside and out.
1. Clean out the joint
Clean out the joint by running a circular saw along the seam. The saw’s cut should be set to reach the full thickness of the plywood with the width of the blade set to shave the edges of both sheets of plywood at the joint and expose fresh wood on each edge. Make sure you remove any fasteners that could get in the way.
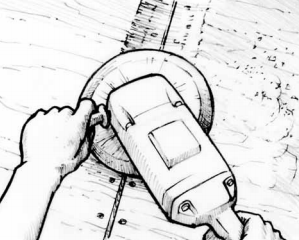
Drive the fasteners further into the joint and then sand a valley, roughly 100mm wide, using a disc sander. Make the depression about 0.75mm deep for each layer of 175g/m2 fibreglass tape that will be used to fill the joint.

Finally, use a sander or a chisel to remove any additional damaged or rotted plywood around the joint. At each edge, use the sander with a roundover bit to round the corners. A 6-9mm radius should allow the glass tape to lie flat on the surface.
2. Seal the edges
To seal the edges, first wet out the seam and sanded area with resin/hardener mix. Then recoat the seam with epoxy, allowing it to be absorbed into the end grain of the plywood. You may also want to inject epoxy between any delaminated veneers that are still sound.
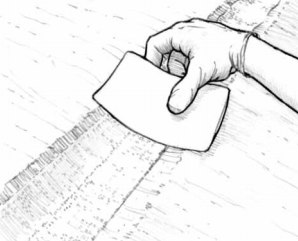
Apply the epoxy mix, thickened with WEST SYSTEM® 406 Colloidal Silica and mixed to a mayonnaise consistency, into the pre-wetted seam. Using a plastic squeegee, force the thickened epoxy into the wet-out seam and smooth the excess mix along the joint. Try to make sure the thickened epoxy is pushed into any voids and between delaminated veneers previously wetted out with resin/hardener mix.
3. Apply fibreglass tape
Apply a layer of fibreglass tape in the depression, along the joint. Using a squeegee, work epoxy into the fabric and remove the excess. Apply additional layers, if required, using the same method. Place the new layers 12mm to either side of the previous layer so the edges don’t fall directly on top of each other.

Apply epoxy thickened with 407 Low-Density Filler, mixed to a peanut butter consistency, to the joint. Use a squeegee to trowel on and shape the thickened epoxy slightly higher than the plywood surface. Allow to cure thoroughly and sand fair.
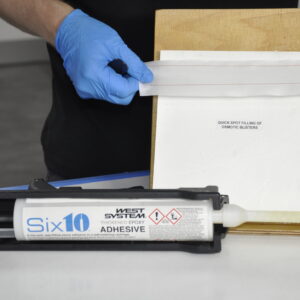
To find out more about the products used in this repair, visit the WSI product page.
Image credit: https://ow.ly/NLlZP


