How To: The secrets to renewing teak deck
PART 1: STRIPPING AND PREPARATION
If your teak deck is looking a bit thin and tired, or is lifting away from its substrate, or maybe if you just want a new design, now might be the time to start planning its replacement. A key ally in the process will be WEST SYSTEM® and PRO-SET® products.
Natural teak decking takes many forms, from thick planks to very thin veneers. Although expensive and in increasingly short supply, teak is still favoured by boat builders for its feel underfoot, its resistance to weathering and ease of working. This close-grained, oily timber can, however, present a few challenges when being used with coatings and adhesives so good preparation is key.
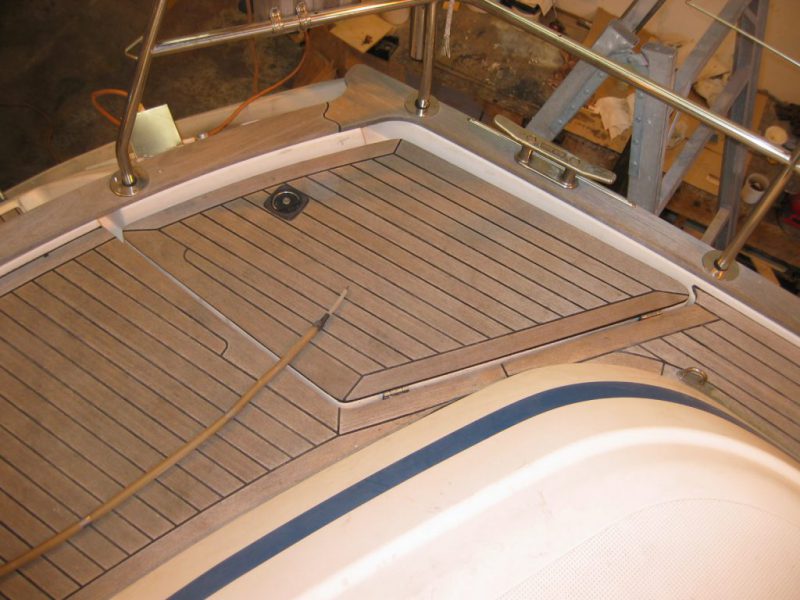
Before: Modern yachts often only have a thin veneer of teak over plywood, which can wear quite quickly.
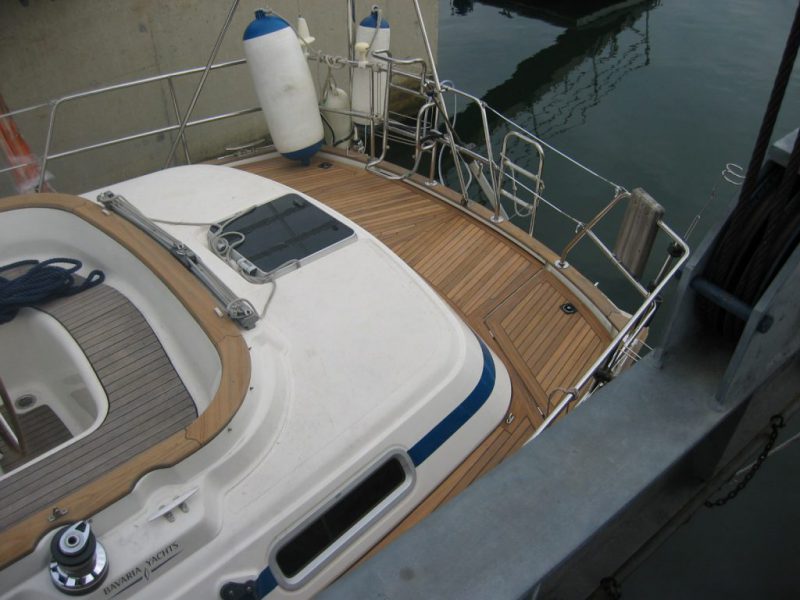
After: A new deck fitted by Goodacre Marine Services has revitalised the yacht.
The secret to a flat and long-lived deck is to use WEST SYSTEM epoxy as a bonding layer, with many top-level production builders opting for the PRO-SET epoxy range. These more advanced epoxies use gentle heating to ‘post-cure’ and are sometimes combined with a vacuum bag technique to ensure a perfect bond.
However, more traditional builders get equally impressive results from standard WEST SYSTEM 105 Resin used with either 205 Fast or 206 Slow Hardener depending on the ambient temperature.
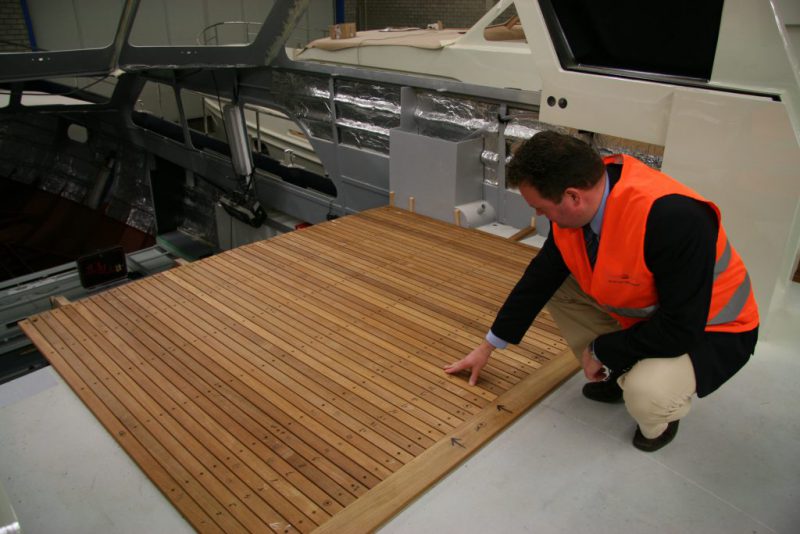
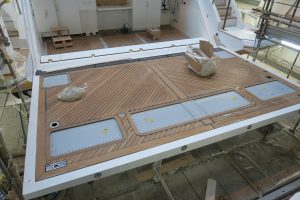
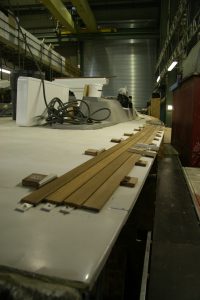
WEST SYSTEM epoxy allows teak to be bonded to virtually any properly prepared substrate, such as this steel deck in a new build yard in Holland.
Many boaters enjoying the summer season may be looking at their decks and thinking ‘time to replace or upgrade’ so here is our series to allow them to plan what can be a very satisfying – but quite a labour intensive – job.
DIY enthusiasts will be able to copy many of the techniques used by professionals for equally effective results.
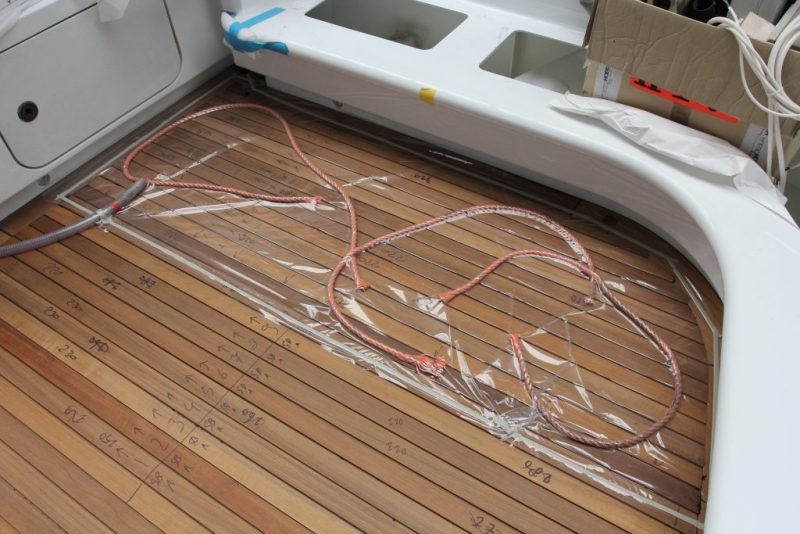
Vacuum techniques help to get a very even bond to the deck. Here a superyacht yard is using a vacuum bag on a freshly bonded deck. Note how the rope is spreading the load across the planks for a more effective downward force.
OTHER OPTIONS
It is very rare that part of a deck can be repaired to blend in seamlessly with the rest, so re-decking projects tend to be full-on projects involving the covering over of the yacht and the systematic removal of the old deck and many of the fittings. Good planning can make this job a lot easier.
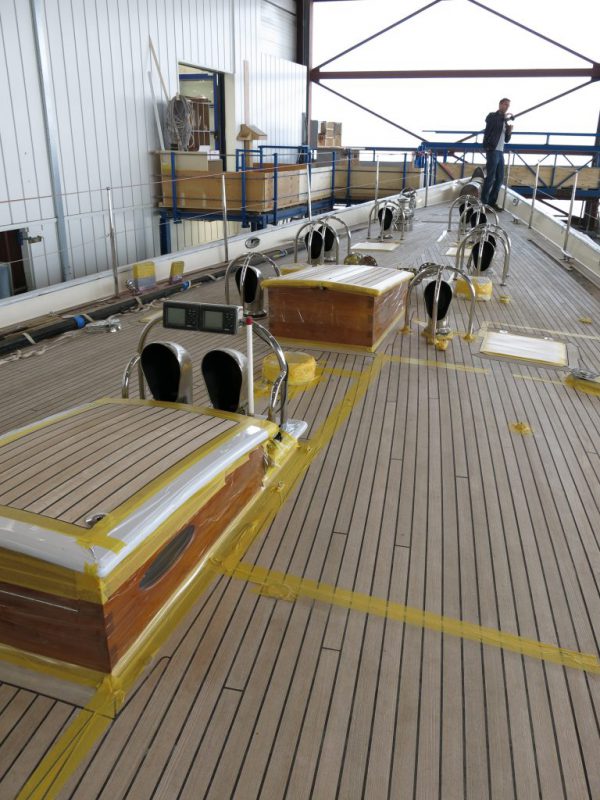
Some projects will take a lot of planning – and a lot of timber. This J-Class yacht is about to have this entire deck replaced with new wood.
There are several good alternatives to the traditional teak planks. Here are some options:
Mock or ‘faux’ teak.
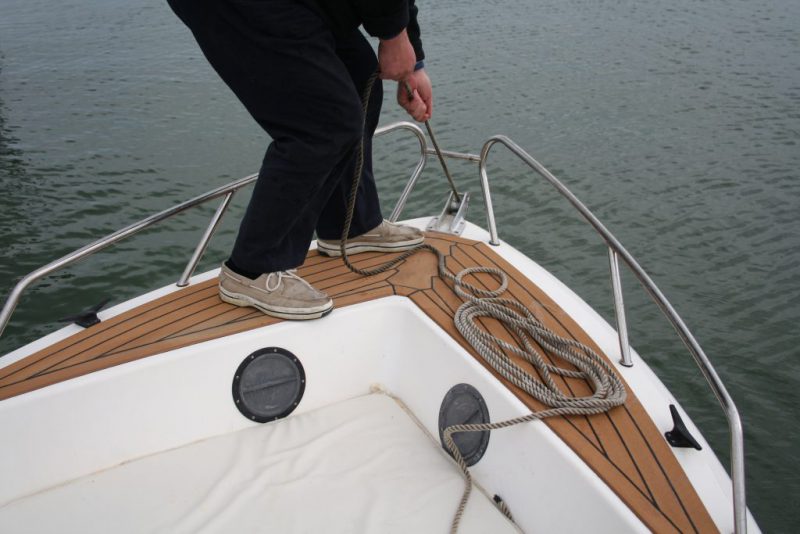
Faux teak looks just like the real thing, doesn’t need scrubbing and gives good grip underfoot.
Modern chemistry has advanced greatly, allowing UV resistant rubbers and vinyls to be coloured and contoured to represent real teak in its fresh ‘just scrubbed’ state. These artificial teaks have plenty of selling points, such as excellent flexibility, ease of cutting and assembly (you can trim them like vinyl floor tiles) and almost zero maintenance. Unlike real teak, the faux teak won’t discolour to grey in the sunshine. My boat has had faux teak exposed to sunlight now for 16 years and all that has happened is some of the caulking has opened slightly (no big deal as there is nothing to rot underneath) and the colour has darkened by a couple of shades. That can be revived with coarse sandpaper.
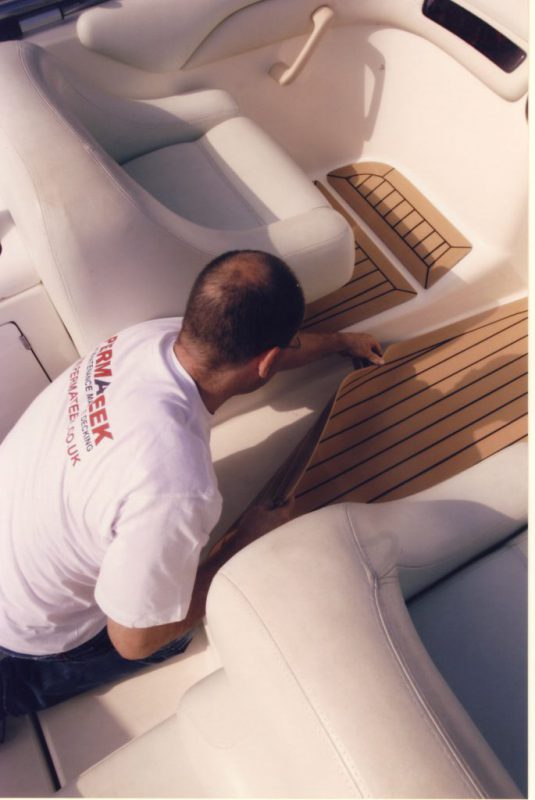
Expert suppliers can cut sheets of faux teak to your patterns and then lay them down almost like carpet.
With the cost of teak spiraling upwards, many faux teak OEMs are investing heavily to create new products. The new second generation (2G) Dek-King from Wilks Rubber and Fendering, for example, claims to be 32% lighter and 30% cooler than the original and is selling well. There is also increasing interest from sunbaked countries in Wilks Cool-Dek range, a PVA product claimed to be 60% cooler than conventional decks thanks to the inclusion of tiny ceramic beads.
Deck paints
You may want to remove teak altogether and have a painted deck instead. This will require a lot less ongoing maintenance and you can colour match to any recent changes in hull paint or sail wardrobe.
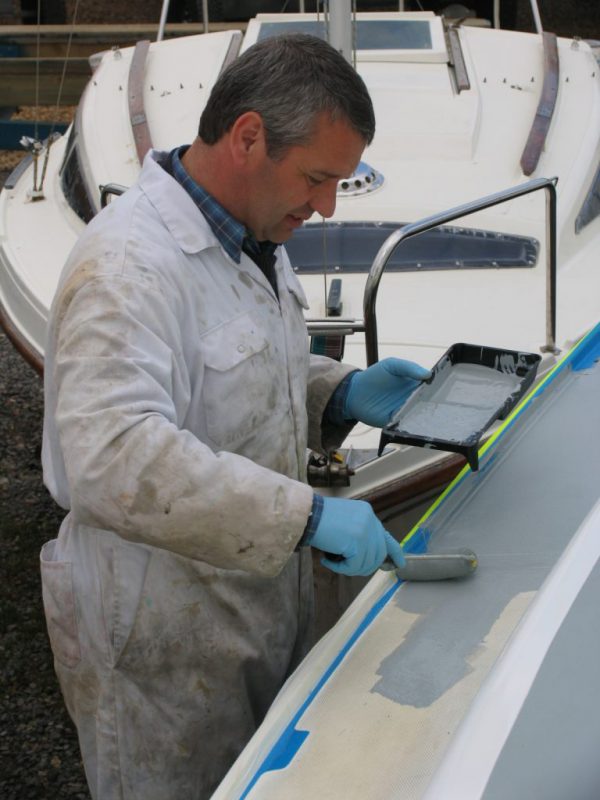
Deck paint is easy to apply with a roller or brush but can wear significantly during a busy season. It is easy enough to renew.
There are several paints available, from sand-impregnated matt polyurethane from International Paints (Akzo Nobel) to rubber preparations more commonly found on commercial vessels and playgrounds. Also popular is a product called Kiwi-Grip, which is an acrylic polymer that is laid on thick and then textured with a roller whilst still wet. This paint can also be coloured to a shade of choice at your local DIY store.
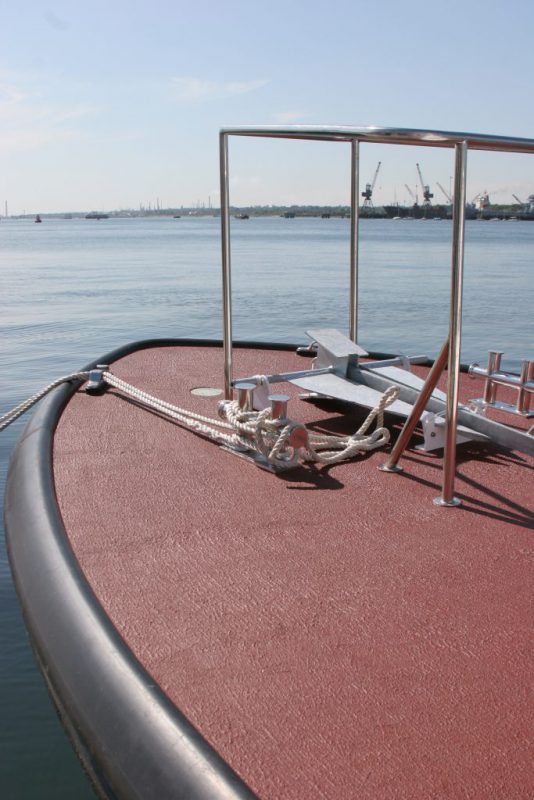
Rubber paints such as this commercial type are rarely seen on yachts but are highly effective.
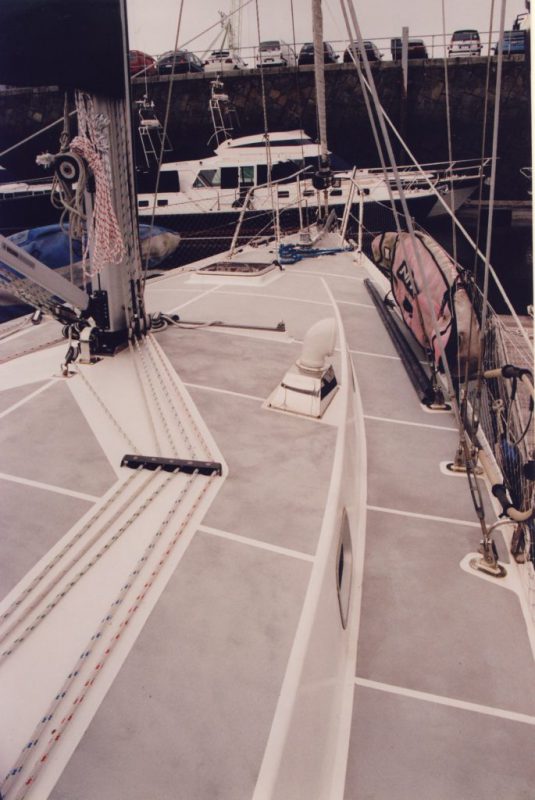
The owner of this blue water yacht made his own non-slip by painting the decks with pigmented epoxy resin and sprinkling grit into the epoxy whilst it was still wet. The masking was removed before the epoxy had cured.
Deck coverings
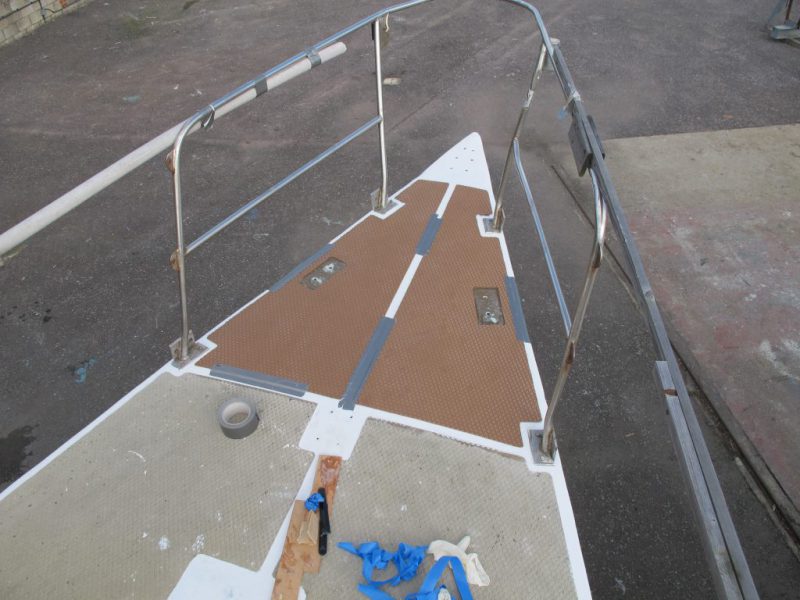
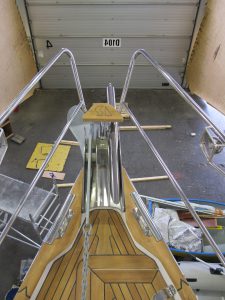
Treadmaster is a very effective deck covering. Two new sheets have been added to the bow of this yacht, whilst the older sheets behind it will be revived with a special colour-matched paint.
A deck prepared to receive a new teak deck can also accept almost anything else and perhaps the longest served is a product called Treadmaster. Made from recycled cork and rubber (the former becoming harder to obtain as the wine industry switches to other types of stopper) the mats provide a hard-wearing surface, with very reliable grip from the diamond pattern. Used widely in the naval and commercial sectors, Treadmaster is available in several basic colours and is attached to the deck via epoxy or a powerful impact adhesive. If your boat has some fitted already, it can be painted with a special paint (Treadcote) to revive it but it is usually tricky to remove the mats themselves once down.

TBS sheets are popular in high-performance yachts and are available in a variety of colours.
There are other rubber mats available, such as those made from French-based TBS, with a greater colour range and less of a pattern but still very effective.
Pre-Made boards
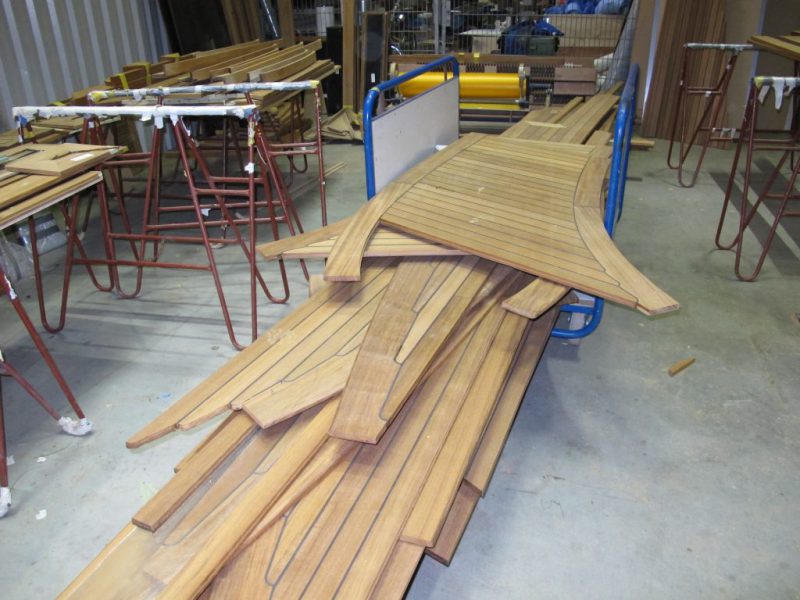
Made to order, these teak boards look very professional and are easy to bond straight down onto the deck.
If you still like teak underfoot but are a little phased by the price, then several companies will be able to make you pre-cut panels, where thin laminates of teak are firmly bonded to marine plywood backing panels. (This process can also be used with faux teak.) The panels are created to a stencil provided by the customer and are then easily bonded down to a prepared deck with WEST SYSTEM epoxy. The big advantage is that skilled craftsmen will assemble your panels with neat angles and consistent grain and can customise to order. Once completed, these professionally-made panels are easy for the DIY enthusiast to fit.
STRIPPING THE DECK
If you have decided on real teak planks, then the route to stripping and preparing the substrate is much the same as for the other alternatives, although cutting the planks to interlock is quite a skill and will usually require some professional tools.
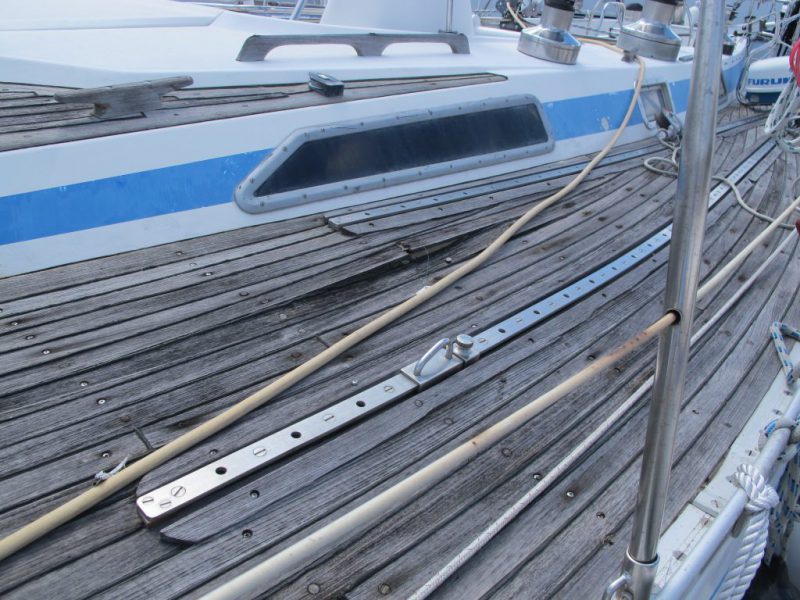
Older boats may have deck planks that were attached using stainless steel screws over a bedding compound. Each screw head is sealed with a teak plug but over time the plugs can move, allowing water underneath. Water ingress and bonding failure can cause some planks to lift and the rest to wear badly.
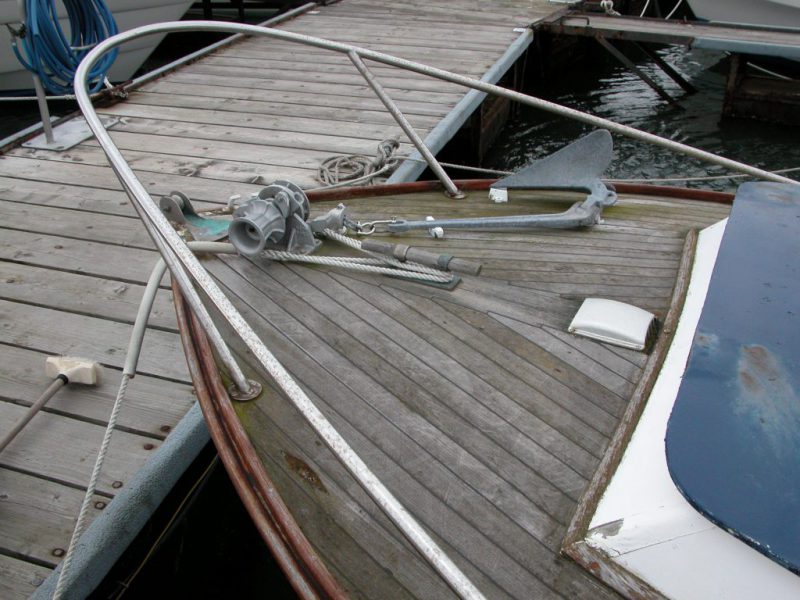
Sometimes a deck is still perfectly functional but just looks old and tired. Veneers can literally be worn through on step areas on busy charter boats, whilst seams and sealant may lift and part. Teak fibres are also destroyed by jet-washing, leaving a very rough surface.
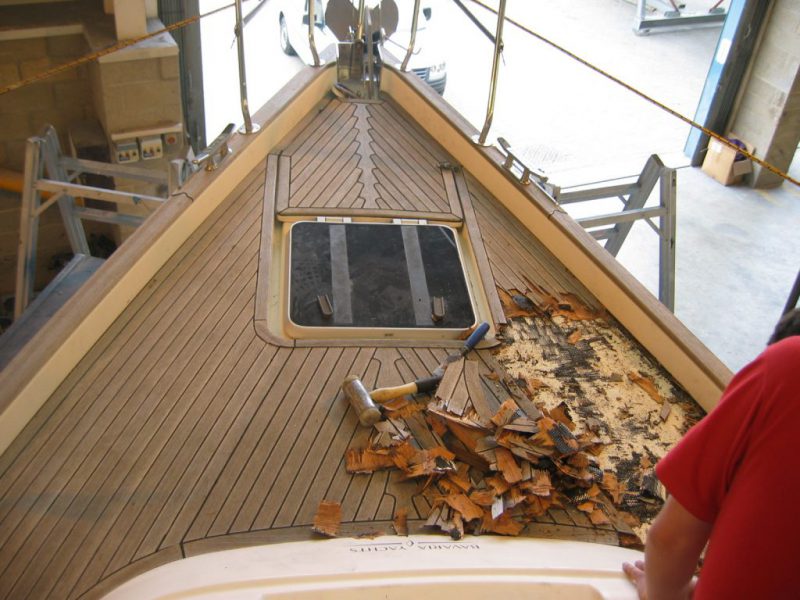
Once a new teak deck has been decided on, the old one is removed to expose the substrate underneath. There is no gentle way to do this and the wood can rarely be salvaged. Tools as clumsy as a crowbar can also prove very effective.

Before – or during – the strip down process, some of the deck fittings will need also to be removed and stored. This is a good opportunity to relocate items that were not ideally placed or add some new fittings to increase deck-working efficiency. Most key items, like mid-deck chain plates, are usually left in place and enclosed later with the new deck.
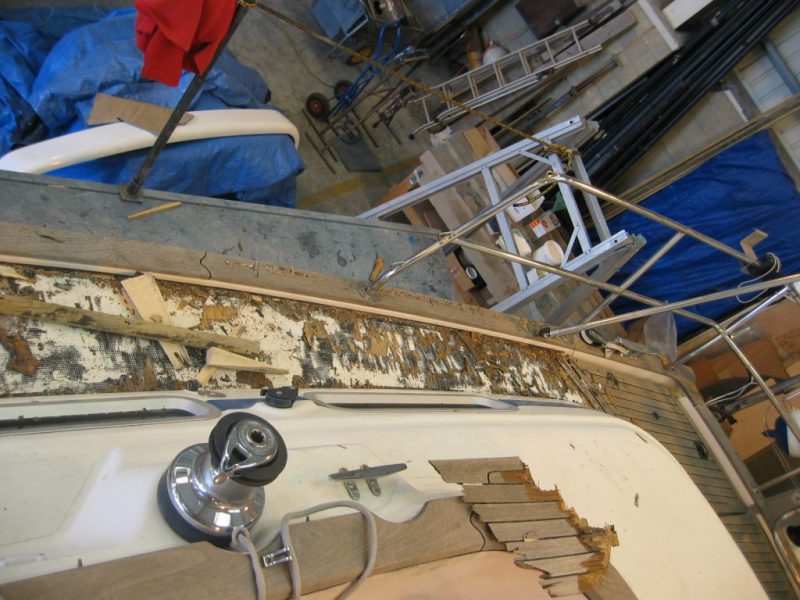
Before
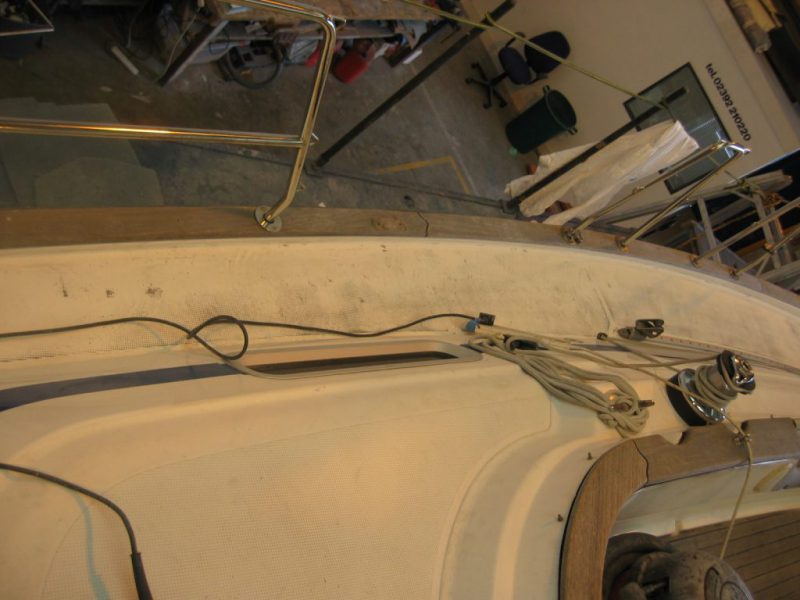
After
The initial removal will reveal bits of wood still stuck to parts of the sealant. These will need further surgery using a chisel. Once the wood has all been removed, the sealant or old epoxy can be cleaned up using a combination of solvents and abrasion. If the deck becomes damaged during the removal process, it can be re-levelled using a thickened epoxy.
The substrate (the basic deck material) which could be steel, fibreglass or wood, is then prepared by first filling any screw holes. On softer materials (wood, GRP) a countersink is helpful, creating a conical hole for receiving epoxy filler.
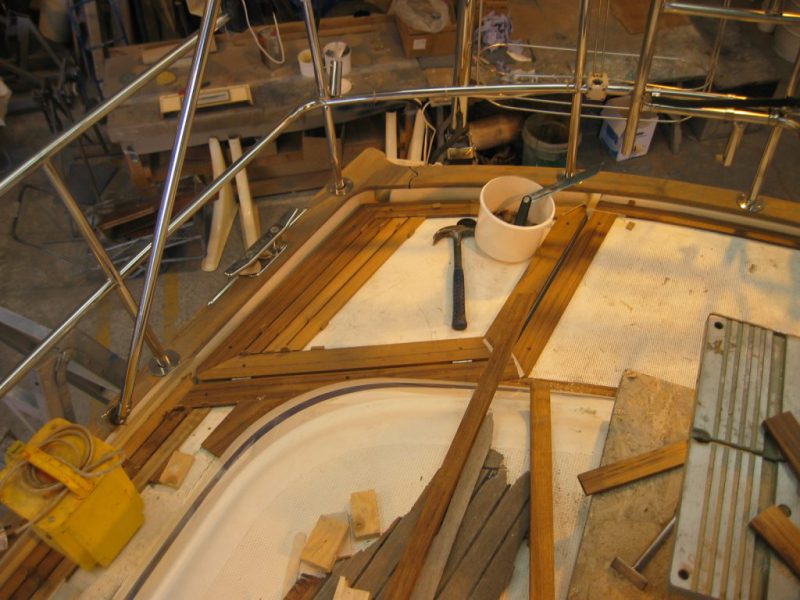
Note: The re-decking process will involve making some small holes in the deck for the screws for the spacers, but these holes will be filled as the deck is laid by the epoxy or adhesive sealant used to hold the planks down.
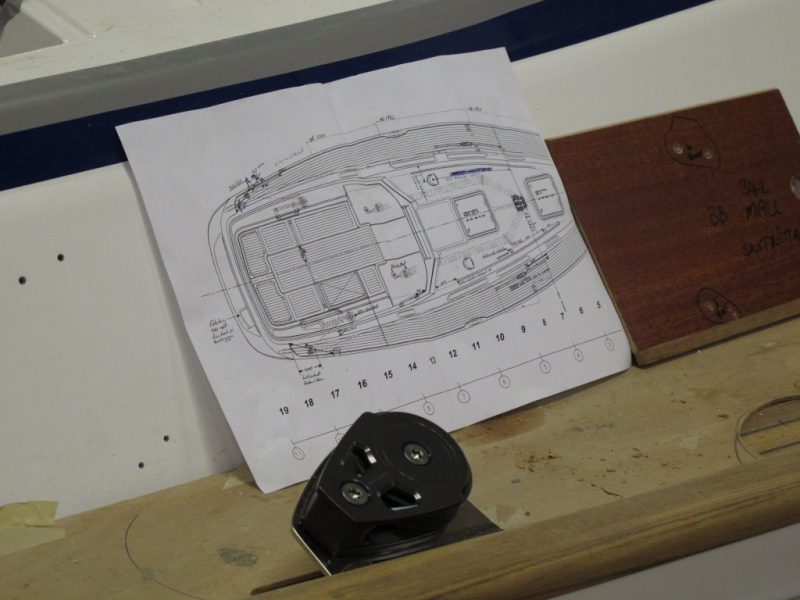
With the deck cleared and prepared, now is the time to sketch out the plan for the new – and possibly improved – replacement. This plan is for a new Halberg Rassy.
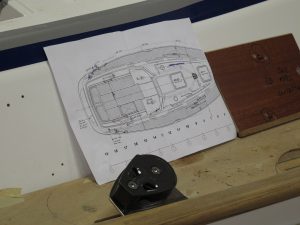
With the deck cleared and prepared, now is the time to sketch out the plan for the new – and possibly improved – replacement. This plan is for a new Halberg Rassy.
How to design your new teak decks to compliment your boat, and get some stunning results.
With the old teak decks stripped off the decks and any holes left filled with epoxy, now comes the fun bit – designing the new decks.
Most refitters will religiously follow the original pattern, mainly because they already have a template from the old deck and know that everything fits where it should.
However, renewing the planking provides a golden opportunity to get a little more creative with the overall aesthetic effect. Some owners, for example, experiment with some in-deck marquetry; the process of creating patterns or even images in the teak by inserting some carefully cut pieces. Putting the yachts name into the deck is a typical use of marquetry but gives a new owner some extra expense if the yacht needs renaming.
Others defy convention and run the planks in a fishbone sequence, or even across the boat rather than going with its natural lines.
Some of these designs work really well; others may have looked good on paper but not so good for real. The key to success is that the design should enhance the yachts good looks by drawing the eye in to her symmetry.
To give you some inspiration before we get to gluing the new deck down, here are some ideas gleaned from new build and refit yards around the world as they go for that ‘wow’ factor underfoot.
The conventional way of laying a teak deck is for the planks to follow the line of the deck, as seen on this Oyster (left) and Hallberg-Rassy. Each plank is being aligned with the curve of the gunwale.
But be prepared to break convention
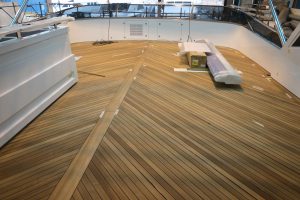
On this Italian-built Azimut the designers have gone for a fishbone effect. Here it is on the main sundeck…
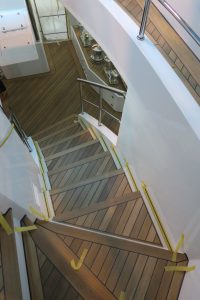
It works really well on the steps, as the planks appear to line up perfectly as you descend between decks.
Make your mark
Some builders will put the brand of the yacht into the teak with a simple route-and-fill technique, such as seen here with the Swedish yard Hallberg Rassy. (Note the neat V-shaped spike in the capping rail caulking near the bottom of the picture).
Other owners will actually incorporate the boats name into the planking – risky when it comes to resale.
Pre-made panels
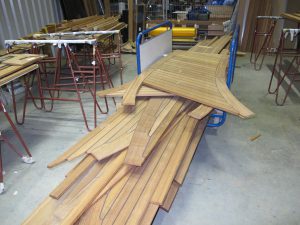
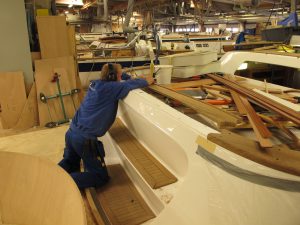
Wherever possible, builders prefer to make the teak decking off the boat by mounting the planks onto plywood or composite boards. They are attached later using epoxy, as we will see in part 3. These examples are being prepared for a Dutch-built superyacht, allowing other works to be done to the deck simultaneously.
Cutting in
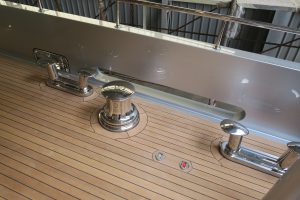
The challenge with any deck design is planking around significant deck fittings. However, these can be cleverly incorporated into the pattern with some artistic design flourishes. On this Italian-built superyacht, for example, the stainless-steel cleats are complimented with a curving design of inserts at the base.
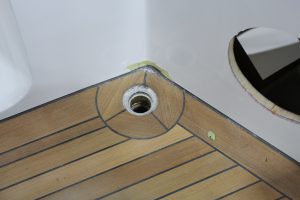
On this drain in the corner of a Sunseeker’s flybridge in build, the inserts surround the fitting so it appears included in the deck, rather than simply drilled into it as an afterthought.

Also on a Sunseeker, these craftsmen are routing out a trim so the teak embraces the workings of a forehatch. These pieces will be used to compliment the stainless-steel hinges.

Here is the insert being put into place. When designing your own deck, you will need to consider what happens around openings like this.
Lockers
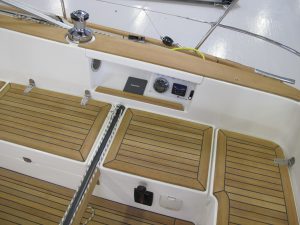
Lockers are perhaps the one area where the most intricate border design takes place, mainly because each lid is an independent unit but has to blend with the deck as a whole. Here is an example from Hallberg-Rassy. Note how the trims surround each lid, but also merge seamlessly into the rest of the deck to create a pleasing pattern. Note also the use of solid timer pieces on the cockpit coaming and the in front of the engine dials.
Functional inserts
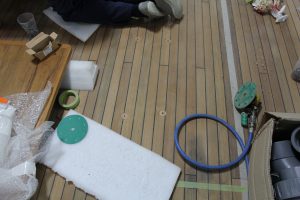
You may need to add pieces into the design to accommodate occasional furniture or removable fittings. These threads have been incorporated into circular pierces, allowing them to be easily found whilst not detracting from the deck design. They do this by appearing intentional. A thread on its own may appear as a blemish otherwise.
Don’t forget the solids
Part of your deck design will also include areas of much thicker wood, as in this toe rail. These solid pieces should match the overall design and so follow a similar pattern. If possible, using the same grade of wood will help if you intend to maintain the golden colour, although untreated wood will weather to a fairly consistent silver grey.
Use thick wood, not veneers
Boats mass-produced for a budget price tend to feature very thin teak veneers, and these quickly wear through of high use charter boats. As you will be investing a lot of time and effort in your new deck, don’t scrimp on the raw material, increasingly costly though it is. Always use quite thick wood where possible. Have a look at these examples being deployed on larger craft. You can see that the average thickness is around 10-12mm, or half an inch or more. In contrast, some production boats only have veneers of 3mm-4mm.
Mix and match with faux
This garage (tender bay) on an Italian superyacht features artificial teak made from PVC. If kept clean, it will mirror the teak on deck but will better resist the heavy use it will see in the garage. Modern fake teak is now exceptionally good and many owners are now switching to it as a harder-wearing and maintenance-free alternative to wood.
Some thoughts on tooling (..and how one WEST SYSTEM® distributor has created his own solution.)
As part of preparing to renew your teak deck, it’s worth having a look at the materials and tools that will help get those planks perfectly aligned.
The real beauty of a freshly laid deck is getting the seams at exactly the right distance so the uniform planks are also equally well spaced.
The problem is, the planks are springy, so bending them into shape horizontally (and perhaps with a pronounced camber) whilst also keeping them flat to the deck can be a challenge. They want to twist up and outwards. The answer is to hold them down with removable fasteners whilst the underlying adhesive sets.
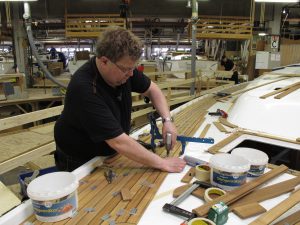
Here workers at Halberg Rassy are using a whole series of screws that are exactly 5mm wide, with metal plates. Each will pin the plank down by screwing it onto the deck. The smooth shank of the screw is in contact with the wood.
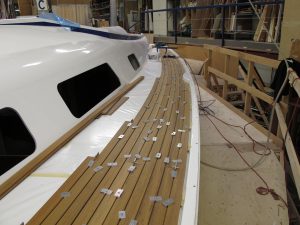
The deck is made first to a specific plan – note the rebated planks and also the blue lines that denote where the planks should be cut to make a neat and uniform pattern.
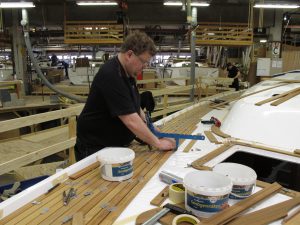
Clamps are used to pull the planks tightly together against the spacers so the seams are exactly the same width along the full length of each plank.

Once the adhesive has cured, the screws are removed and the application of a sealant like Sikaflex not only seals up the remaining screw holes, but also gives the deck a certain amount of flexibility.

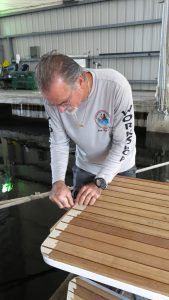
David Jaffeux from Directeck, is a specialist distributor with WEST SYSTEM products and a major supplier of teak products. (In case you’re wondering why he is posing with mugshots of David and Richard from West System International, they were there giving demonstrations to the visiting public.)
He has developed these ingenious plastic T-pieces that literally slot on to the seams.
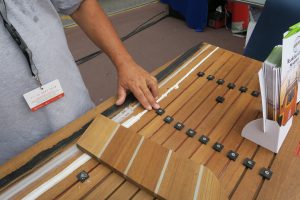
“The advantage is that they are easy to clean and re-use,” he said. “Also, there is no risk of the screw thread damaging the edge of the teak plank as it is inserted.”
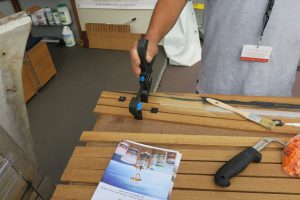
The pieces are available in two different sizes, denoted by the colour. Orange spacers (seen at the right of this shot) are for 4mm seams and black ones are for 5mm.
“We make these in France, not China,” David said proudly.
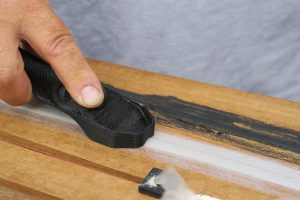
Another tool David has devised is to create a raised bead of sealant between the planks. This specially designed ‘pull’ spatula has a notch set into the spreader head that creates a raised bead of sealant when run across the wet material. The usual way is to use a flat spatula with the seam bordered between strips of masking tape, but the sealant can sometimes slump as it settles. This technique gives a raised bead that can then be sanded back completely flat.
Thoughts on base adhesive – making it rigid.

Whilst there are many different types of flexible adhesive sealant available to bed the teak planks onto, several builders like to use a base of WEST SYSTEM Graphite Powder (additive 423) mixed with WEST SYSTEM 105/205 epoxy.

The planks need to be sanded and cleaned with solvent to remove the oiliness, but when bedded down onto the epoxy/graphite mix, the deck becomes a remarkably solid structure when the epoxy has cured.
The powder is also used for the seams, which removes any problems with heat shrinkage and forms a tight adhesive bond between the planks. Epoxy should only be used in the seams if the teak thickness is 6mm or less, any greater thickness of timber will move with moisture uptake and may cause splitting in the planks.
For more information on the spacers and for obtaining WEST SYSTEM products in France, visit: www.directeck.fr


