How To: Protecting bare plywood with epoxy

Many older boats are made using plywood and this can deteriorate with age, especially if rainwater has been able to penetrate the paint layers. WEST SYSTEM® Epoxy will repair and preserve the wood for many years to come.
- PREPARATION AND REPAIRS
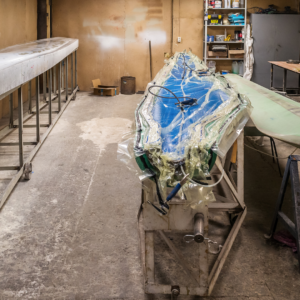
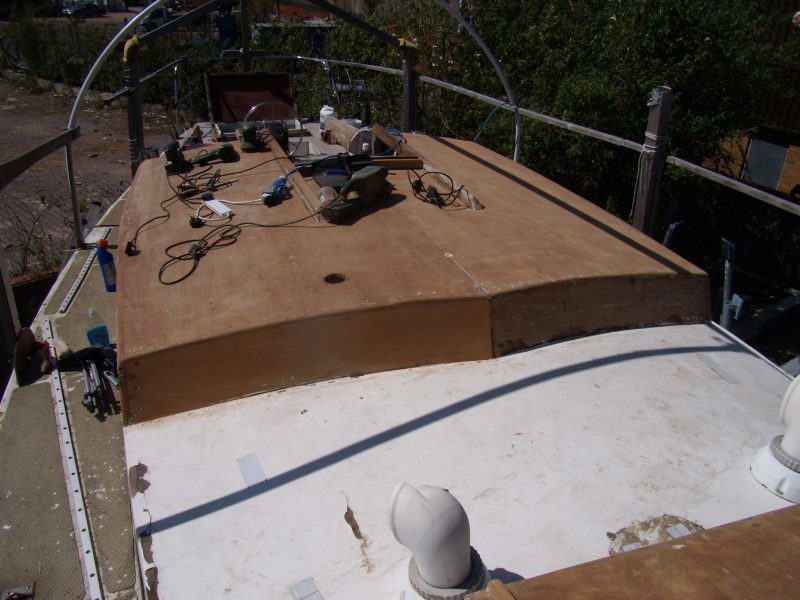
The cabin on my ferro-cement boat was made from 1 inch (25mm) marine plywood back in the 1970s and was feeling its age. Damage to the paint and poorly sealed deck fittings had allowed rainwater to penetrate, causing degradation and localised rotting.

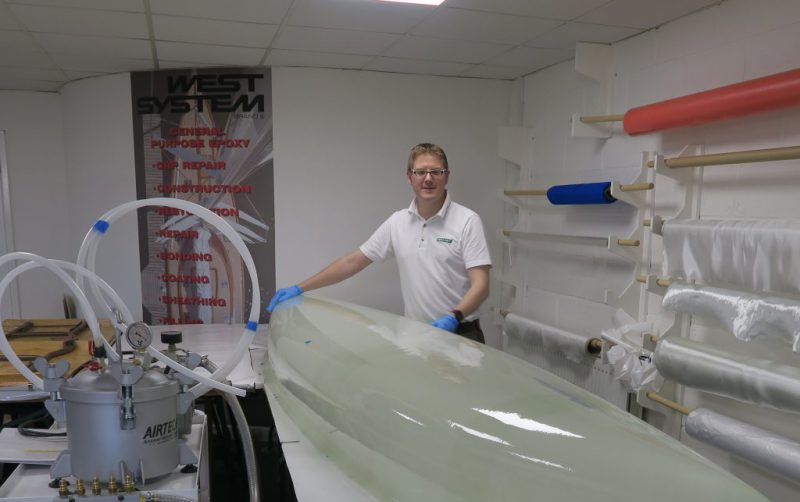
A course with WSI showed how rolling on and ‘tipping off’ (smoothing) just three coats of WEST SYSTEM epoxy can not only seal the wood against further water ingress but can also stabilise areas of rot once the soft wood has been dug out. Additives can be used to create powerful adhesive fillers to pad out the voids.
The first task was to remove all the deck fittings, which would have to come off anyway for re-bedding. If any of the screws are stuck, a tip is to heat them with a small blowtorch so the metal expands slightly. Once it cools and shrinks back down, each screw or bolt will have enlarged its hole and be easier to remove.
Note: Only do this on wood you can afford to scorch slightly! (Alternatively the tip of a soldering iron can be used with greater precision)
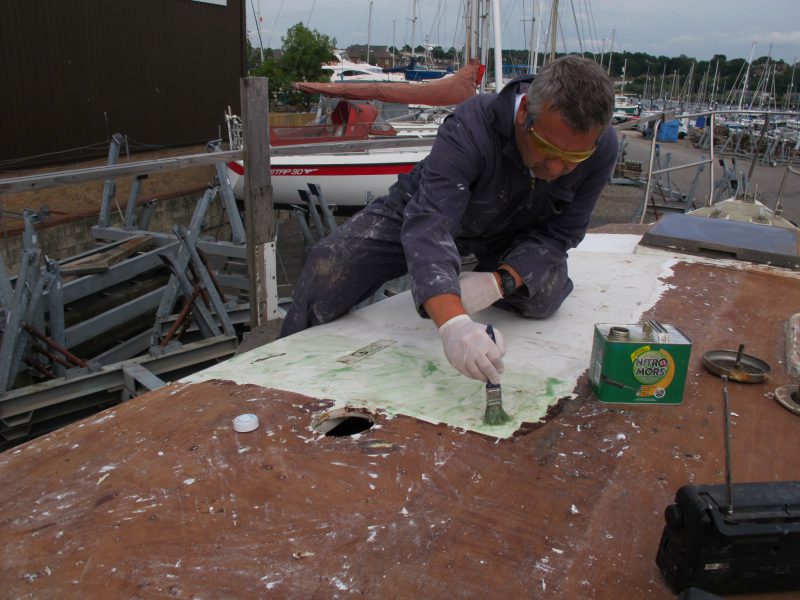
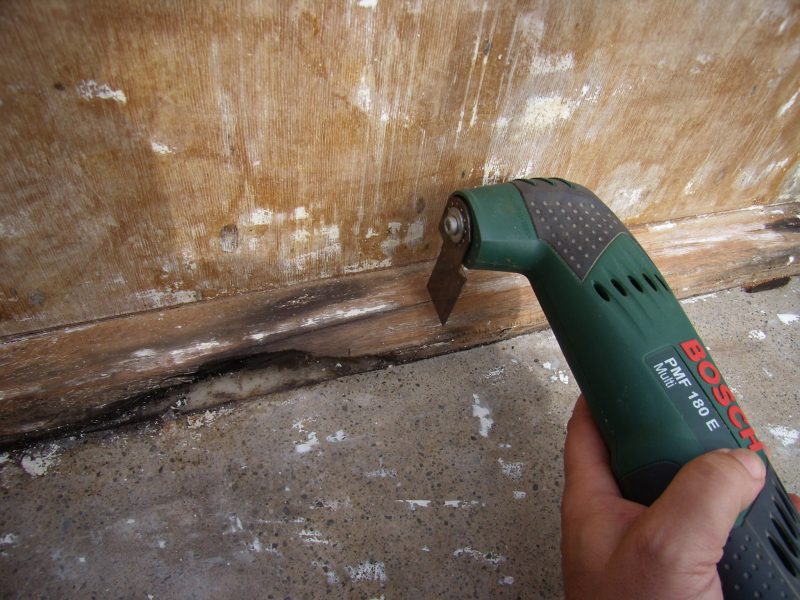
The next task is to remove any decorative coatings. If the paint is a single pack product, ordinary household paint-strippers will be adequate. However, two-pack polyurethanes (pigment mixed with a separate tin of hardener) are remarkably tough and may need specialist strippers. Heat guns or aggressive abrasives will also prove effective. Non-skid materials like Treadmaster can usually be removed with a chisel but be careful not to do too much damage to the substrate.
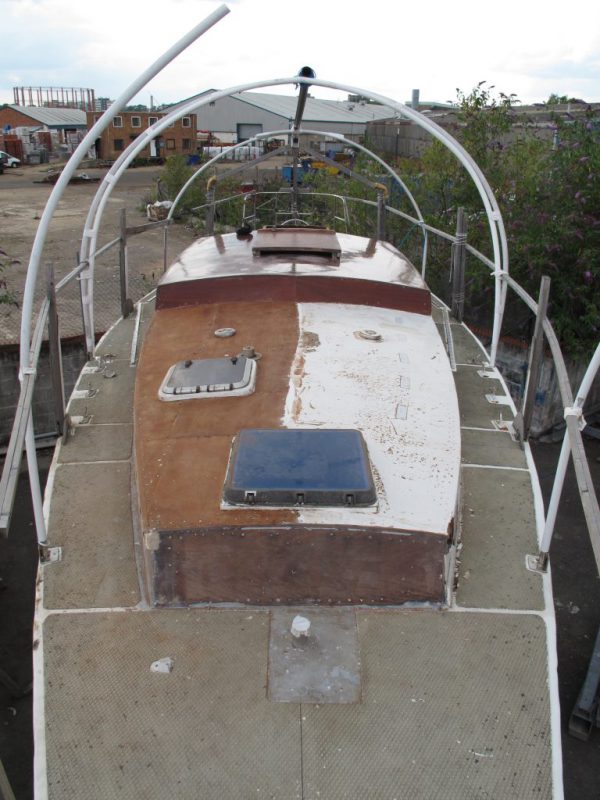
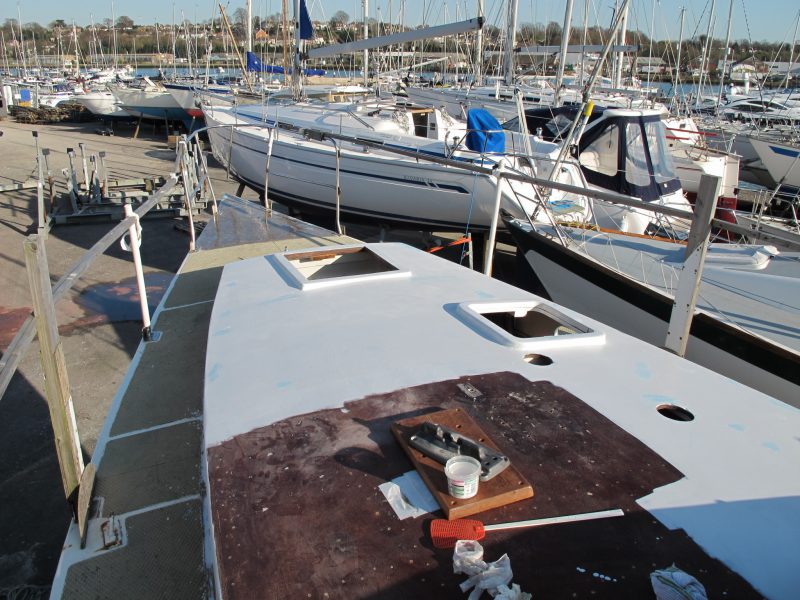
Tip: Only remove the paint on an area you can work on in the time window available, say over a weekend. Try and keep the exposed plywood protected from the weather, as even a light shower can set the project back until the wood dries out again. This project is being done in stages – you can see that the rear part of the cabin has already stripped and coated over a weekend. The starboard side is being stripped and abraded during the next visit and the port side remains protected by paint until that time comes.
With the paint removed, any residual paint stripper was washed off with fresh water and then the cabin abraded thoroughly with 80-grit paper. This will prepare the wood for the first coat of epoxy.
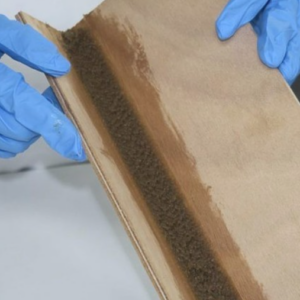
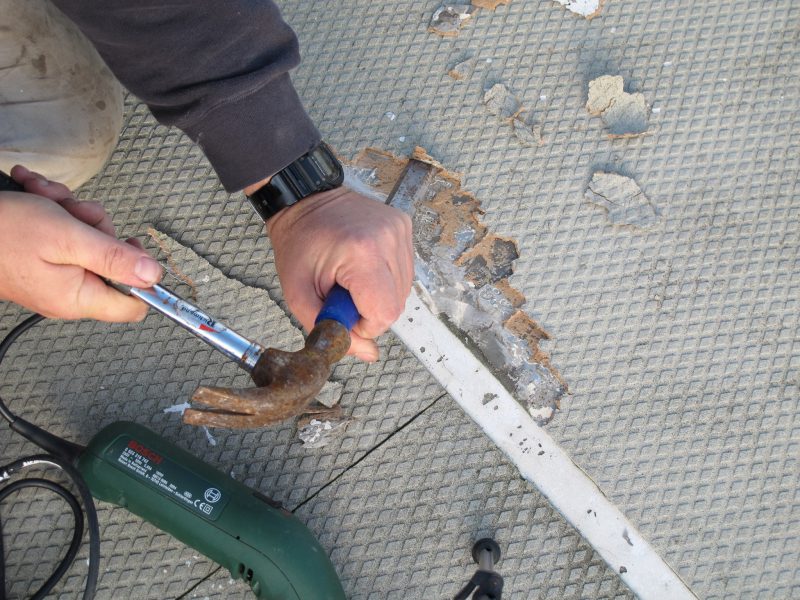
 In any soft areas, the rot was thoroughly chiselled out and the remaining void dried with a hot air gun. Smaller voids were stabilised with epoxy mixed with an additive such as WEST SYSTEM 406 Colloidal Silica to make a filler the consistency of peanut butter. Larger ones, such as this trim, were cut cleanly in good wood each side and had a new piece of hardwood shaped and then glued (epoxy mixed with colloidal silica) into place.
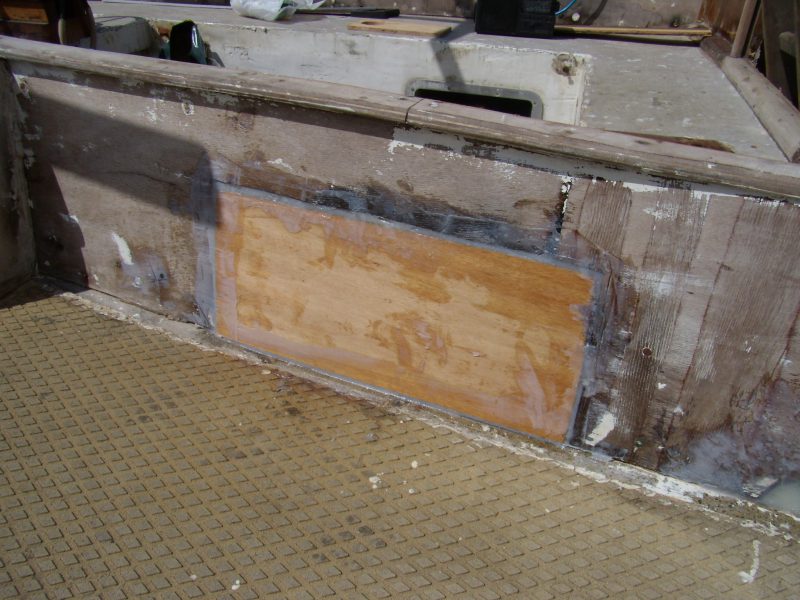
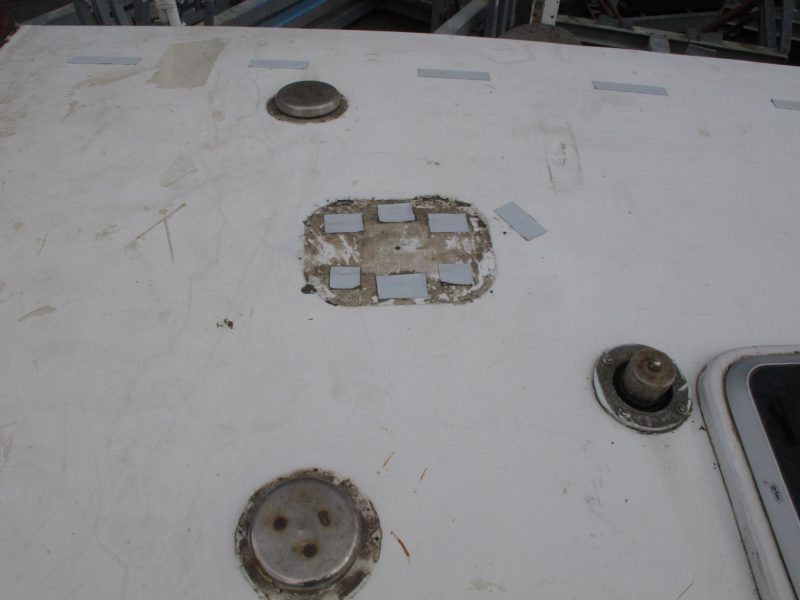
In some areas, the plywood was so rotten that I cut out the damaged sections completely and inserted a patch of new marine plywood pre-coated with epoxy. Note the (pale) glue additive used at the edges. It is important to seal the edges of the laminates of the plywood with mixed epoxy to stop delamination in the future.
- APPLICATION
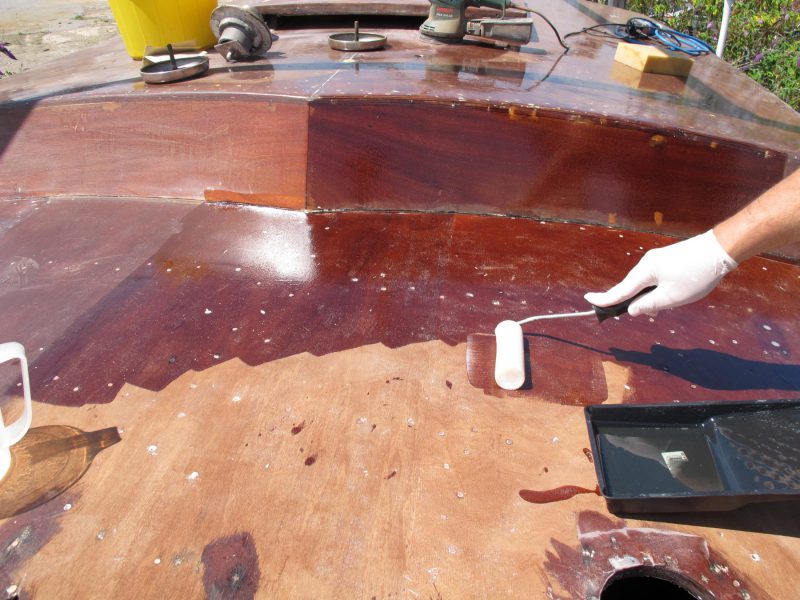
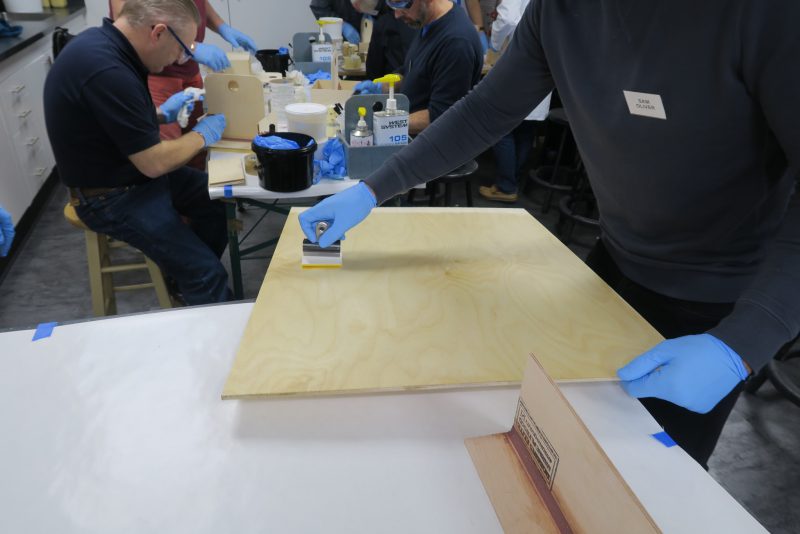
Choosing a day with no risk of showers, I mixed up enough WEST SYSTEM 105 Epoxy Resin with WEST SYSTEM 205 Fast Hardener that I could safely apply in about 20 minutes. Had it been a really warm day, I would have used the WEST SYSTEM 206 Slow Hardener instead of 205 Hardener. Mixing smaller amounts using the measuring pumps and pouring it straight into a roller tray after thorough mixing avoids exothermic reactions and eliminates waste. Decanting the mix (stirred for at least a minute in the mixing pot) into a roller tray, I began to roll it over the bare plywood.
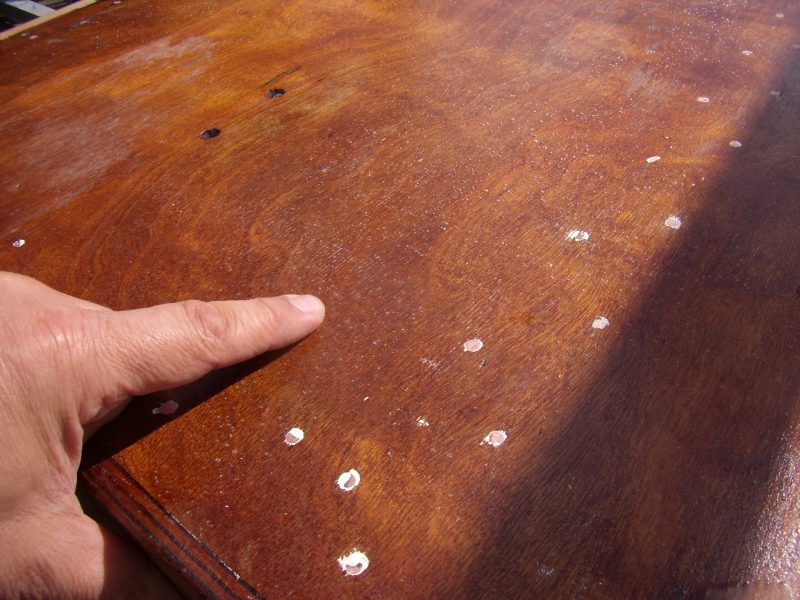
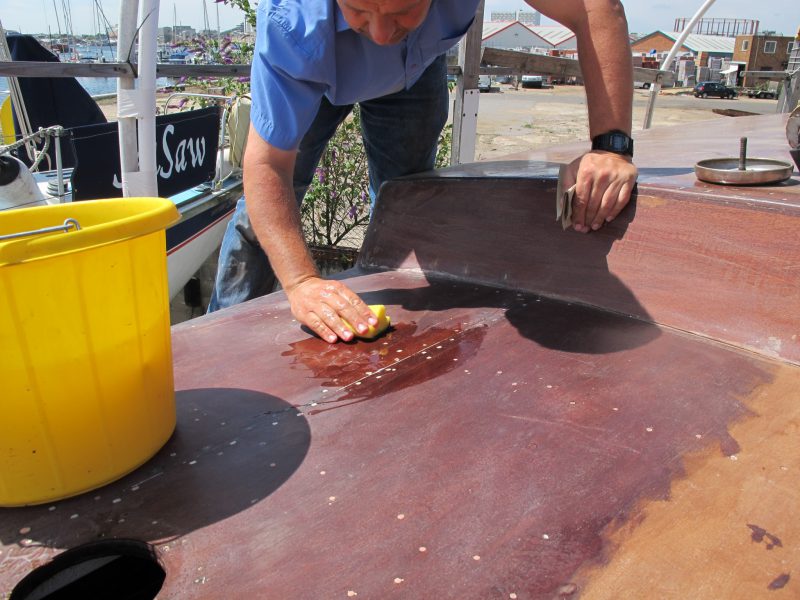
A common mistake (which I made) is to apply the epoxy on a bright sunny day. The plywood will out-gas as the air in its fibres heats up and expands, causing thousands of tiny air bubbles (seen in this photo) to appear in your coating. It is best to leave this job until a cooler day, or in the evening, as the plywood will helpfully suck the epoxy into its pores as it cools.
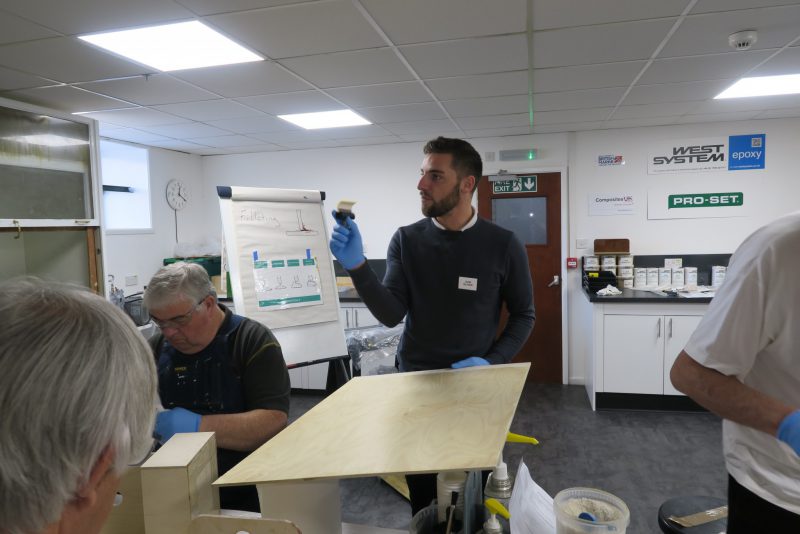
The air bubbles can be smoothed flat with a brush, or a piece of cut roller, as demonstrated by Sam here on our WSI course. Tipping off is always good practice as when applying epoxy with a foam roller the texture of the foam and air in the foam can be transfer to the surface. Tipping off levels the surface. Alternate the direction in which each coat is tipped off, 1st coat vertical, 2nd coat horizontal, 3rd coat vertical, etc.
It is best to add subsequent layers ‘wet-on-tacky’, although this may not always be possible with your schedule. Wait until the epoxy has become sticky (tacky to touch) but not hard and apply a second coat. A third goes on in the same way.
‘Ask Hamish’ tip: “Knowing when to recoat is to use something we call the ‘Sellotape test,” Hamish advises. “This refers to a comparison between the tackiness of the coat and the back of a piece of Sellotape. If your coat isn’t as sticky as Sellotape, and reside comes away on your finger, then it needs a little longer to cure before recoating. If it is not sticky at all, and has a hard feel, then it has cured for too long and will need to be left to fully cure, the amine blush washed off and a new key made by abrading.”
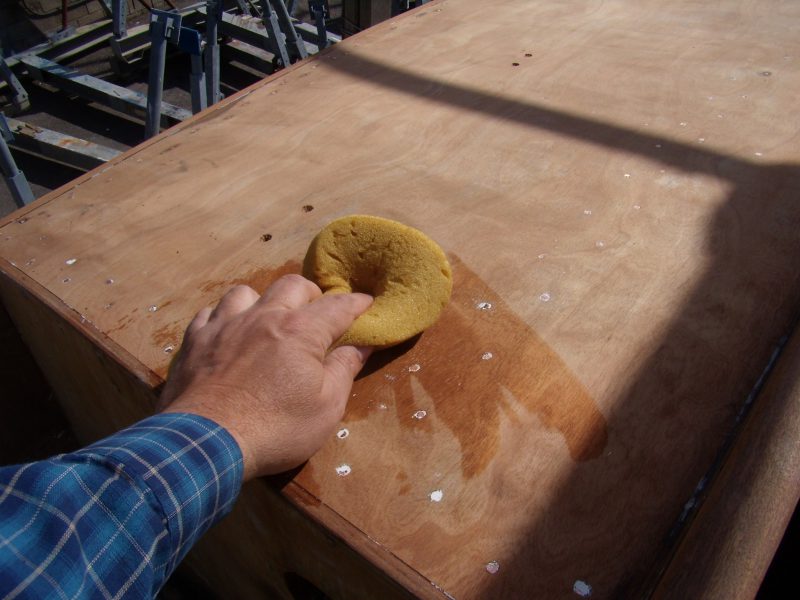
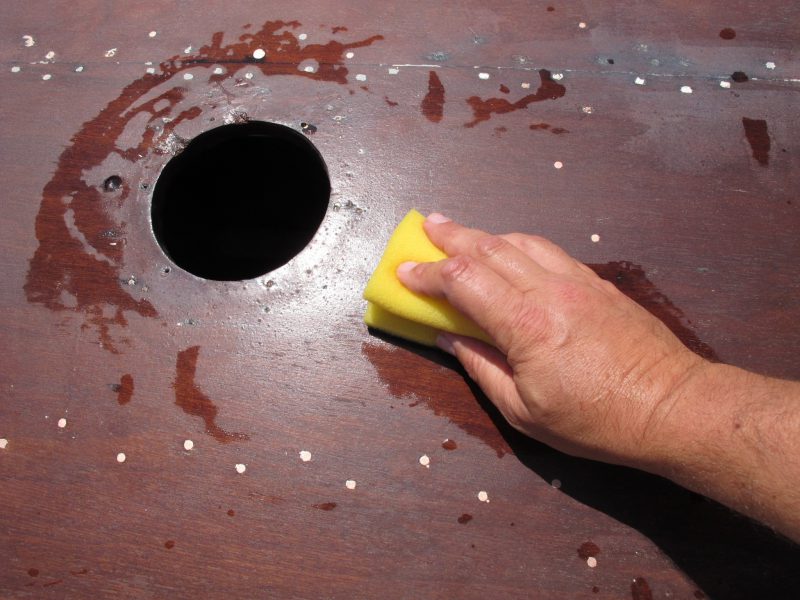
I had to leave some of the recoating for several days, so when I returned it was necessary to rinse off the amine blush (Amine blush can appear as a wax like film on cured epoxy surfaces. It is a by-product of the curing process and is more noticeable in cool, moist conditions.) and abrade with 80 grit again before recoating. Any filled areas could be sanded flat at the same time to create a smooth finish.
Note: Amine blush isn’t a problem when laying wet resin onto a tacky, uncured coat as it will reabsorb but it will interfere with new coats if it is allowed to establish itself on the cured surface. Just use fresh water and a scouring pad to dissolve it and actively dry the surface with clean paper towel (avoid air drying as this will leave the amines on the surface). Recoat when the surface is fully dried.
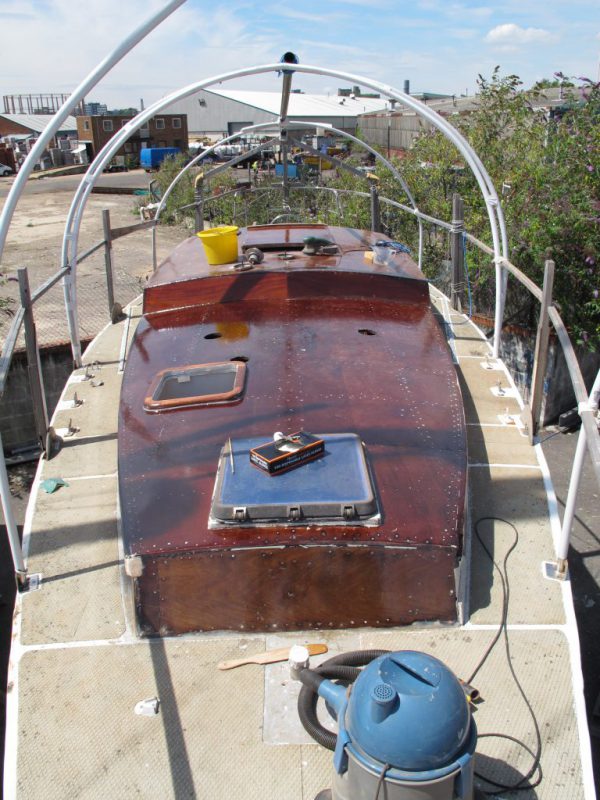
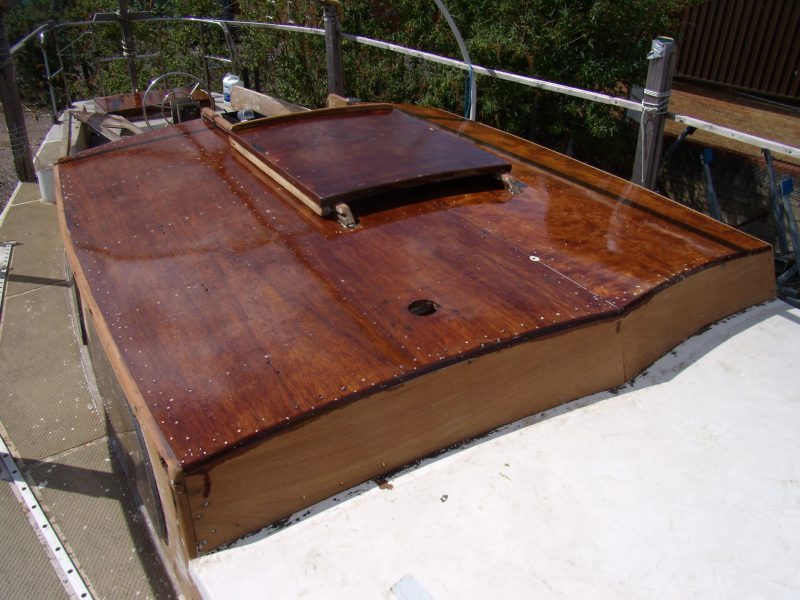
The whole cabin top and sides were coated with three layers of WEST SYSTEM 105 Epoxy Resin with WEST SYSTEM 205 Fast Hardener. It actually looks quite striking and if I had used the WEST SYSTEM 207 Special Coating Hardener instead of 205 Hardener, (note, it has a different mix ratio) then I could have achieved a really rich, deep gloss, ideal for receiving a UV-resistant varnish over the top.
3: FINISH AND PAINT
However, this cabin was just too messed up to sport a Riva-style varnish finish so I washed off and braded the final coat ready for an epoxy primer. This will act as a tie coat between the epoxy and the first layer of two-pack paint. I could have added a layer of reinforcing cloth and smoothed on a mix of fairing filler to enhance the integrity of the cabin but felt this was probably over-kill. The epoxy would form a tough enough barrier by itself.
Note: An alternative at this stage is to use WEST SYSTEM Peel Ply. Cheap and plentiful, peel ply is laid over the last coat and rollered down. Once the epoxy has cured the ply is literally peeled off, leaving a roughened surface underneath and taking any amine blush with it.
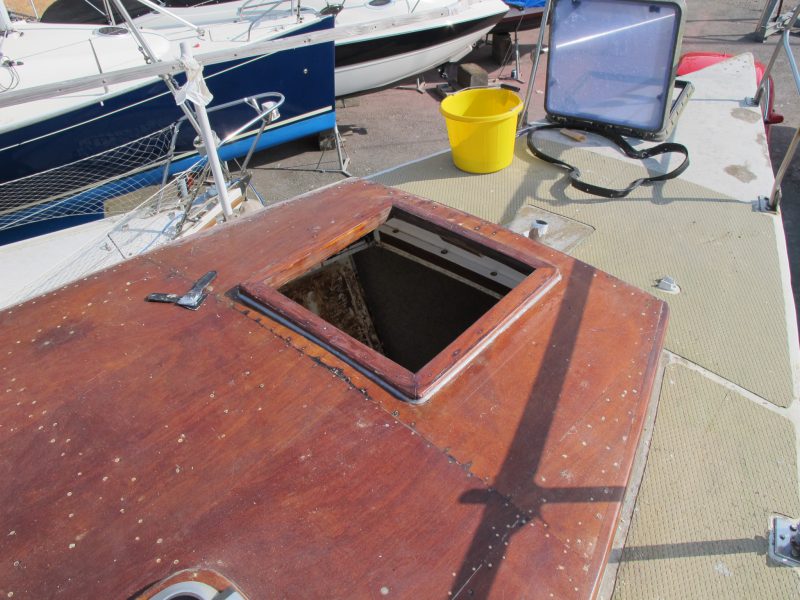
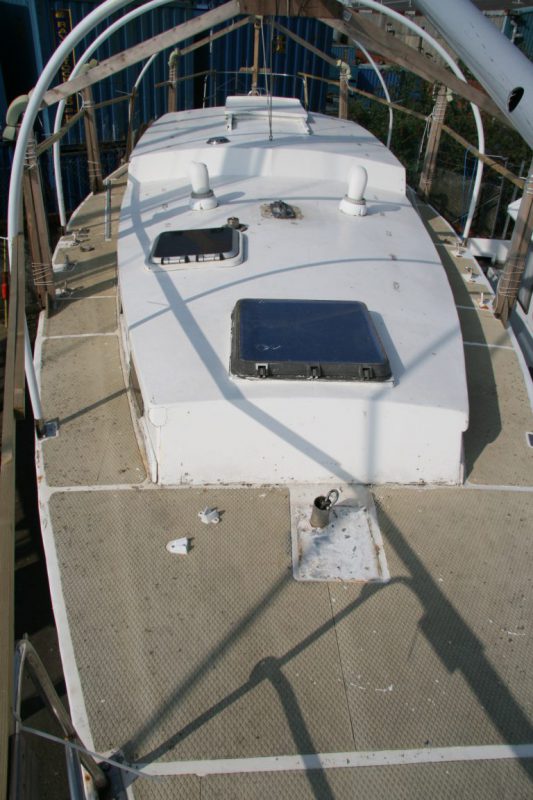
The old forehatch was removed, the paint on the frame stripped, the wood abraded back and then also coated with three layers of mixed epoxy. To increase strength and watertight integrity, I made a fillet around the join between the deck and the hatch frame. You can see it as the white-coloured bead.
On goes the primer and paint. Thanks to the three layers of WEST SYSTEM®105/205epoxy and fillers made using WEST SYSTEM 406 Colloidal Silica I know that this plywood is now fully sealed and stable. I can therefore leave the cabin to concentrate on other aspects of the refit and do the final cosmetics closer to the launch date…whenever that may be!
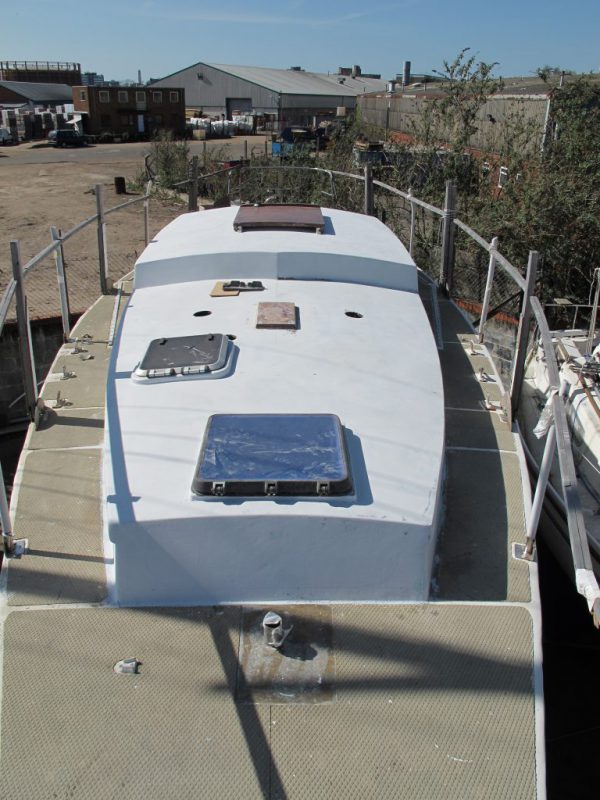
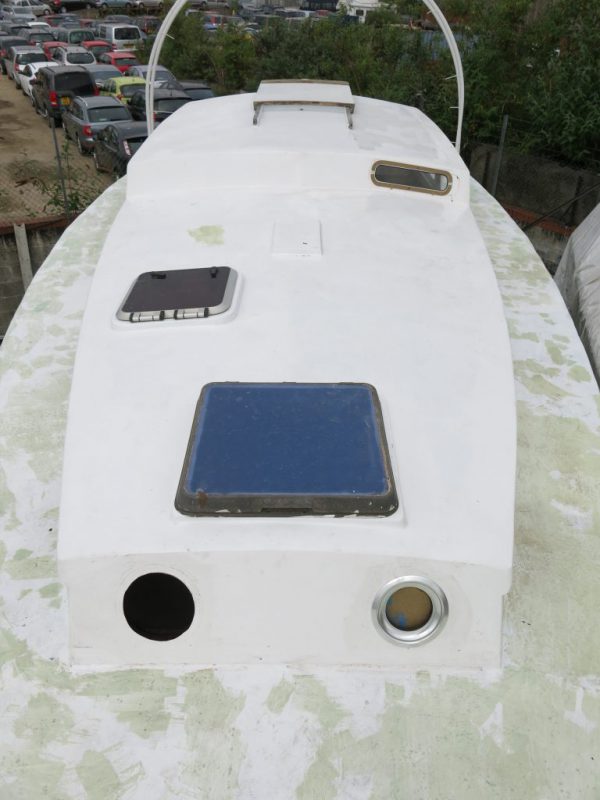
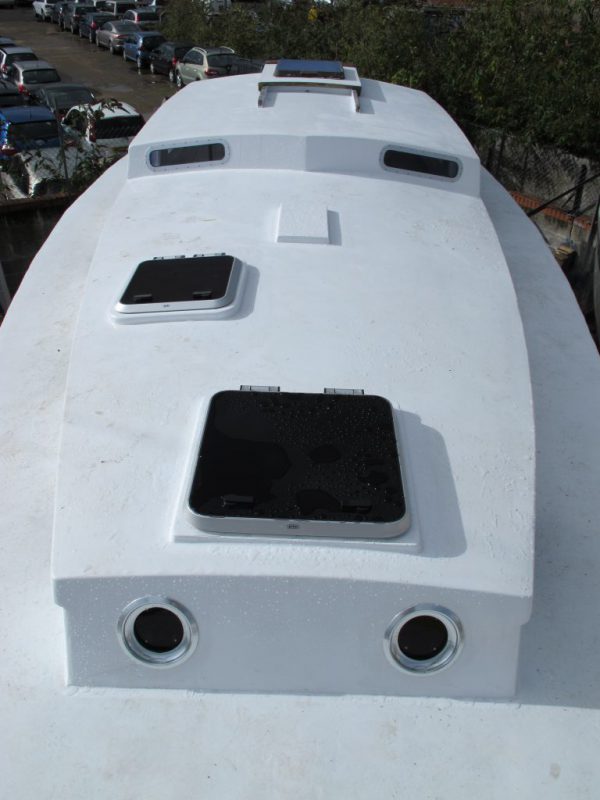
Sometime later and the cabin top and side are undercoated (left) and sporting new windows (middle) and forehatch (right). Although still a long way from being finished, the cabin is now fully watertight and looking half-decent. It is far more attractive than the mess I took on, with the reassurance that the epoxy will preserve the substrate for decades to come.