How To: How to repair laminates using vacuum bagging
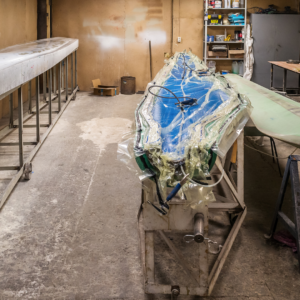
There are several methods for repairing laminates on your fibreglass boat but the most effective way is vacuum bagging. This will give you the nearest result to the original. Whilst it’s considered an advanced technique, with the right process, anyone can perform a decent repair job using vacuum bagging – especially when you have us to guide you through it.
What is vacuum bagging?
Vacuum bagging is the process of applying pressure to the laminate – once laid-up – to maximise the consolidation of the fabric. It is a practical clamping method which can be used for applications of all sizes, from small hobby projects to large-scale use such as product manufacturing and backyard building.
Why use vacuum bagging?
Using the technique… will result in maximum consolidation that should be equally as strong as the original material.
Vacuum bagging is an extremely effective way to achieve a superb quality repair for highly stressed, lightly built composites. For most fibreglass boat repairs vacuum bagging isn’t a necessity. However, using the technique to laminate new fabric into an excavated damaged area will result in maximum consolidation that should be equally as strong as the original material.
What’s the process?
1. Prepare to repair
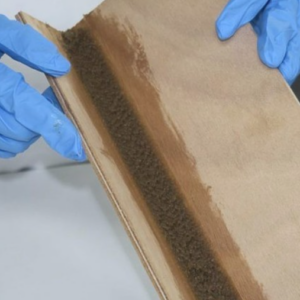
Using a grinder with 40-80-grit paper remove the damaged area, leaving a circular or oval shape. Any delaminated laminate should be removed so that the undamaged laminate underneath is exposed. Then, bevel the edges of the cavity to a 12 to 1 angle. The area needs to be free of any airways in order for the vacuum bagging to be effective, so make sure the back of the opening is sealed to provide an airtight envelope.
Trim your Episize™ Biaxial Fabric to the same shape as the excavated repair area. You’ll need enough so that the combined thickness of the layers is slightly thinner than the original laminate. Trim the first piece so that it’s slightly smaller than the outside of the bevelled edge. Each of the remaining pieces should be cut slightly smaller than the preceding piece, with the last piece the same size as the bottom of the cavity at the inside of the bevel.
Next, prepare the vacuum bagging materials. Cut your release fabric, perforated film and breather so that they are slightly larger than the repair area. Then cut the vacuum bag several inches larger than the repair area, applying mastic sealant several inches outside the perimeter of the repair area.
2. Wet-out process
Use a mix of WEST SYSTEM 105 Epoxy Resin® and 206 Slow Hardener® to wet-out the repair area and apply a thin layer of epoxy, filling in any voids or unevenness.
Now apply the wet-out layers of cloth. Begin with the largest layer and then continue progressively to smaller layers centred in the repair area, wetting-out each layer of cloth on a plastic-covered table first, then smoothing each layer into place on the repair area.
Remove any air bubbles and excess epoxy with an 808 Plastic Squeegee to ensure a better finish. Use this to squeegee the layer of release fabric over the layers of cloth – again removing any trapped air and excess epoxy. Place the perforated film and breather material over the lay-up and seal the vacuum bag to the mastic.
3. Vacuum bagging
Make sure you attach the vacuum port off to the side of the repair to prevent dimpling. Then, turn on the vacuum pump and attach the vacuum gauge. After the vacuum has stabilised, you can apply moderate heat from a heat lamp or portable dry heater to the lay-up in order to speed up the cure.
Once the lay-up has had enough time to cure thoroughly, approximately 12 to 16 hours, remove the bag, breather, perforated film and release fabric.
Finally, grind any high spot or bumps and fill any low areas with a thick mixture of WEST SYSTEM epoxy and 407 Low Density Filler and allow the mixture to cure. To seal the repair, sand the area thoroughly and apply two coats of WEST SYSTEM epoxy to finish.
For a full guide to vacuum bagging applications, including health and safety advice, expert techniques, as well as further boat building and maintenance publications, visit West System International.
Image credit: compositesworld.com