Projects: Repairing a radio-controlled plane with epoxy
What does Epoxycraft’s Richard Ross do when he isn’t out on the road? He flies remote-controlled planes – and he repairs them with epoxy, too. In this article, he talks us through his latest repair to a Weston Cougar 2000.
My wife likes to poke fun at my love of flying radio-controlled planes by calling it my ‘sad anorak hobby’. I’ll concede, it’s definitely a bit geeky but it’s great fun – especially considering how fast the planes can fly. You can get them going as fast as 100 miles an hour! Although that’s far too fast for me – I prefer sticking to safer speeds of around 40 miles an hour.
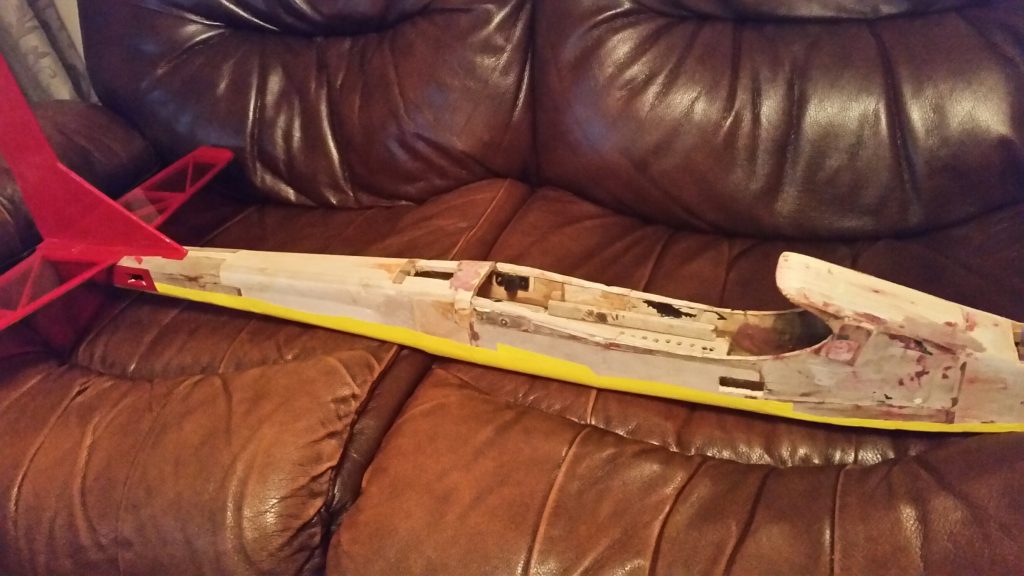
I fly my Weston Cougar at about that speed; I rescued it from the brink of destruction a couple of months ago. A brand new balsa and ply kit costs about £130 but my plane only cost me £5 on eBay because it was a wreck – full of dents, holes and broken bits, plus modifications that I wasn’t too fond of. My plan was to set about repairing it – with my trusty WEST SYSTEM® epoxy by my side, of course.
Cutting out the damage
After removing the plastic covering, the first thing I did was a damage repair assessment, listing all the repair and modification work I wanted to carry out. The most obvious starting point was to give everything a good clean up, which is a vital part of preparing for any work with epoxy.
My Cougar had a lot of damp and mould stains on it, which I needed to remove; without doing this, I’d just lock any wetness into the wood with the epoxy and it would warp. So I sanded out what I could and cut out any particularly bad damage.
Once the remaining wood was nicely sanded, well abraded and wiped over with acetone to ensure it was clean, I primed the areas that needed repairing. This meant using WEST SYSTEM 105 Epoxy Resin® mixed with WEST SYSTEM 205 Fast Hardener® to wet out the repair area, waiting for it to go tacky before applying the filler, wood or fibreglass.
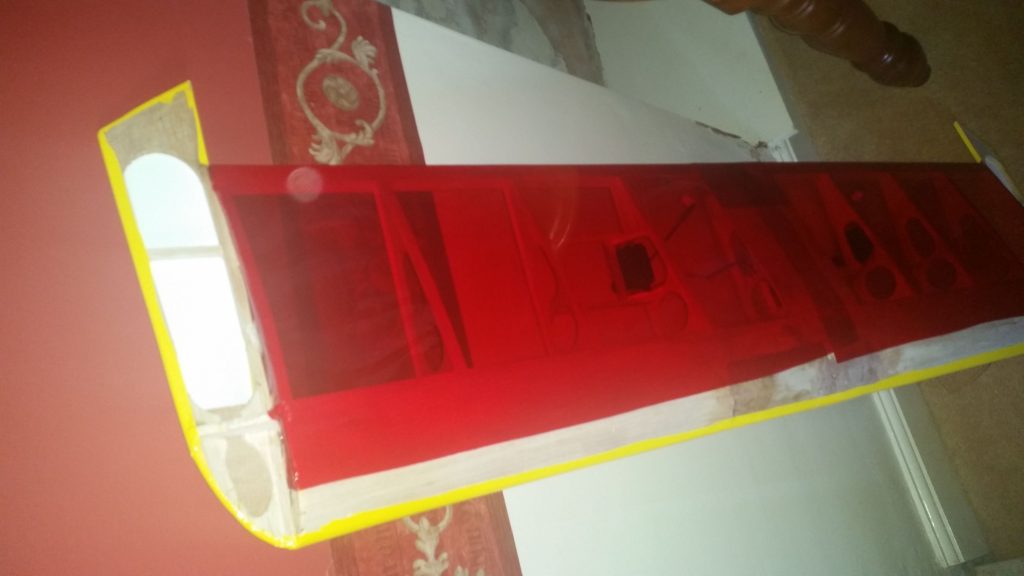
I made most of the structural repairs to the fuselage using balsa wood sheeting. Where I couldn’t use balsa (such as when repairing holes in the wood), I applied a backing patch of fibreglass before filling the holes with 105/205 mixed with WEST SYSTEM 407 Low Density Filler.
The 407 filler is a good choice, even though it’s slightly heavier than WEST SYSTEM 410 Microlight™ filler. Given the twisting forces these planes have to deal with, 407 filler offers extra strength due to the colloidal silica it contains.
Preparation, preparation, preparation
After filling in and bonding new wood where necessary, I left the whole construction to cure for 48-72 hours, before sanding it. Then I re-covered the whole thing in a heat-shrink covering film, in a smart red and yellow.
I’d say that all in all, it took me about five evenings to complete the work, with some waiting in between for curing and so forth.
“Surface preparation is king”
If I had to give advice to anyone thinking about carrying out a similar repair, I’d say that surface preparation is king. I follow the mantra that there are three stages of surface preparation when working with epoxy: 1) surface preparation, 2) surface preparation and finally 3) surface preparation… you can never do too much!
Aside from that, make sure you get everything ready well in advance and don’t mix up the epoxy until all your pieces are shaped, laid out and you’re absolutely ready to go. Be patient; if you think you haven’t got time to do it properly, then you certainly haven’t got time to do it twice!
Thanks very much to Richard Ross for his contribution.
If you liked this, why not read how John White built his grandson a Formula 1 racing car?


