Projects: Building an 18th century gajeta – Part 2
Part 2: Applying the skin
In a remarkable project that combines traditional boatbuilding skills with modern techniques, a Croatian Gajetareceives its primary wooden framework, cut by computer and bonded with WEST SYSTEM® epoxy.
With the plywood formers for the 7m (21ft) fishing boat assembled at the Betina Shipyard in Croatia (see part 1) the task of attaching the timber frames could begin. The process of creating the structure to ‘form’ the hull is usually known as ‘lofting.’
“As the whole boat was modeled in a 3D programme, this data could be sent to a CNC (computer numerical control) cutter for creating precision components,” said the project’s naval architect, Srdan Dokovic. “Some parts, like the frames, were first bonded together using thickened WEST SYSTEM epoxy to make a strong, shaped piece of timber. This was then trimmed into the required dimensions by CNC.”
At the Betina Shipyard team, the whole project was assembled like ‘a giant Lego set’ as Srdan puts it.
“Every part of the structure was a perfect fit with the next one,” he explained. “Everything on the boat was bonded with epoxy to reduce the amount of metal fasteners required and we laminated several interior components this way as well. With computer modelling, we were able to minimise the amount of mistakes and the CNC machine also gives a big reduction in assembly time. The result is a much lighter, stronger and faster gajeta with minimal waste in man-hours and materials.”
Assembling the frames:
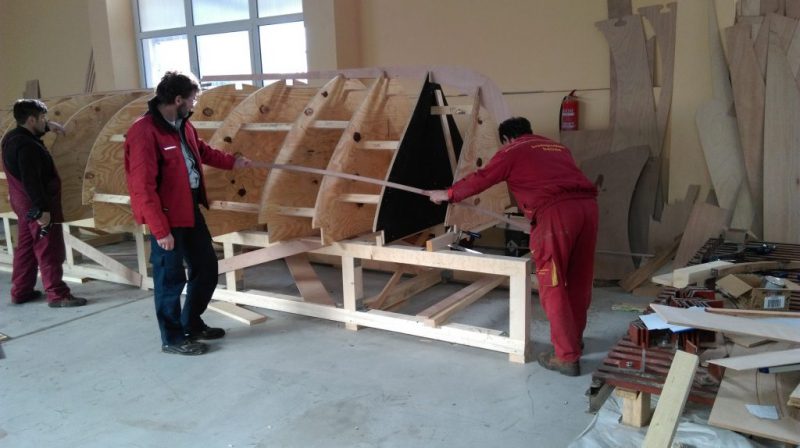
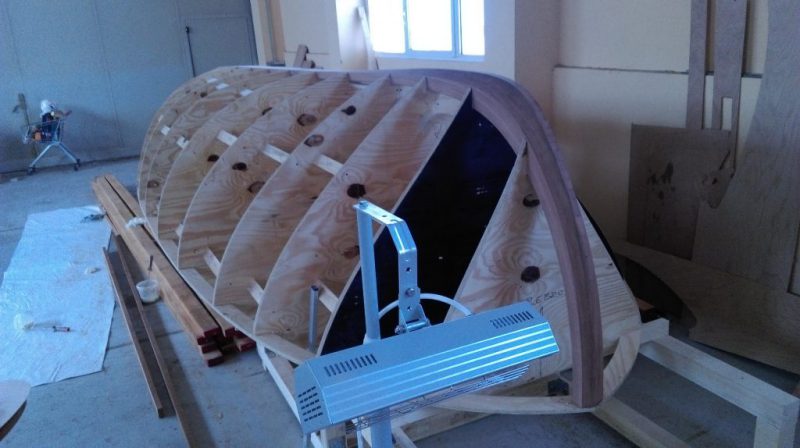
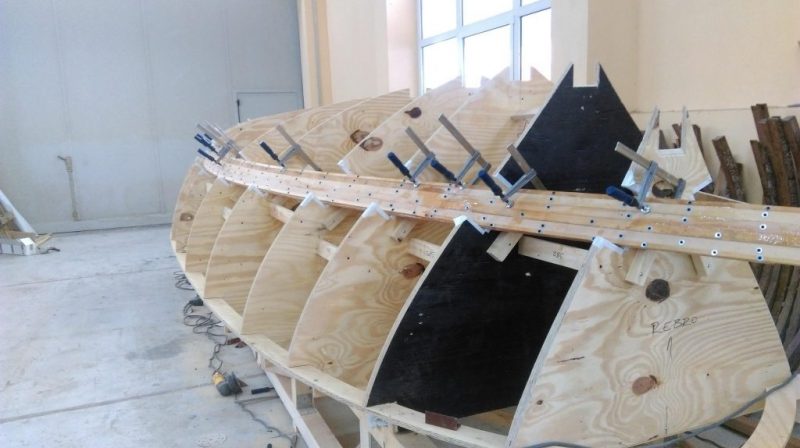
The plywood formers outline the shape the hull will take. Note the spacers between them that will prevent the uprights from leaning out of shape.
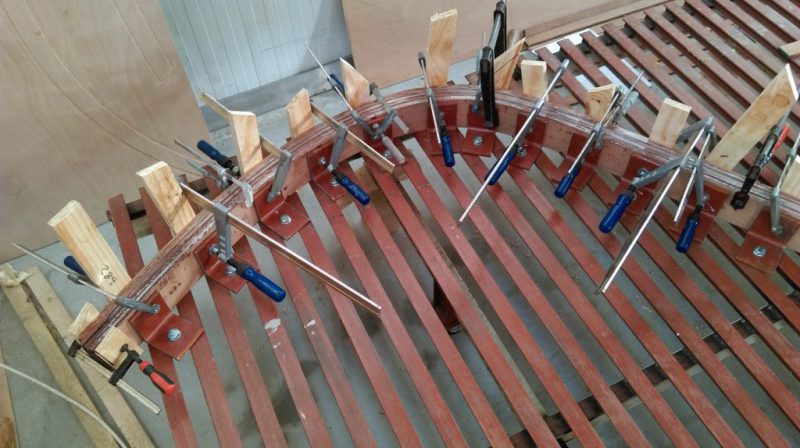
Laminating the inner keel with WEST SYSTEM epoxy. In days of old, joiners had to find the bough of a tree where the grain ran into a curve that suited the shape of the keel. Now bending several thin layers of timber against metal formers and bonding the layers together with thickened epoxy can achieve an even better effect. Note the clever design of the metal frame that allows for an infinite variety of curves.
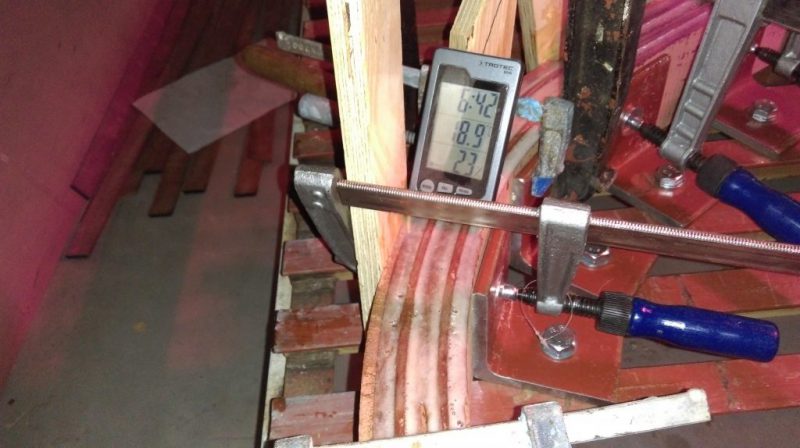
As the keel and frames will be on display, wooden wedges between the clamps and the timber prevent circular indentations being formed but care has to be taken to ensure the wedges are not accidentally bonded into the project! Note the electronic sensor, which is showing the time, temperature and humidity. The higher the temperature, the quicker the bond will cure. Beyond around 20°C, it is better to use a slower hardener to lengthen assembly time.
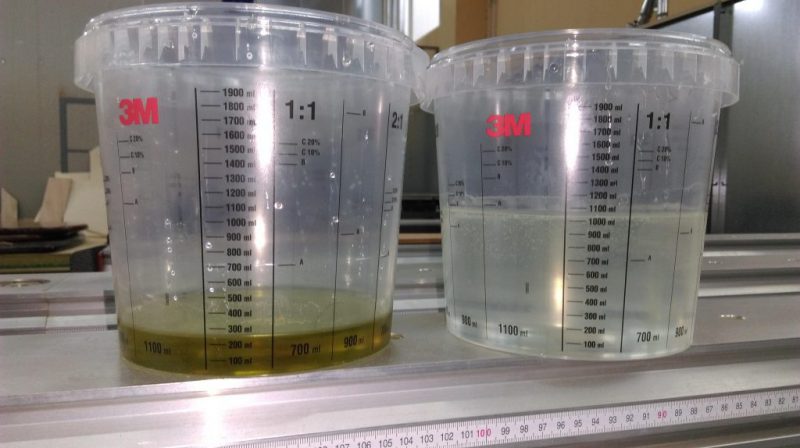
The project used WEST SYSTEM 105 Resinwith 205 Fast Hardenerin the colder months and 206 Slow Hardenerin the warmer months. (Boat builders in the Tropics often use 209 Extra Slow Hardenerto deal with excessive heat and humidity.) Accuracy when mixing the resin and hardener in its 5:1 resin to hardener ratio guarantees a highly dependable bond. Here the components are being measured by volume…
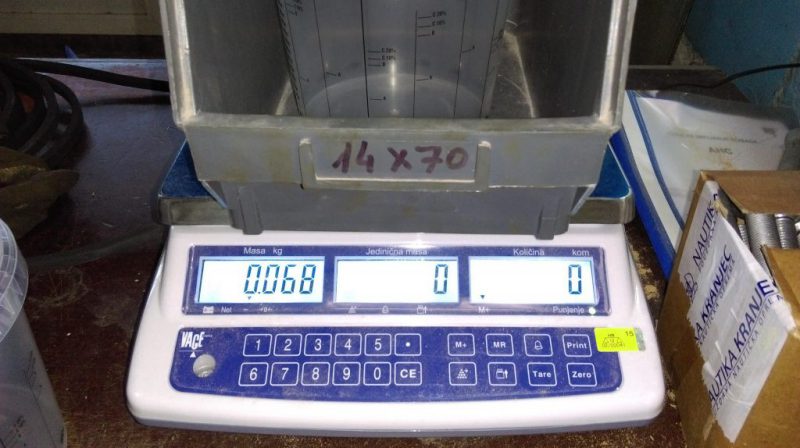
:..but they can also be measured – or double-checked – by weight. The weight ratio is close, at 5: 1 (5 parts resin to 1 part 205 hardener). Some builders prefer to use digital scales throughout the project for a more precise calibration, especially if mixing very small quantities.
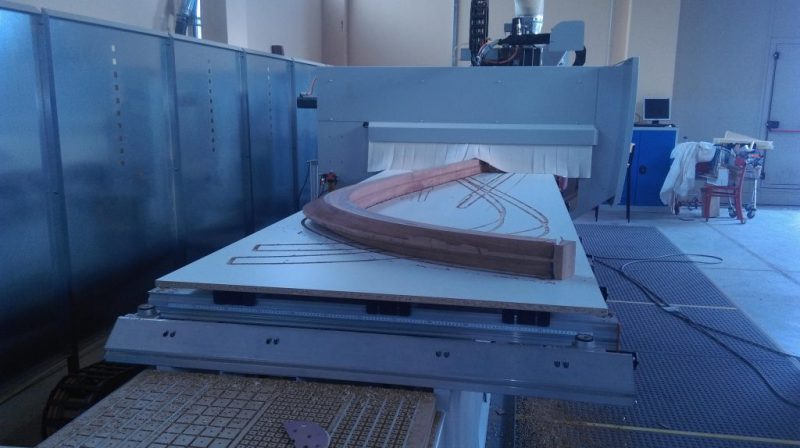
The inner keel was made from two laminates, port and starboard, which were then laid over each other and cut as one. The CNC machine has introduced a camber into both sides at the stem so the planks will butt up against a flat surface when they are fitted.
At the same time, smaller supports are assembled as opposing pieces, with the final CNC trim ensuring that they are perfectly symmetrical. Traditional boat builders can achieve near accuracy but rarely match the perfection available from a machine that can cut to tolerances of 1/100th of an inch.
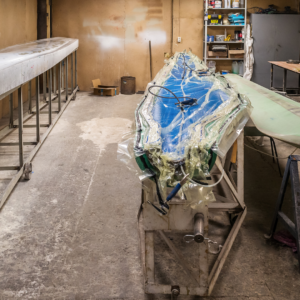
The cut and shaped halves are bonded together with thickened WEST SYSTEM epoxy and then the complete unit is dropped into its precut notches in the plywood formers. Note the perfect fit, especially where the prow is cut horizontally.
A close up of the forefoot profile. Note the number of laminations involved, which allows a thick piece of keel to be made that has incredible strength without excessive weight. The epoxy also serves to protect the laminates against water ingress, achieving a very long lasting structure.
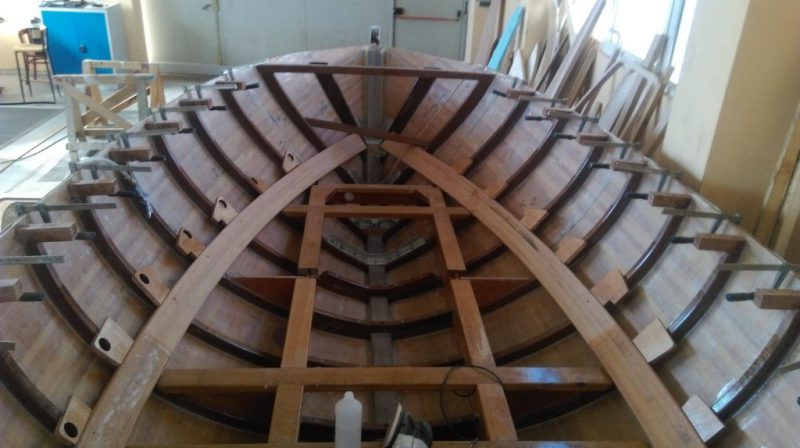
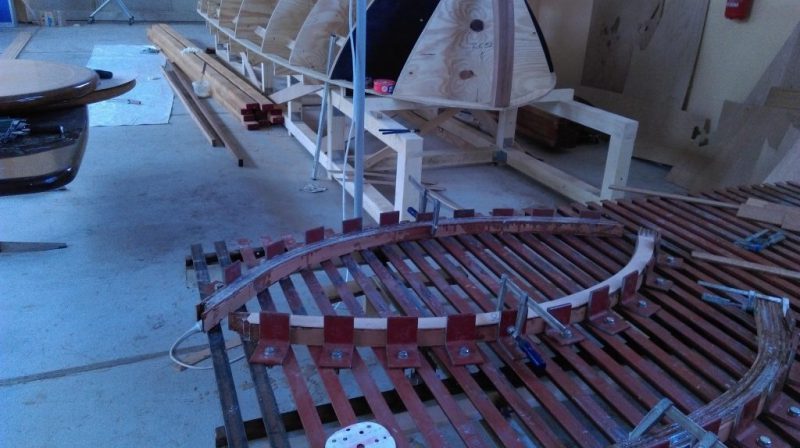
The next job is to make the two inner stringers, one for each side. These will create the curved ‘wishbone – shaped’ longitudinal support against which the floorboards will rest. We’ve jumped ahead in this image to show you how it sits inside the hull. It is an important part of the structure, so has to be strong and accurately made.
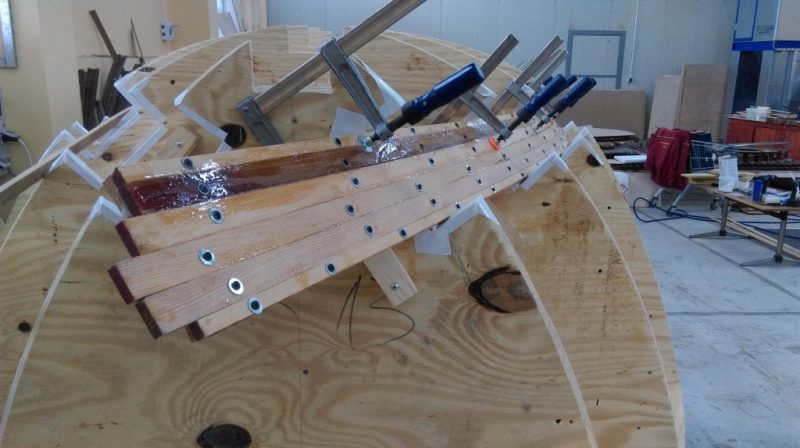
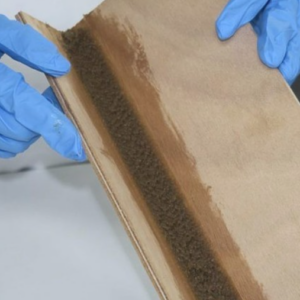
From the computer drawings, the exact position of the stringer is known, so notches are measured and cut into the formers. These are lined with duct tape to aid release of the subsequent epoxy work. Strips of cedar are then bonded to each other and attached by screws through stainless steel washers to backing batons. (Although it looks like a series of silver-rimmed holes in the wood, close inspection reveals that the screws are black!) The screws and washers have all been waxed to aid removal.
A second layer of planks is overlaid on the first and held in place by reusing the waxed screws and washers that held the first layer. The second and third layers are laid onto the partially cured “green” epoxy. Wet onto wet bonding achieves a strong chemical bond.

After the third layer has been attached, the thickened epoxy is allowed to fully cure and is then sanded in situ. This will flat back any runs or raised patches. Note how the shape has been achieved by progressively re-clamping the stringer to batons screwed into the plywood formers. No need for protectors here – any indentations will be hidden in the final build.
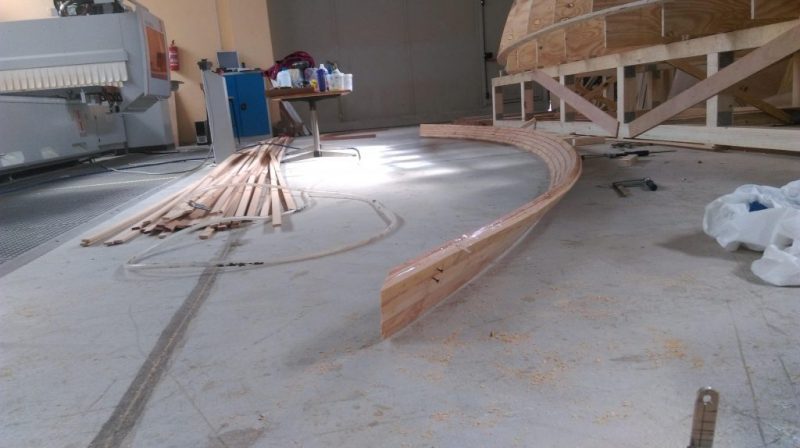
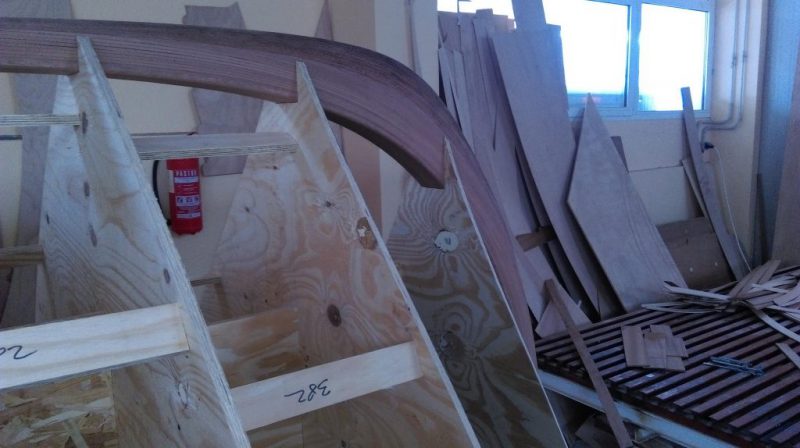
Here is the port stringer, ready for final sanding and finishing. Note the permanent twist achieved by the lamination process and the number of strips used – three across and five down. This has made a very strong structure that will not warp and lose its shape, thanks to the rigidity achieved by the thickened epoxy.
Note: The adhesive is a mix of WEST SYSTEM 105 Resinwith 205 Hardenerand 403 Microfibres Adhesive Filler. This filler is added at a ratio of between 4% to 16% by weight, depending on the thickness required. Alternatively, adding 406 Colloidal Silicainto a 105/205epoxy mix makes an equally powerful adhesive. The ratio required of the 406 Filleris between 3% to 8% by weight.
Next time: Adding the planks, and making some more frames.
Primary bonding relies on chemical linking of adhesive layers such as the wet lay-up of fibreglass laminate in a mould. All the layers of adhesive cure together in a single fused layer. Epoxy applied over partially cured epoxy will chemically link with it to form a primary bond. The ability to chemically link diminishes as the previous layer of epoxy cures and the bond becomes a secondary bond.