Projects: A bicycle made of wood?
Keen cyclist Chris Thompson realised that the versatility and strength of WEST SYSTEM epoxy would allow him to make his dream bicycle out of hardwood. The result is a roadworthy work of art.
Take several sections of dense brown oak, hollow them out and then assemble them into a frame, one you have designed after a long period of research. Then use WEST SYSTEM epoxy to laminate everything together and to give the frame a protective coating because you know it’s strong and up to the job. Add road legal hardware such as handlebars, wheels and brakes and you have a head-turning hand-built bicycle that is also relatively lightweight.
Chris Thompson describes all this on his remarkably detailed website www.woodenbicycle.co.uk and has kindly allowed epoxycraft.com to condense his technical narrative and some very detailed step-by-step images into this brief overview. If you want to follow in his tyre tracks and make your own version, then everything you need to know is there on his site.
Having previously made hardwood furniture, an acoustic guitar and a house extension, Chris describes himself as ‘a builder, a maker, a fiddler – one of those blokes with a workshop and a passion for doing stuff.’ He has been cycling all of his life, starting with a heavy steel framed bicycle in his childhood before progressing to a lightweight Claude Butler Brevet in his 20’s. For his 48th birthday, he wife bought him a coveted Claude Butler Vincenza.
Whilst hugely enjoying the Vincenza, Chris had always been keen to make his own custom machine, something that would really stand out in the crowd. He had been considering carbon fibre when he discovered a bicycle made from bamboo by enthusiast Jay Kisinger. Further research led him to the website of Renovo, the manufacturer of bespoke wooden bikes and Chris was inspired by the gently curved frames.
“ I could see from their pictures that they created two hollowed out clam halves that come together to make a hollow frame,” he explained. “I later found a few people using similar methods. I don’t know who originated this style of wooden bicycle construction but it was a system that would allow me to work in wood, not carbon, give me great scope for creativity and make a beautiful, stand out bicycle – assuming I could pull it all together.”
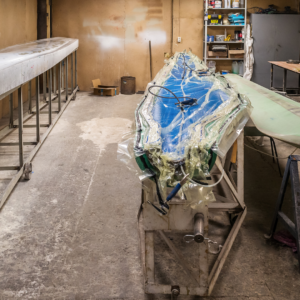
And pull it all together he did, as you can see from the picture at the top of the page. Here are the key stages, with a particular focus on how WEST SYSTEM epoxy was used to assemble and reinforce all the critical sections and leave the frame with a hardwearing protective coat that really reveals the beauty of the wood.
Making the curve
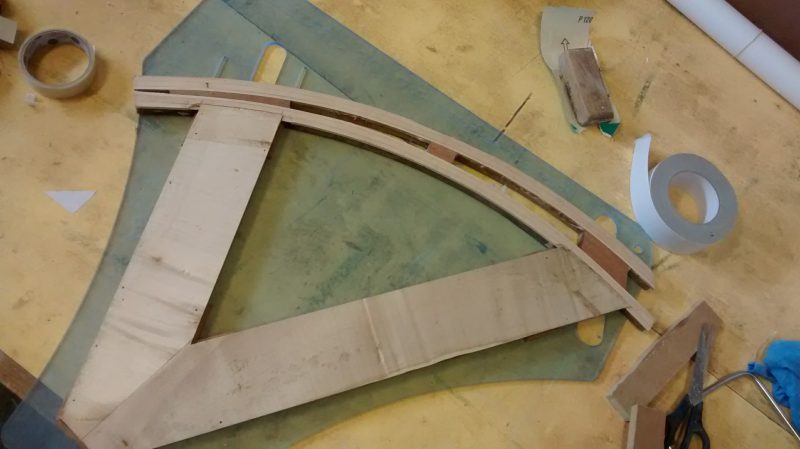
The top beam and seat stays were going to be curved, which complicated the job. Chris made the curved top piece out of flat strips of brown oak and used a technique where the strips are individually steamed inside a polythene tube and the tube itself is bent to shape around a jig. Whilst the laminates do spring back a bit once cooled and removed from the tube, they are much easier to clamp into place. They were glued to each other using thickened WEST SYSTEM epoxy.
Testing the fit
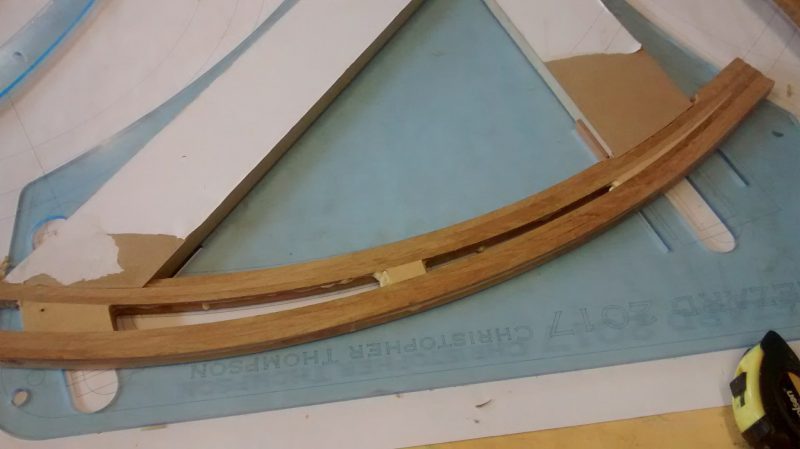
Chris only had a limited supply of brown oak, so to avoid any wasteful mistakes he checked the fit of the top beam against a jig made from MDF. “All this seemed a bit of a faff,” he admits, “But all things considered it was definitely worth the trials to give myself confidence it would work with the final timber.”
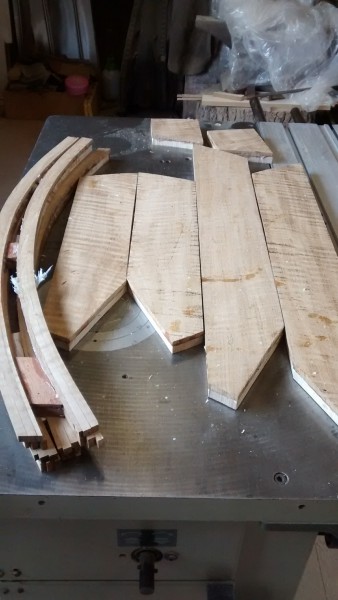
Cutting the pieces
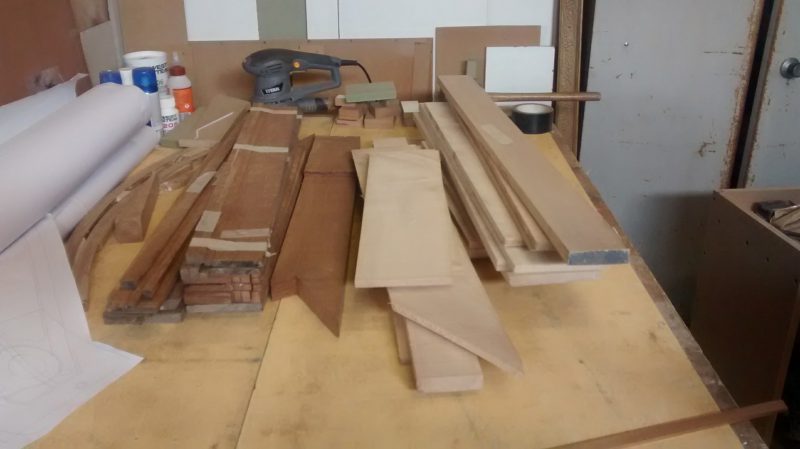
“My first job was to cut up my precious brown oak and hope I had enough. I made a cutting list and prepped a stack. Where the laminates would be seen I made sure I cut the pieces from the same stock and numbered them so I could maintain grain pattern as much as possible. I also cut and shaped some frame spacers for the inner cores from scrap mahogany as these would never be seen.”
Bonding the pieces together
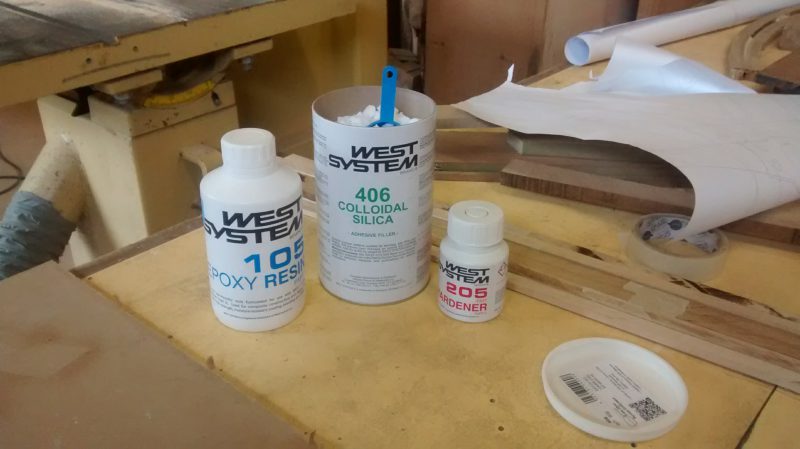
“All my gluing was done using WEST SYSTEM epoxy. This would not only be super strong but also 100% waterproof. I used 105 Resin, 206 Hardener and 406 Colloidal Silica for all the wood-to-wood bonding. I realised I had sufficient sycamore maple to make a second frame, so I combined this with some normal English oak and decided to make two bicycles at once.”
Rest of the frame
“The down tube and seat tube did not need bending, so it was a simple case of cutting the blanks. I used 4″ wide sections and laminated layers one and two, as these were the pair that would be finger jointed together. I used the MDF trial pieces I had made as templates because I knew these fitted and I had worked out the finger jointing. I fixed the blank to the MDF jig and ran round with a flush cutting router bit.”
Jigging the frame
“Using the index peg locations, I placed my bicycle frame shape jig and drew around it just to show how the frame would ultimately be cut out of the blanks. I clamped the two halves together to make sure everything was working and lining up accurately. This still only made up 4 of the 6 layers required. The final, outer layer lay up was slightly different in order to overlap the finger joints and hopefully add strength. It was back to the steaming bag to prepare and lay up the 8 laminates needed for the bicycle top tube. Being visible outside of the frame, these were the most crucial.”
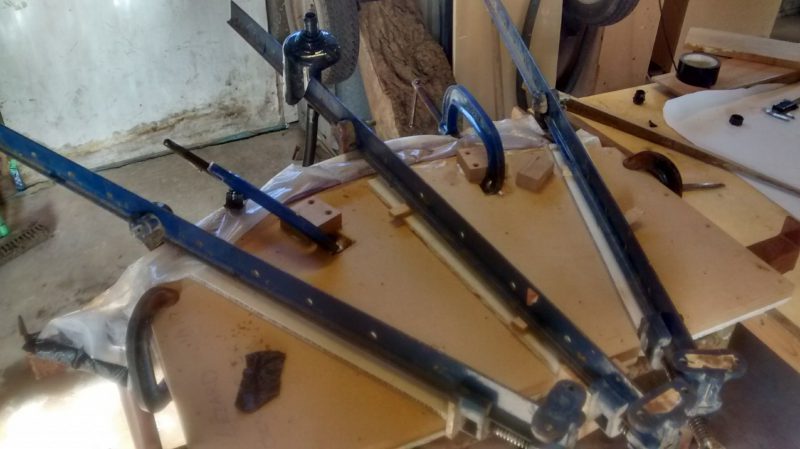
Keeping it all flat
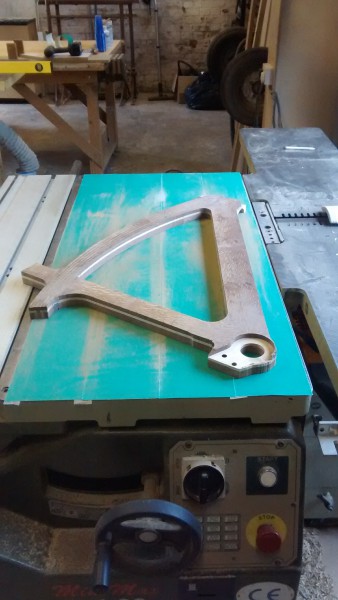
“I couldn’t afford for the bike frame halves to be twisted in anyway, so when gluing on the last layer I decided to clamp the frame to my machine-flat table saw. I clamped the top tube but used screws in the waste area of the down and seat tubes as I couldn’t get clamps to reach. The bicycle frame could be repositioned into my jig because of the index pegs. I flipped the jig over and used a 1″ (25mm) round nose router bit with a 27mm guide bush. I had CAD drawings to make sure I ended up with a 5mm wall thickness. It was a bit scary to start cutting the material away and not the most pleasant of jobs but all seemed to work.”
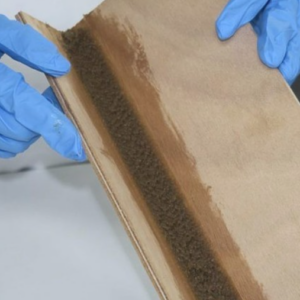
Hollowing out the pieces
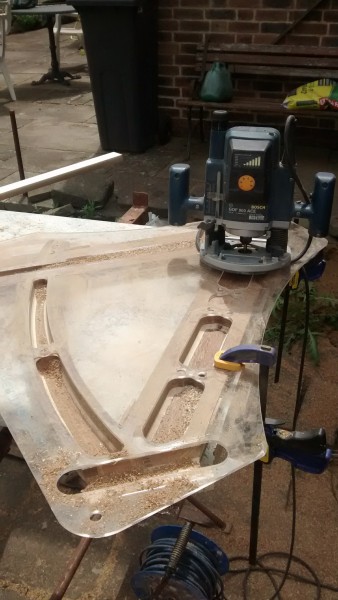
“Brown oak is very dense and consequently very heavy. Hollowing it out made the frame start to feel a lot lighter, although it would never make a super light bike. Once hollowed, I wanted to sand the matching faces as true as possible so I wouldn’t need to force the halves together under pressure. I used my flat table saw bench again and fixed sheets of 80-grit paper to the whole bench top using double sided tape, marked the bike frame face with red crayon and sanded them flat. I then loosely clamped the two halves together to check they were reasonably true.”
Running cables
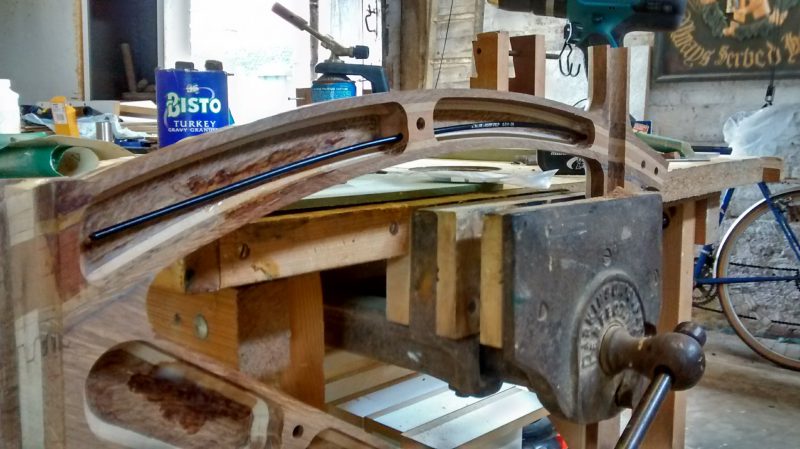
“I planned to run internal cable routing through the frame and thought I would run the derailleur cable through the seat stay. To allow for this I would omit one of the laminates from the central core of the right hand stay. In order that I could still bend the laminates I wrapped one of them in cling film so that it could be in place for the glue up but easily extracted.”
Bonding metal to wood
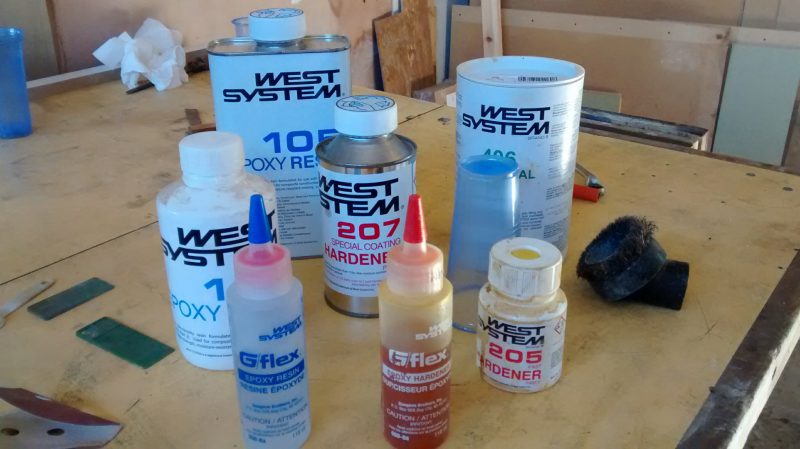
“The main frame had been made fairly true and the halves came together with a good fit, so I would glue these together first, including the head rube and seat tube, which I had machined to length and drilled with a few holes to help bonding. On the very helpful advice of the technical staff at WEST SYSTEM epoxy, I would use the 105/205 system with 406 Colloidal Silica to bond wood to wood, as I had done throughout but I employed G/flex epoxy for bonding wood to metal. G/flex epoxy remains slightly flexible so is suitable for bonding dissimilar materials which can expand and contract by different amounts in response to temperature changes. All metal parts were scrupulously cleaned and roughly abraded to aid a good bond.”
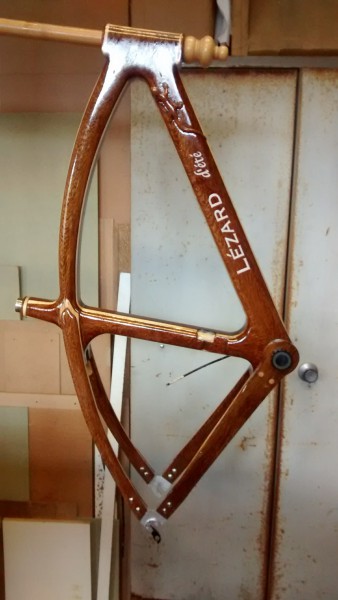
Shaping and preparing
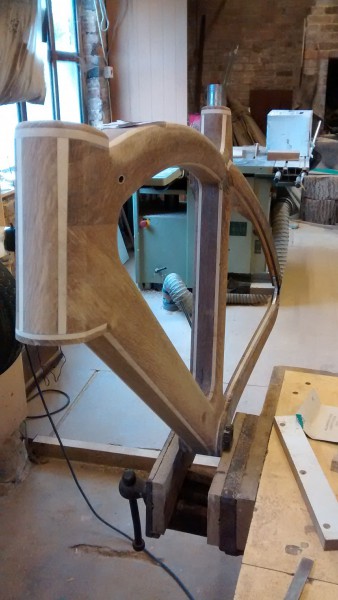
“I now pretty much had myself a bicycle frame. Next came the fun bit of getting it shaped and smoothed and ready for a finish. I made some capping pieces to go on the top and bottom of the head tube and seat tube. Because I did not want to see the join of the two frame halves on the front of the head tube I routed out a section and inlaid a new piece of brown oak. I also thought this might help bonding as it crossed the two halves. I also added some extra pieces to neaten up where the seat stays joined the seat tube and form a nice, strong area that would take the brake calliper.”
Adding a lizard
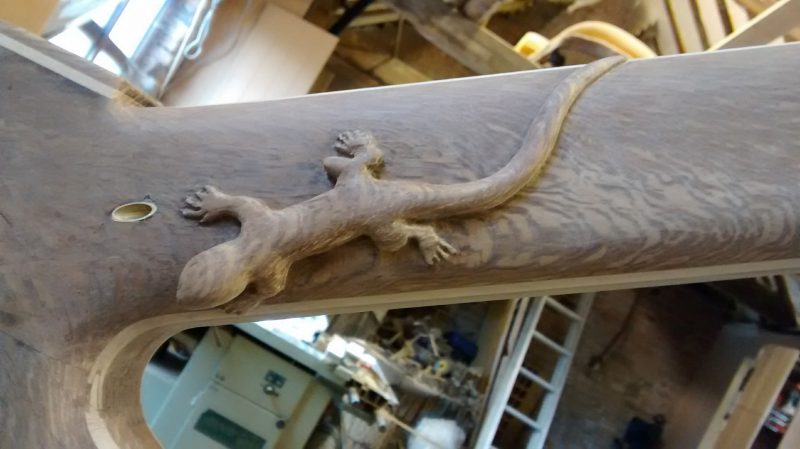
“I decided to name the two bicycles Lezard d’Ete and Lezard d’Hiver (Summer Lizard and Winter Lizard) and would carve a lizard on the frame. I photographed one of my previous lizard carvings, made it black and white, scaled it down, printed it out and fixed it to a piece of brown oak. The block of wood would have to match the curve of the frame, so I fixed some 80-grit paper to the frame where the lizard would go and sanded the block so its shape matched. I then glued it into position before starting to carve. I also designed some decals, which I had printed and then fixed to the wood.”
Waterproofing with epoxy
“Having sanded the whole frame down to 240-grit it was time to apply a finish. I wanted this to be hardwearing and fully waterproof finish, so decided to use epoxy overcoated with a 2K polyurethane. The tech guys at WEST SYSTEM epoxy suggested I should switch from the 205 Resin used for gluing to 207 Resin for the finish, which is more transparent and less ‘yellow’. It also has some UV inhibitors to delay any yellowing over time.”
“I applied two coats of epoxy, tack-on-tack, then left it for 48 hours. I then sanded the epoxy using 120-grit, being very, very careful over the decals. As well as smoothing out the unevenness of the brush-applied epoxy it is important to sand the epoxy back to ‘dull’ as a key for the next coats. I repeated the process, applying two more coats of epoxy, tack on tack and left the frame for another 72 hours before sanding back with 240 grit.”
Finishing with gloss
“Once the frame was sanded smooth it was time to apply the polyurethane topcoats. Using a spray gun and compressor I sprayed 4 coats of Jotun’s Xtreme Gloss 2K polyurethane tack-on-tack as this would give the best protection. I left the frame for 72 hours before lightly sanding with 1500 grit paper followed by buffing with 3M Fastcut.”
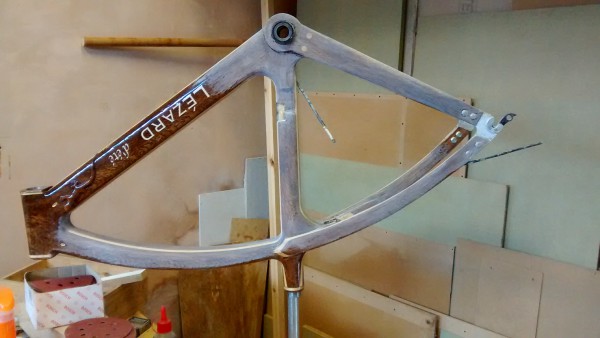
The end result
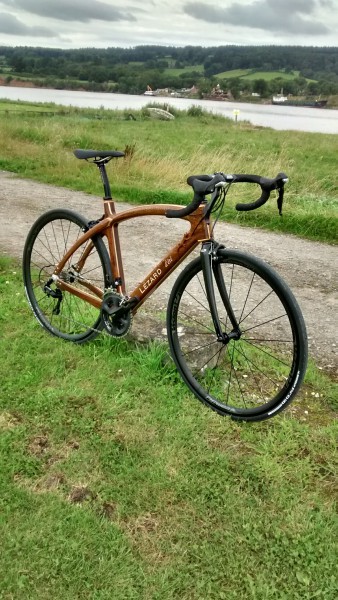
Finally assembled, here is the first bike, Lezard d’Ete. Chris says that his winter bike, made from sycamore maple and featuring a drive belt and Efneo gearbox should be available to view on his website from the end of 2017.
Our thanks to Chris for sharing this remarkable project with us and you can read more about it – and other projects he has completed – at www.woodenbicycle.co.uk